For most pilots, myself included, aircraft engines are a bit of a mystery. As years pass we learn the jargon (jugs / mags / flywheel / exhaust valves / crankshaft etc etc). But unless you have an opportunity to see inside an engine, you don’t realize the simplicity of their design. In 2018 I spent a 3 days at Aerosport Power in Kamloops BC building a new Lycoming IO-540 from engine kit. The parts were all new parts direct from Lycoming. No overhauled or remanufactured parts were used.
Given that my only engine experience was torqueing spark plugs, the opportunity to build an engine was not to be missed. Aerosport’s build school was a one on one builder / technician experience where Aerosport staff guided me through the build process. I was allowed to do as much as I wanted (a lot).
In some cases, I asked the tech, Simon, do do what was necessary as I didn’t want to get something wrong. For example threading the case halves with silk thread seemed like something that I wanted not to do as an error would result in an oil leak along the split. Also, I had Simon install the prop nose seal as this was something I doubted I would ever need to do. Again, I wanted it done right.
The build from start to first engine run took 3 days. The build took 2, day 3 being spent prepping the engine for first run.
The pix below are the highlights of the build (or at least when I remembered to take pix) and are by no means complete. There are many steps I didn’t document but none were particularly difficult. Like anything else, the key was to know what to do and in what order. That is where the Aerosport technician shined. Simon was very experienced and very patient. As a result I really enjoyed the experience and would recommend it to anyone so inclined.
The Engine Being Built
Here are the specs on the engine I built:
- Base engine : Lycoming IO-540 parallel valve (Aerosport Power)
- Cylinders : 9:1 compression
- Barret Precision Engines Cold Air Induction
- SDS electronic ignition / electronic fuel injection
- Estimated rated HP : 300
DAY 1
I arrived at Aerosport early in the morning and got to work after a shop orientation and safety briefing.
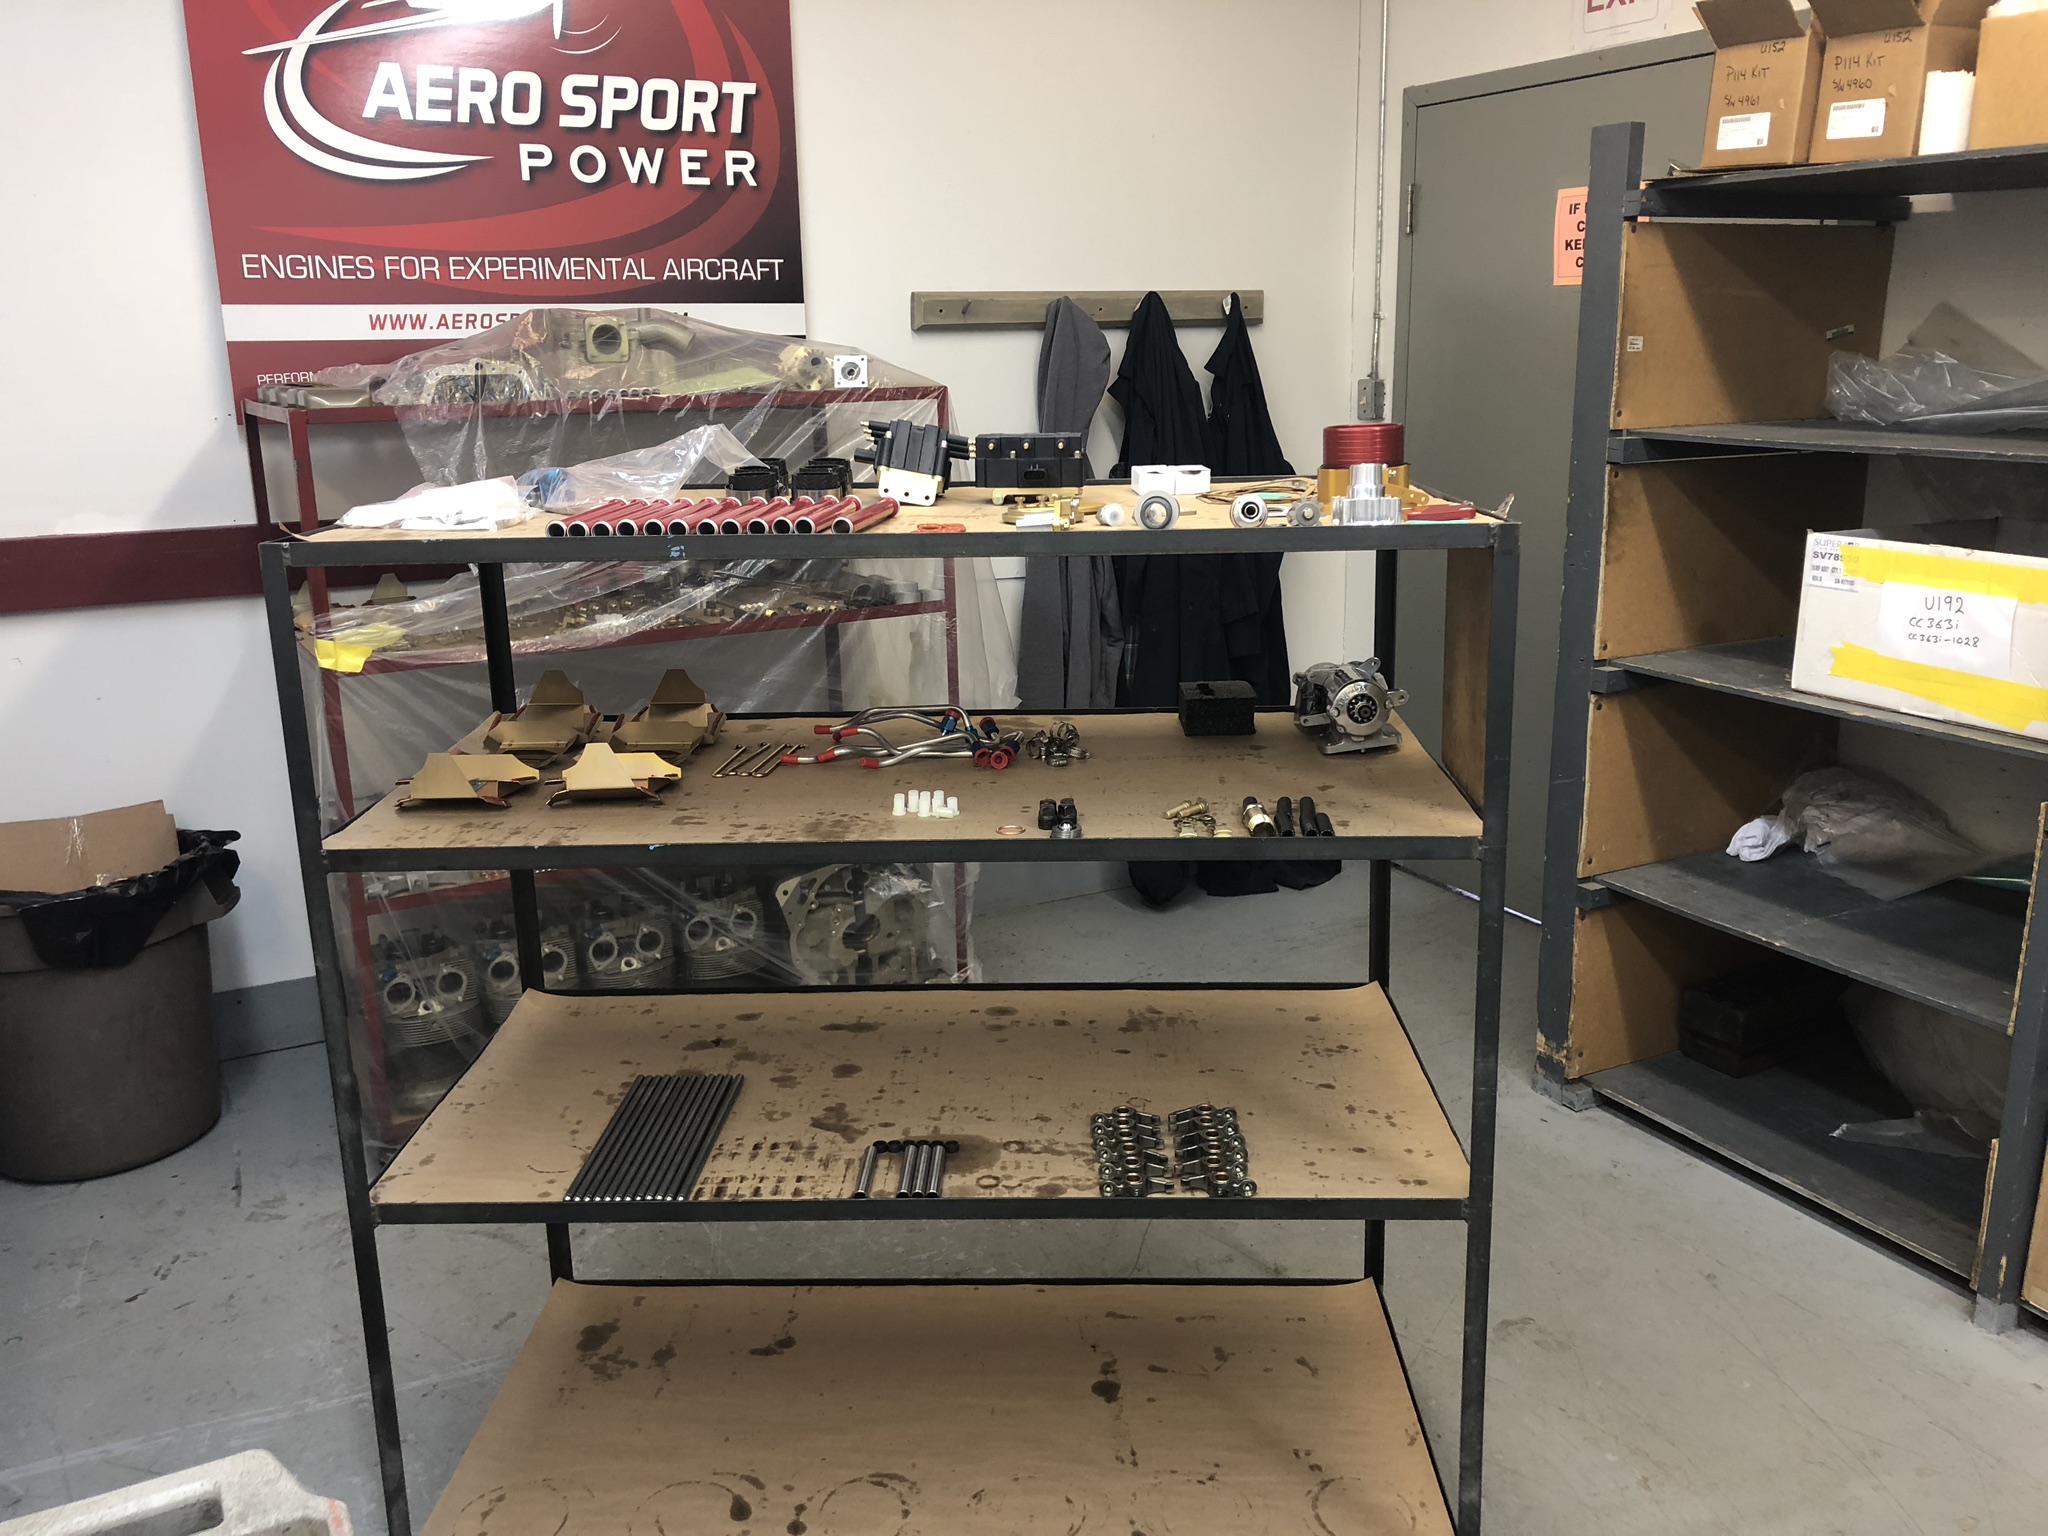
My engine to be was laid out on a shelving unit – parts were balanced and the cylinders were ported and polished; ready for assembly.
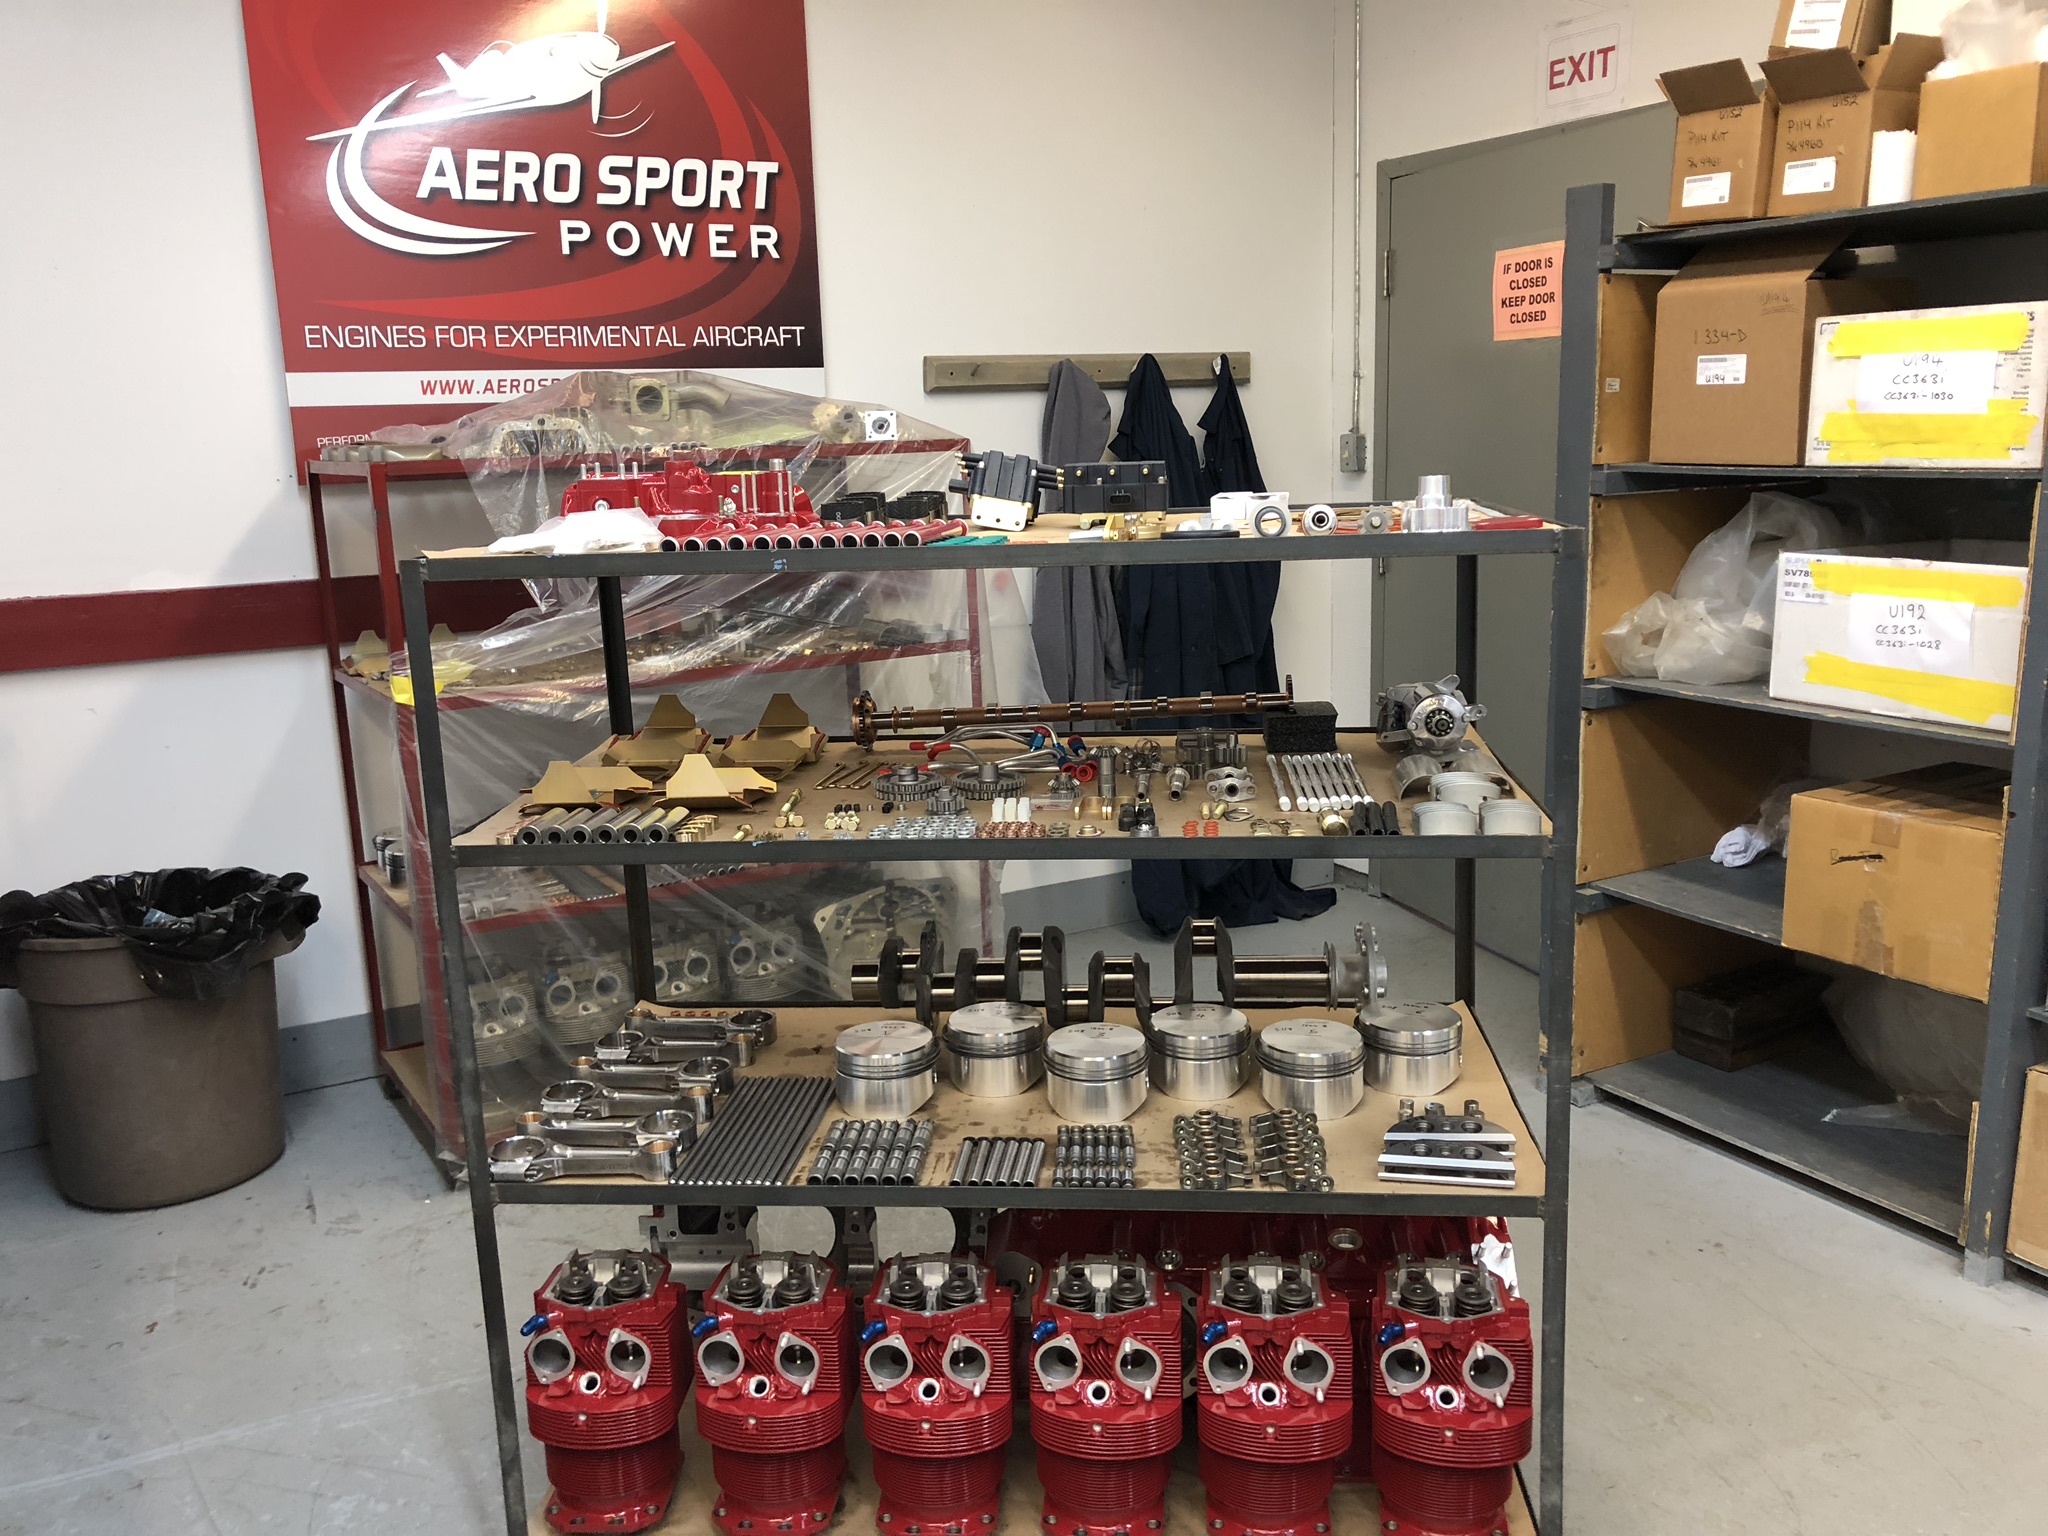
Parts on shelves 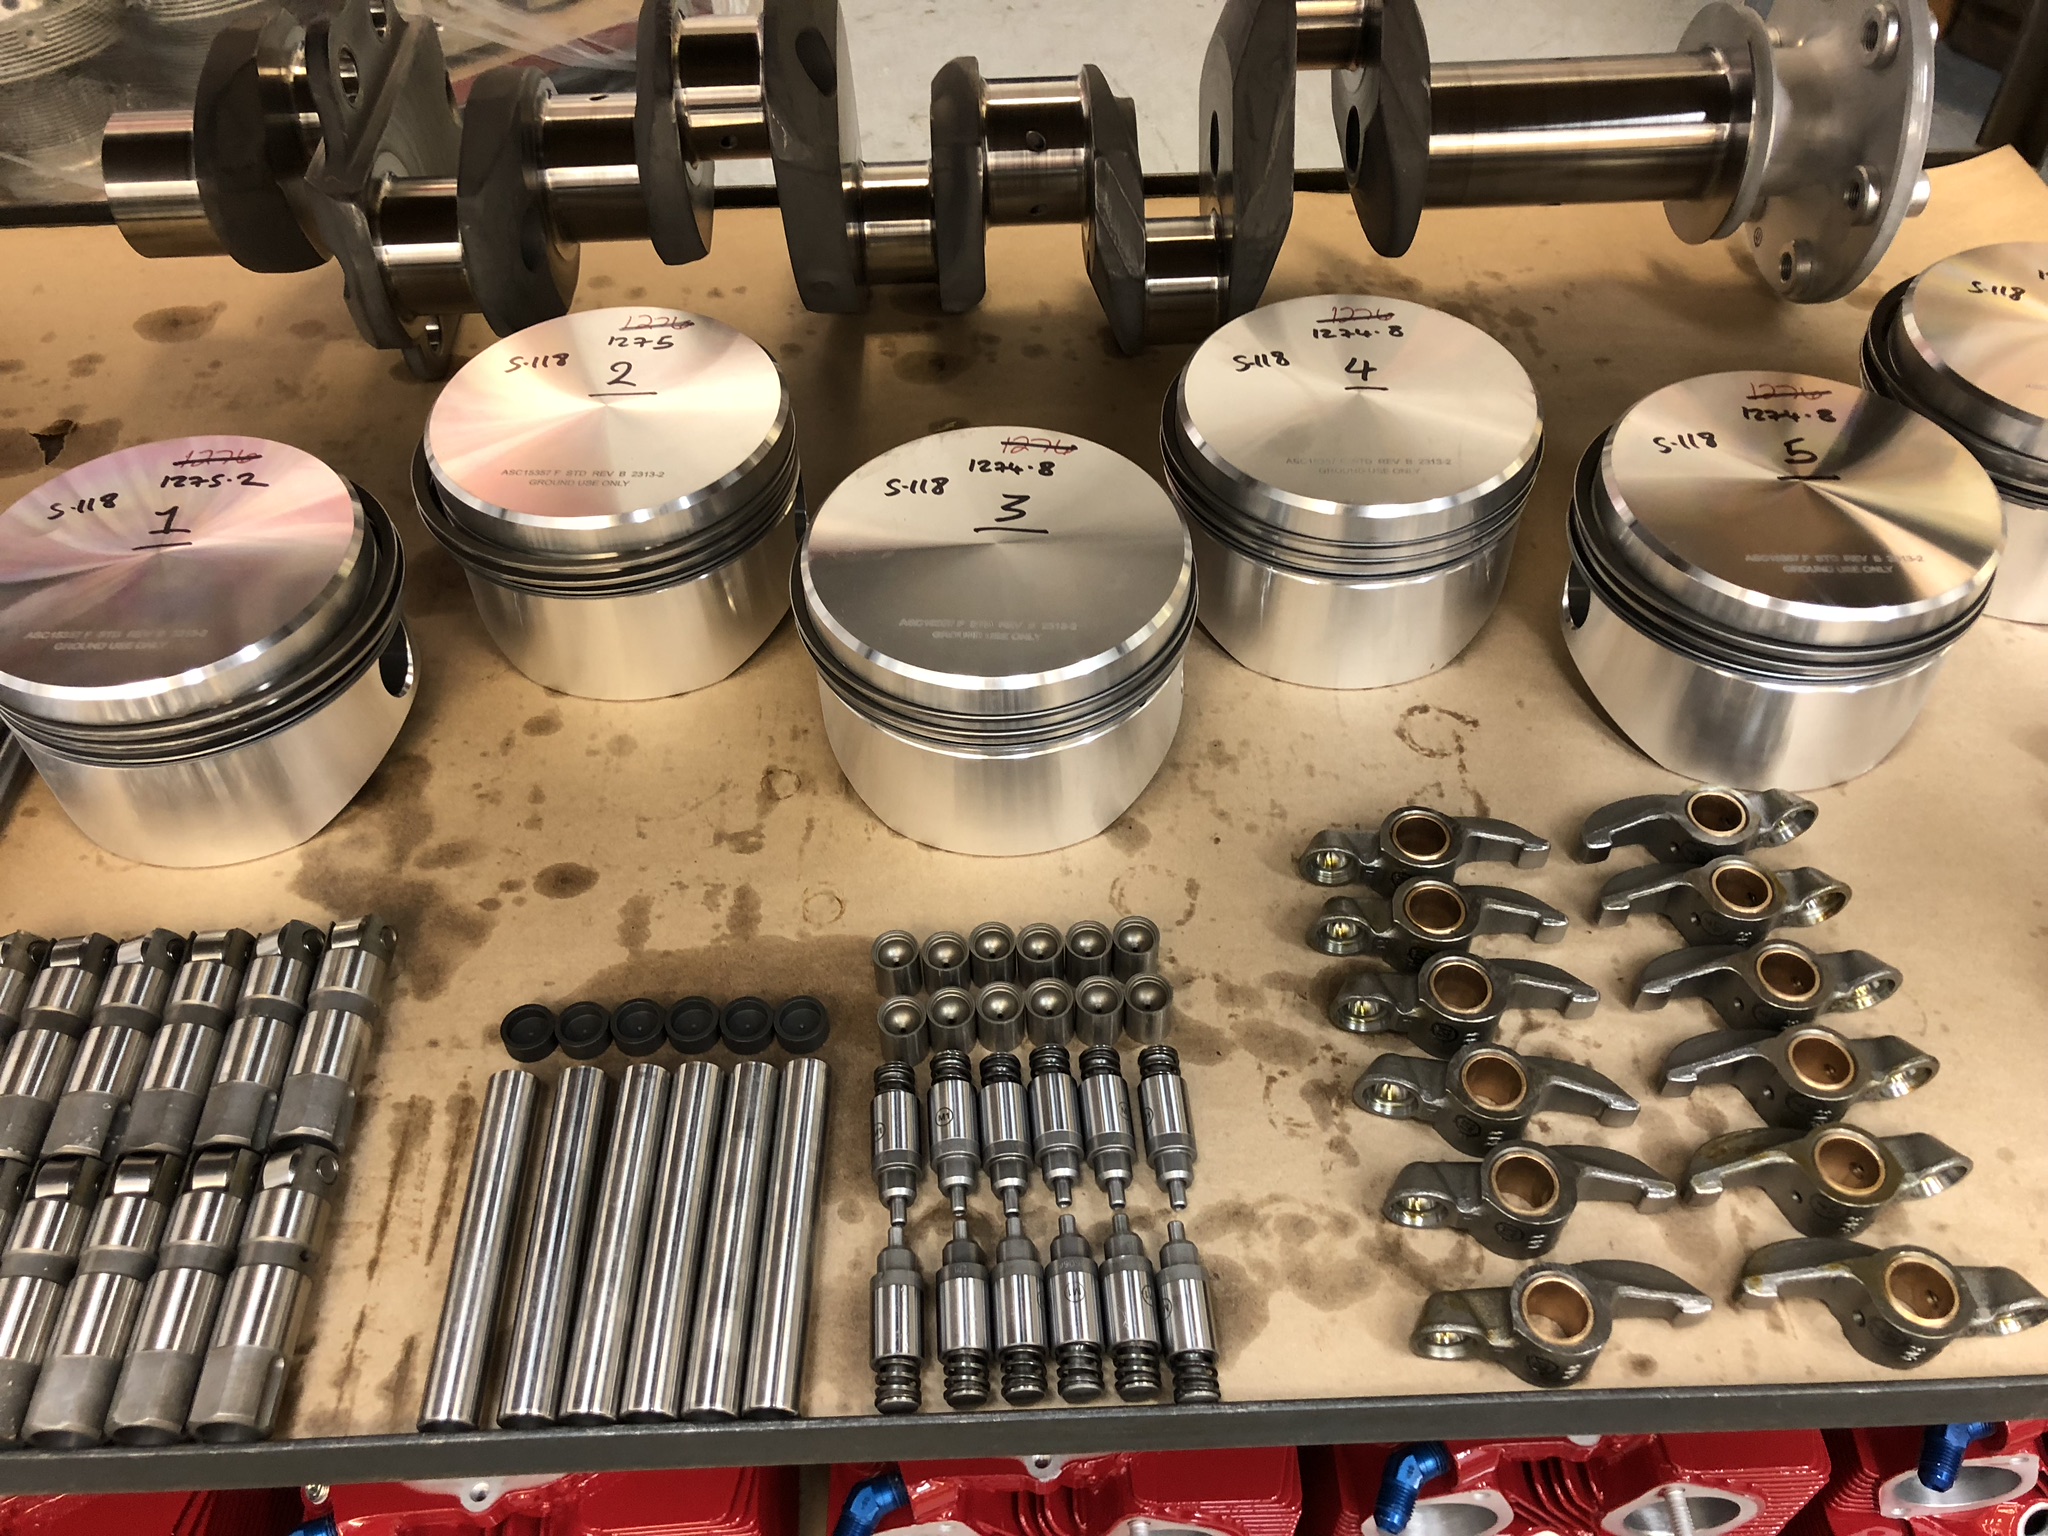
More parts, note weights on pistons 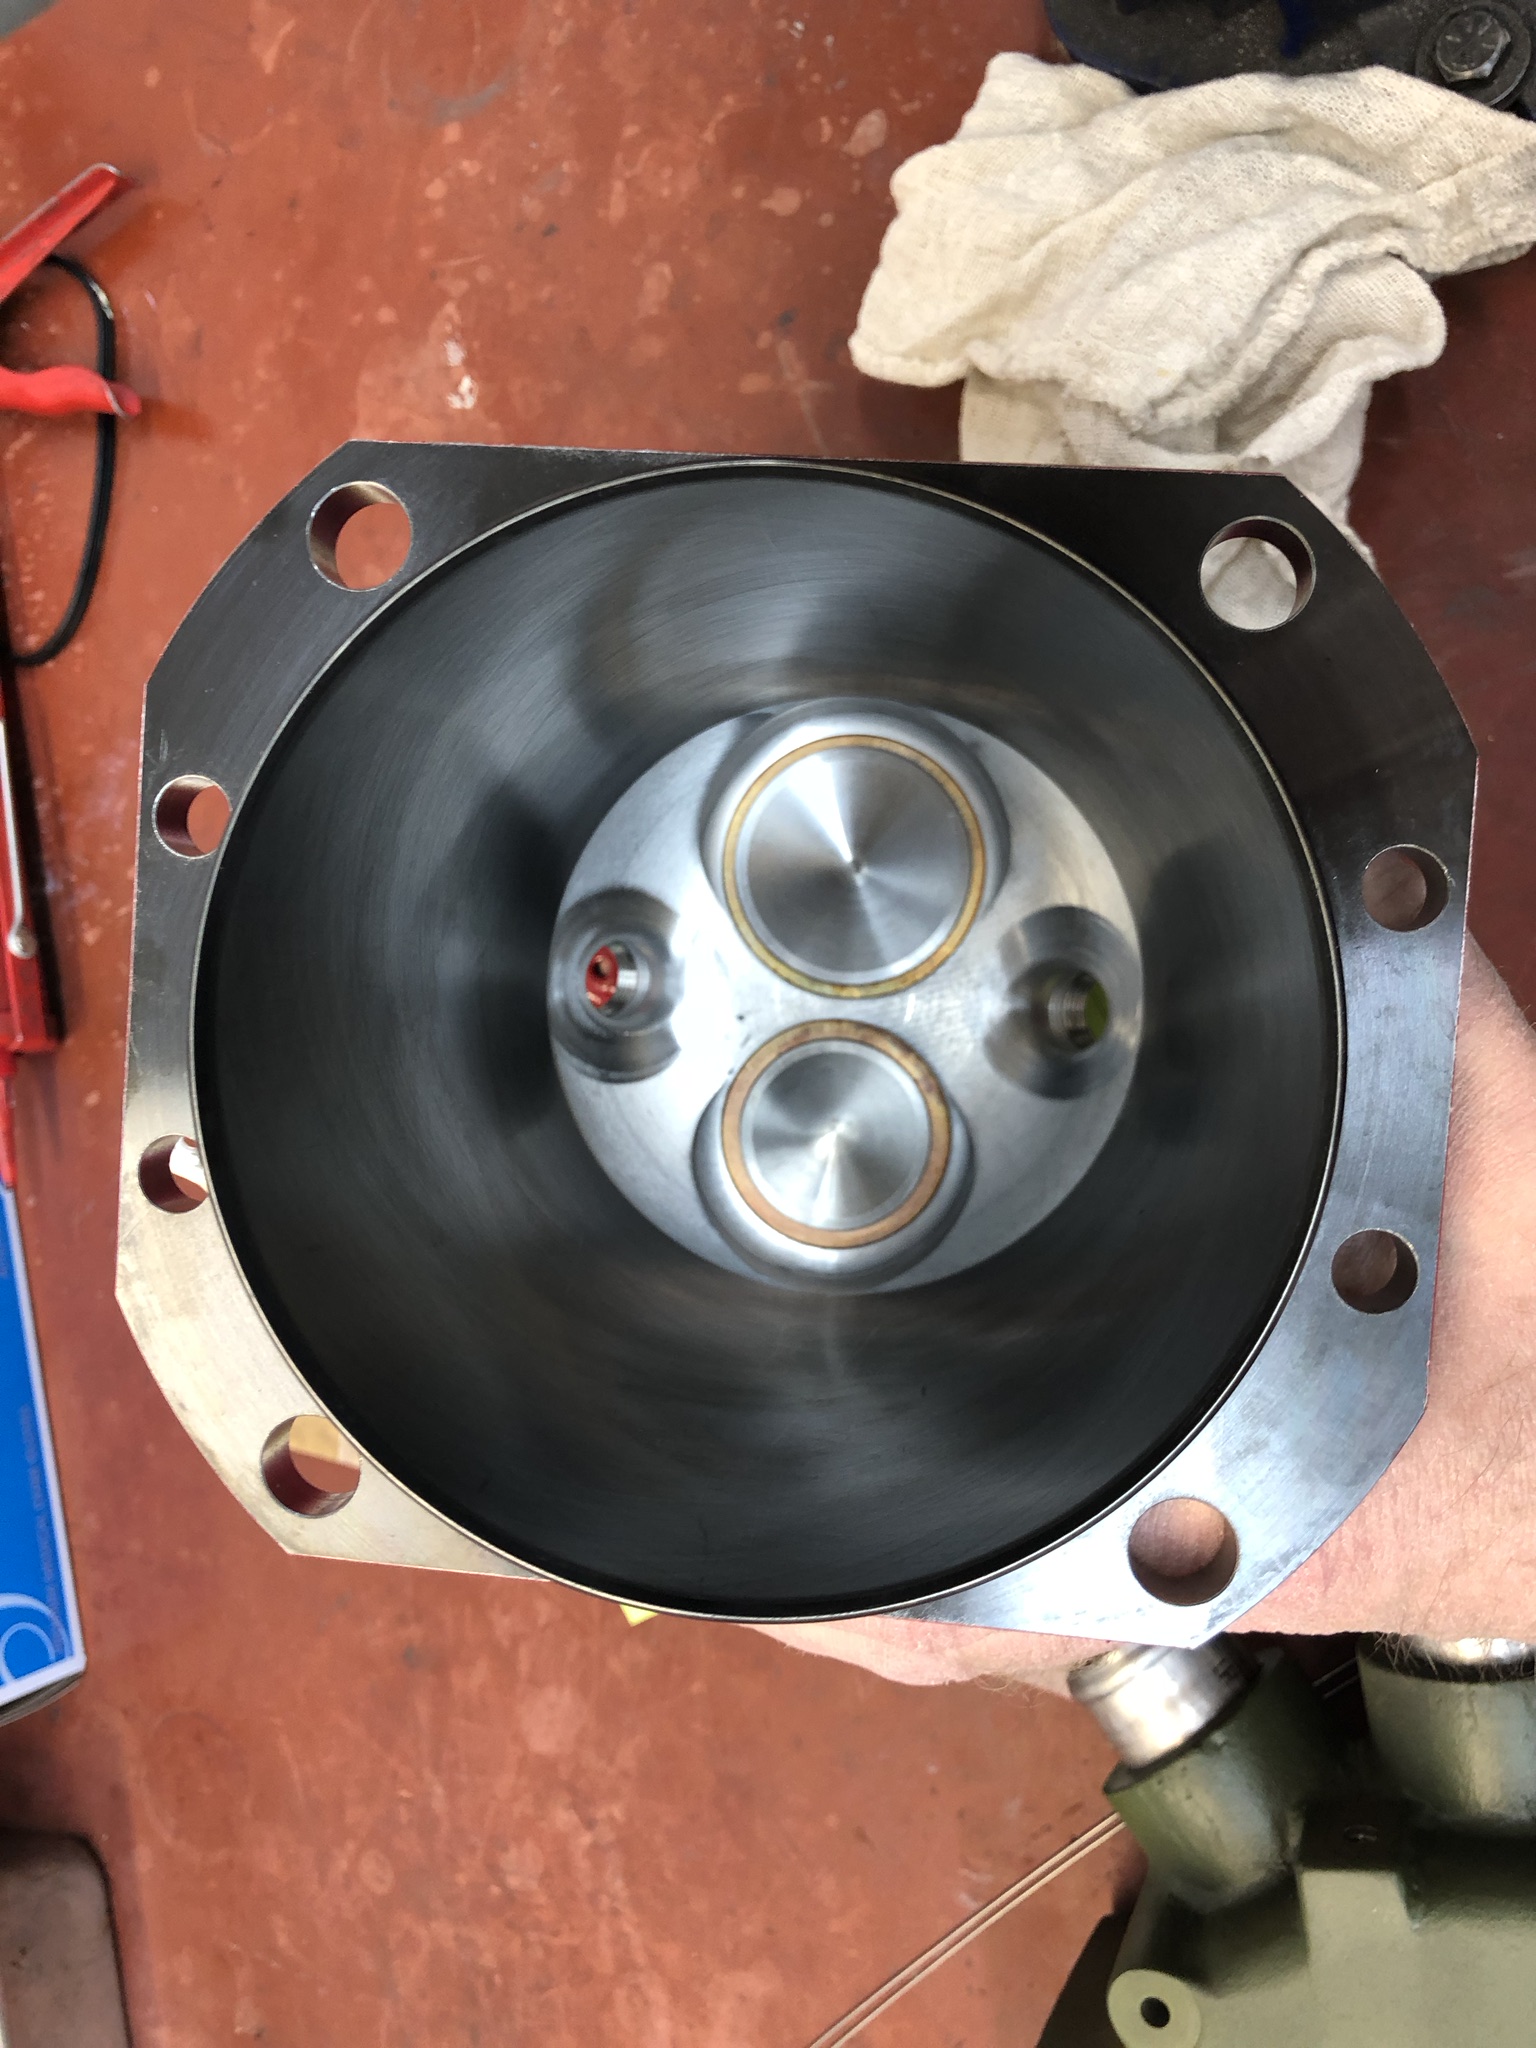
Inside cylinder barrel 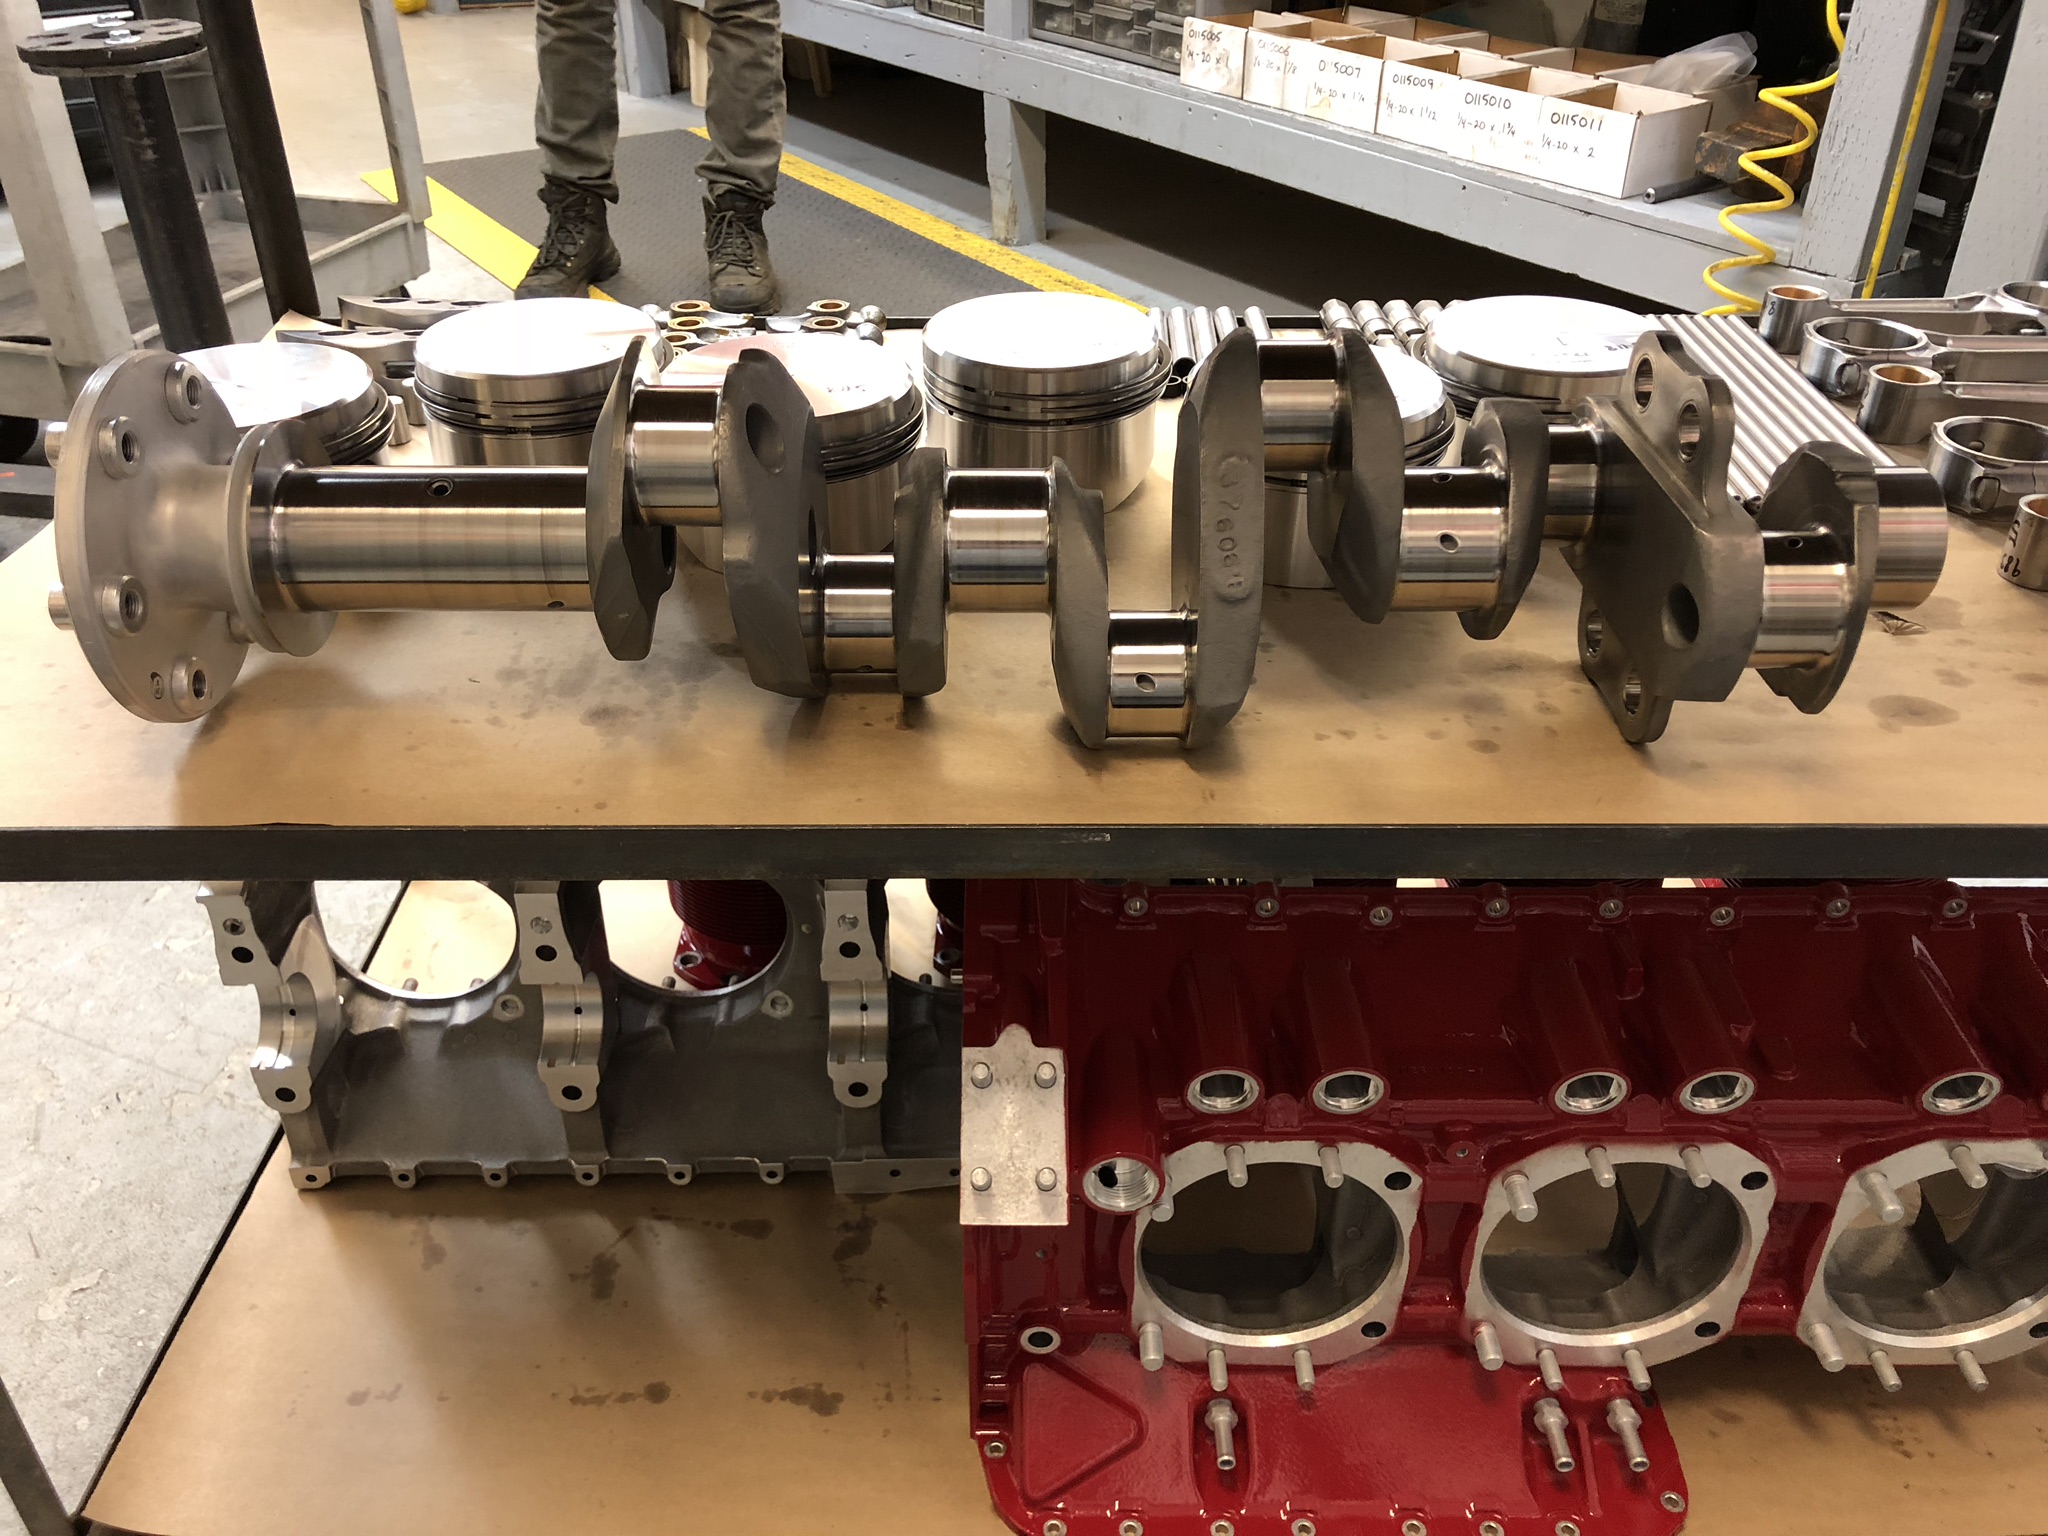
Crankshaft and engine block half 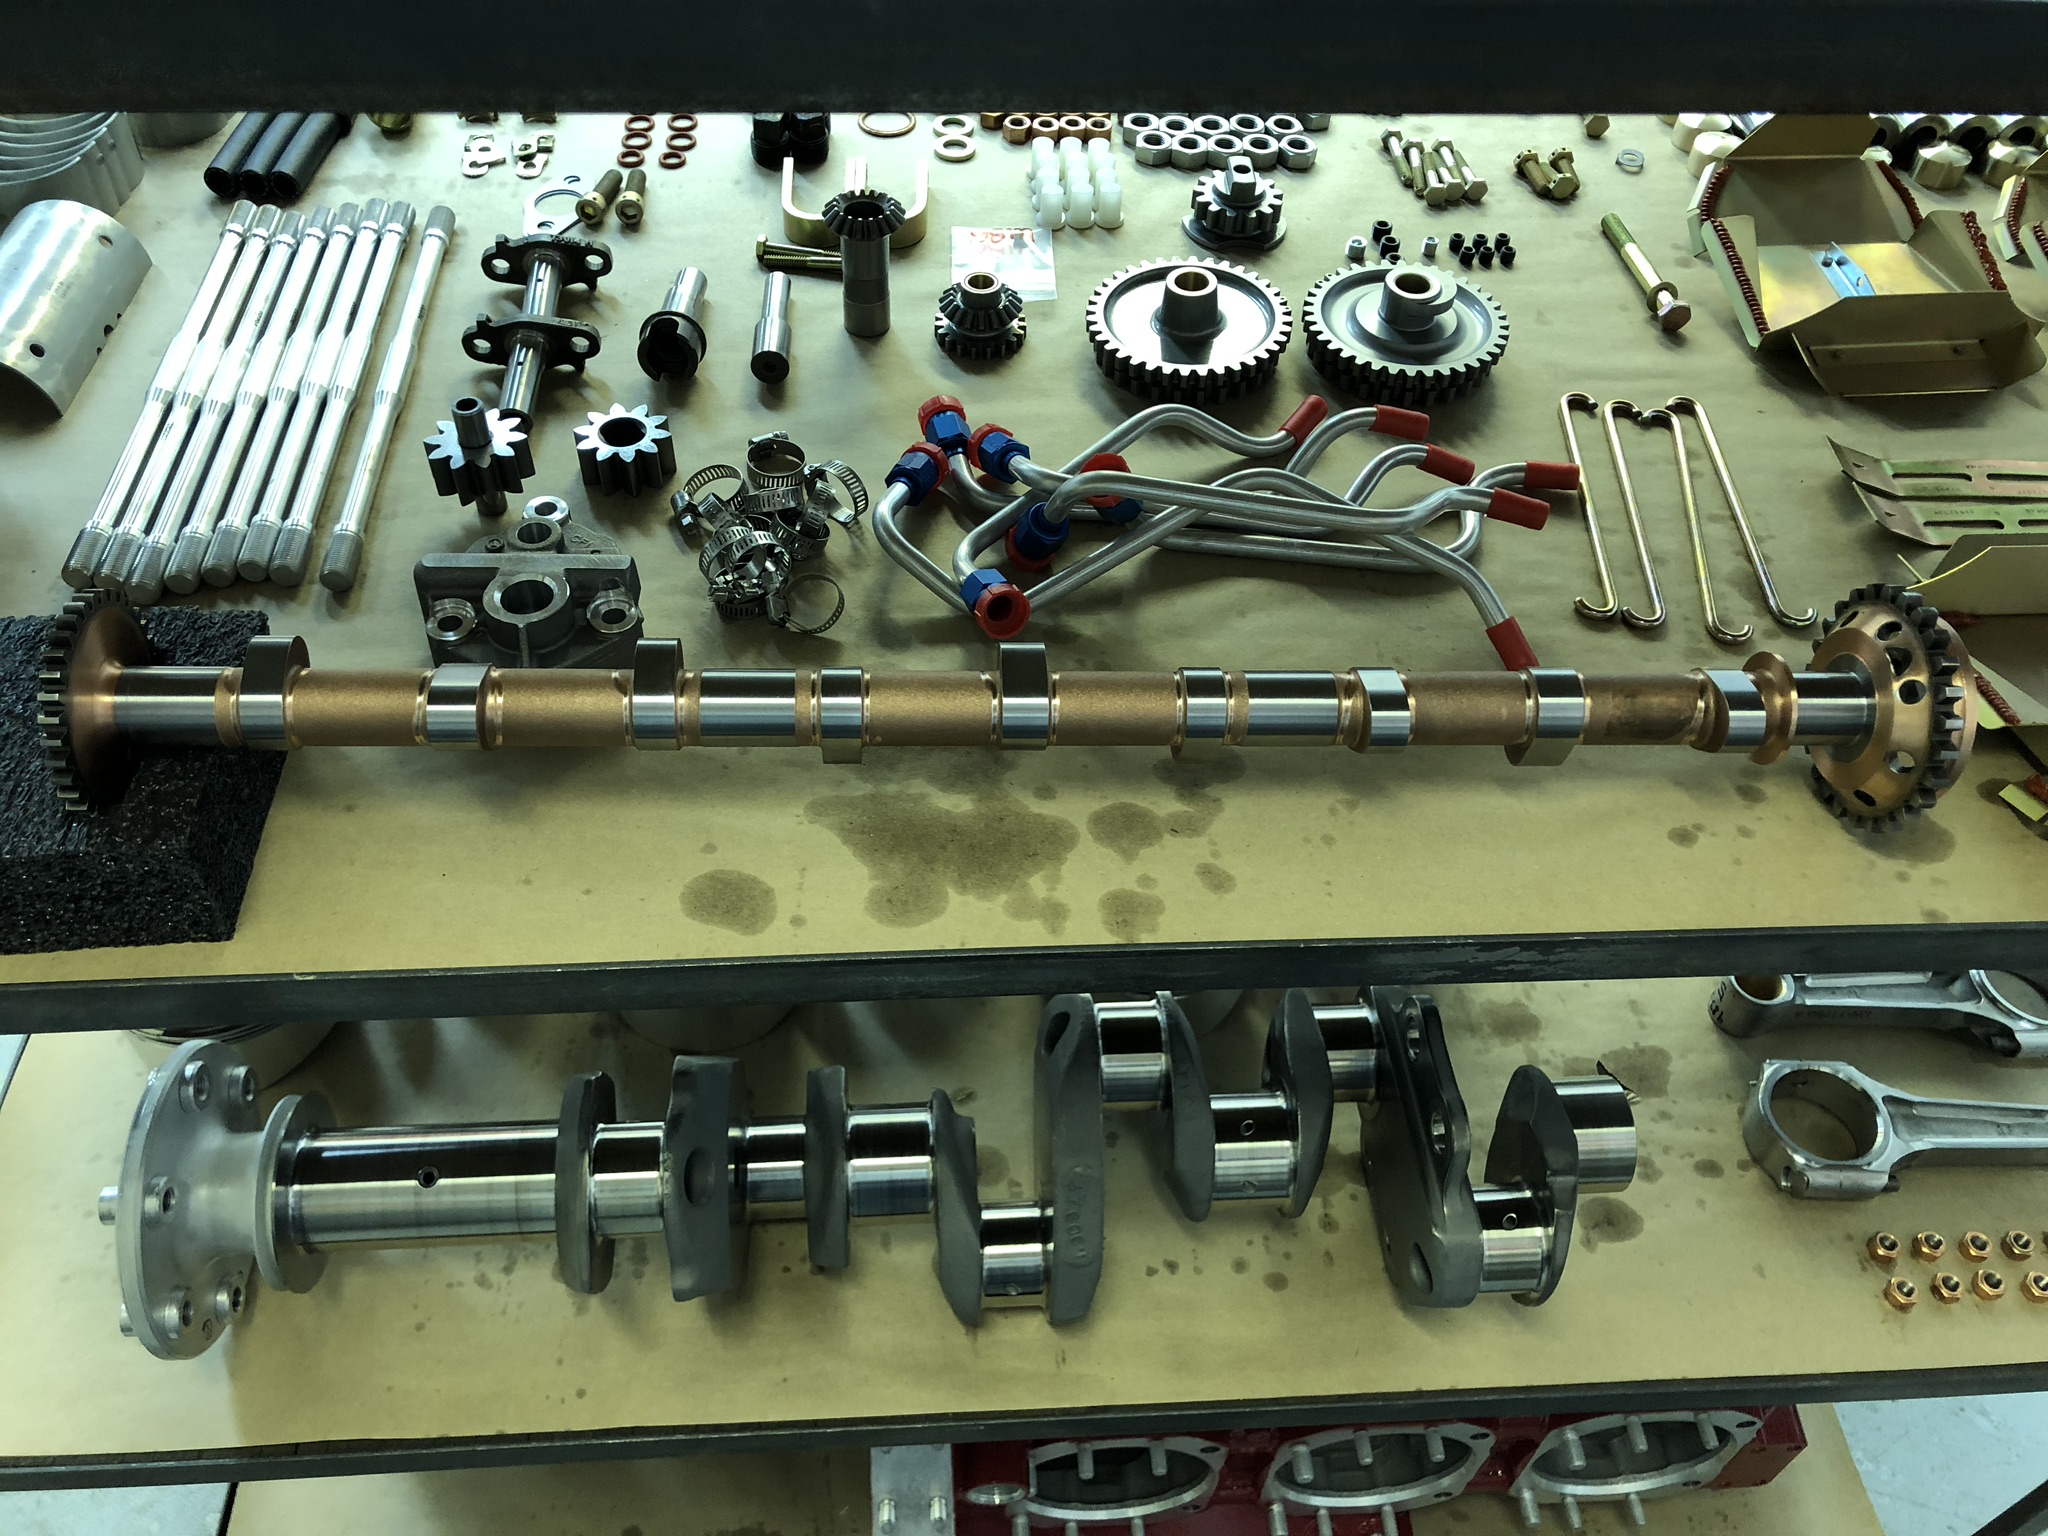
Small parts, cam and crank shafts
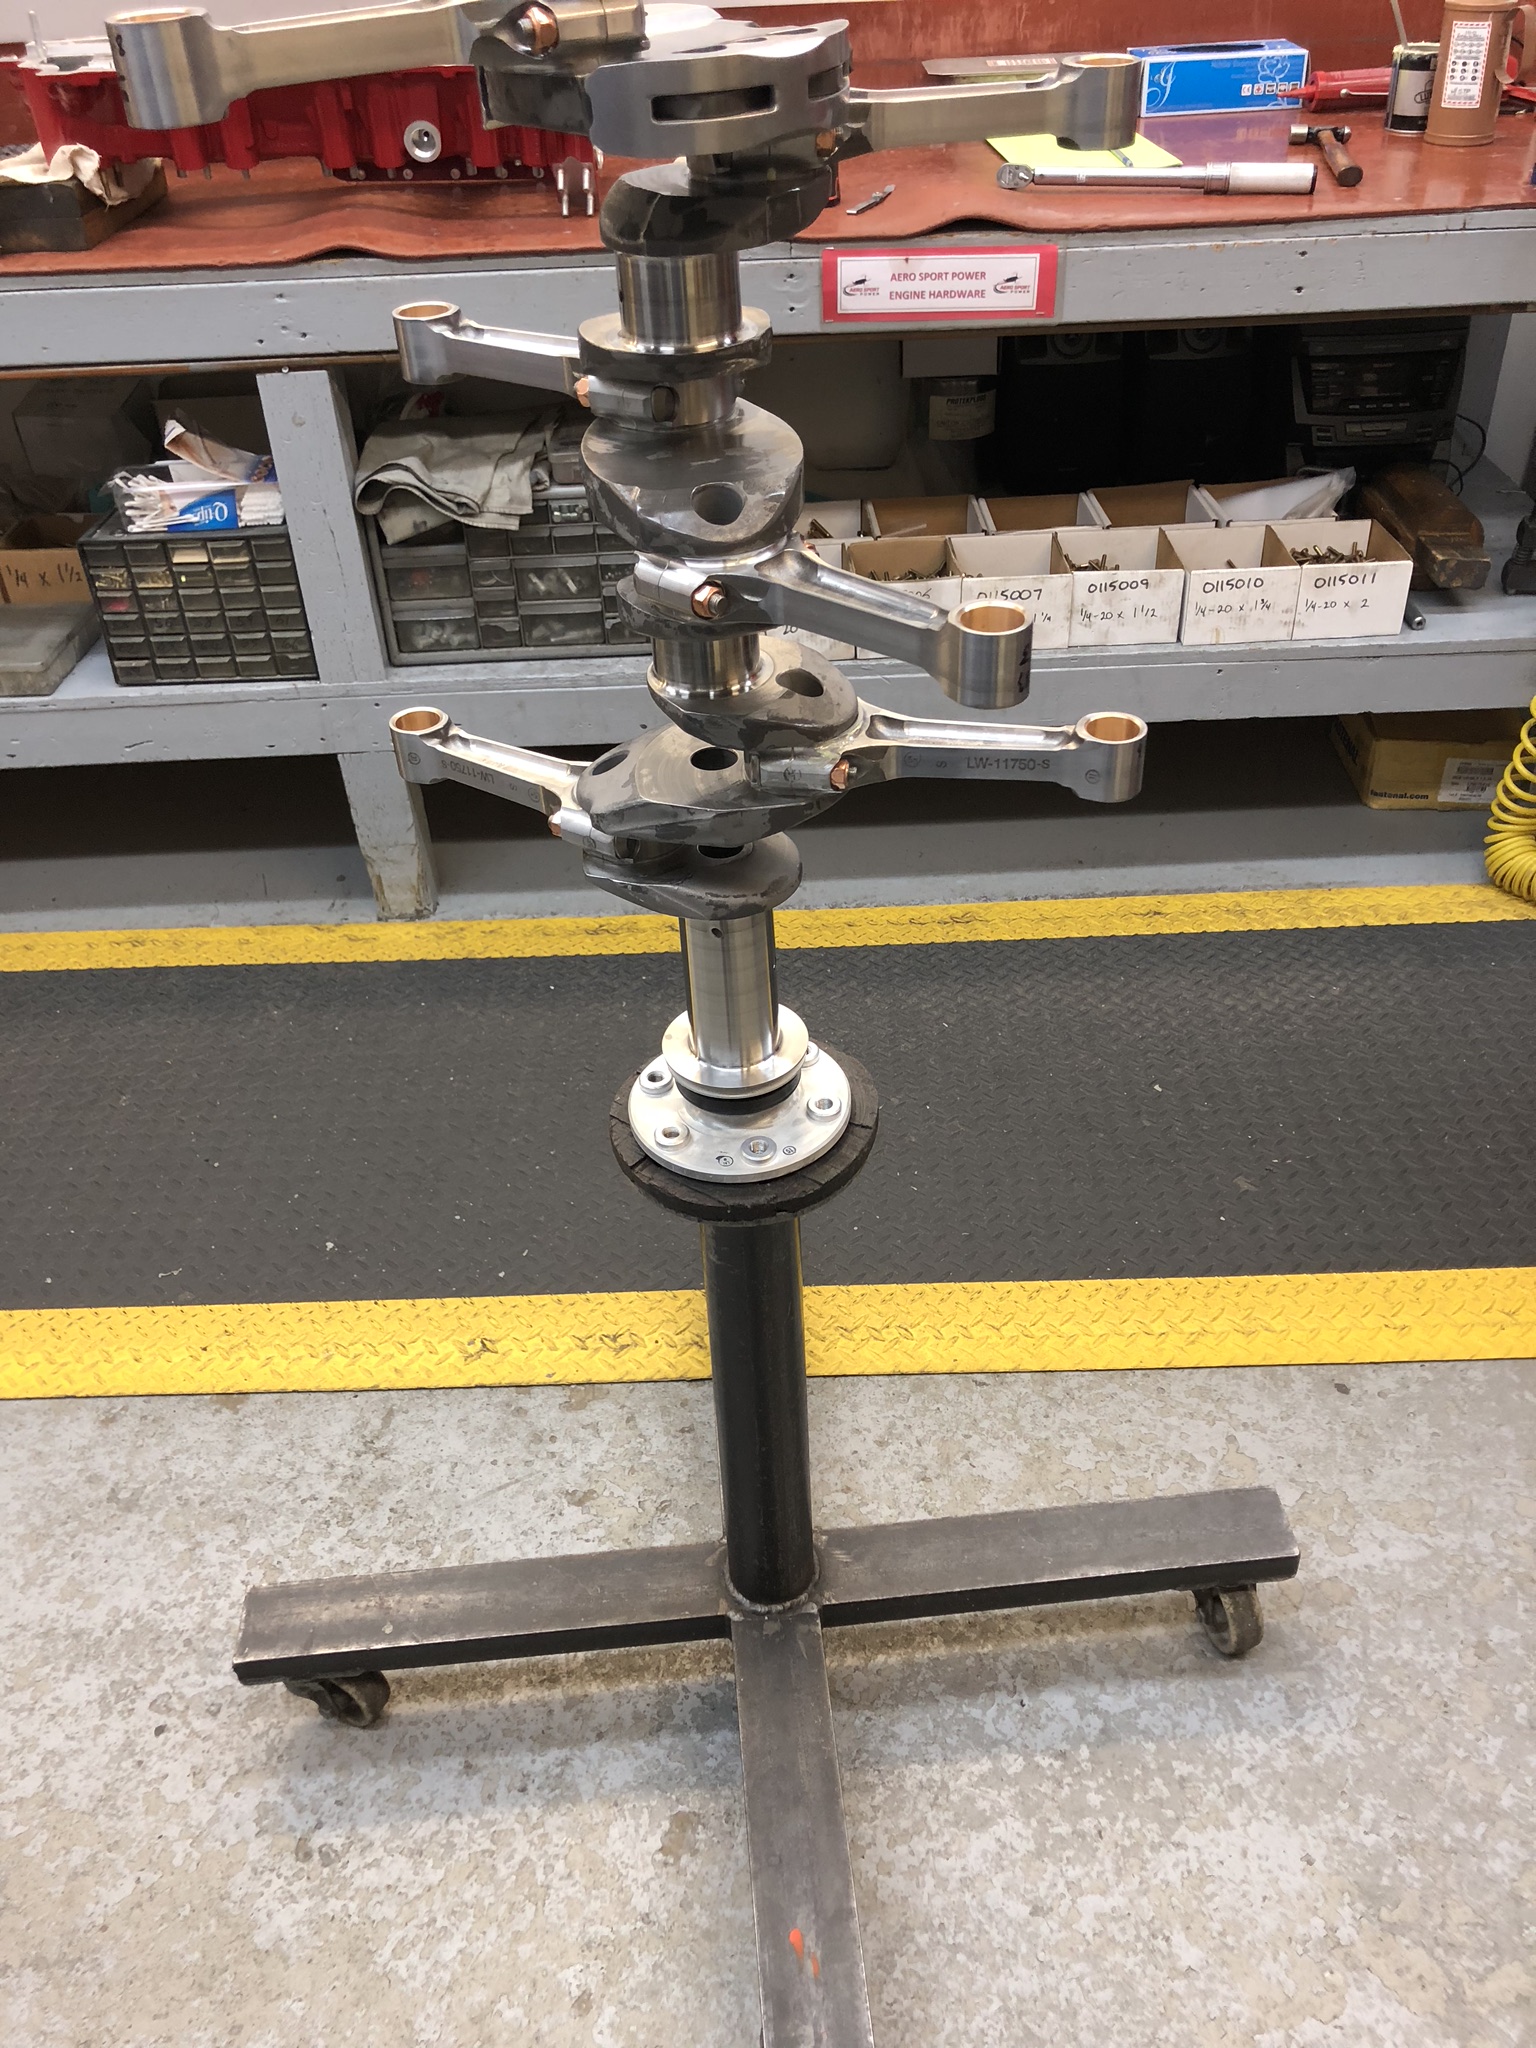
8:30 am – The fun begins. The crankshaft is mounted on a vertical engine stand. Connecting rods are installed. After bearings were placed into the case half, the crankshaft / conn rod assembly was placed inside. A double line of silk thread embedded in sealant was around the case half as well. In the pix the sealant is a light red. The prop nose seal was also installed.

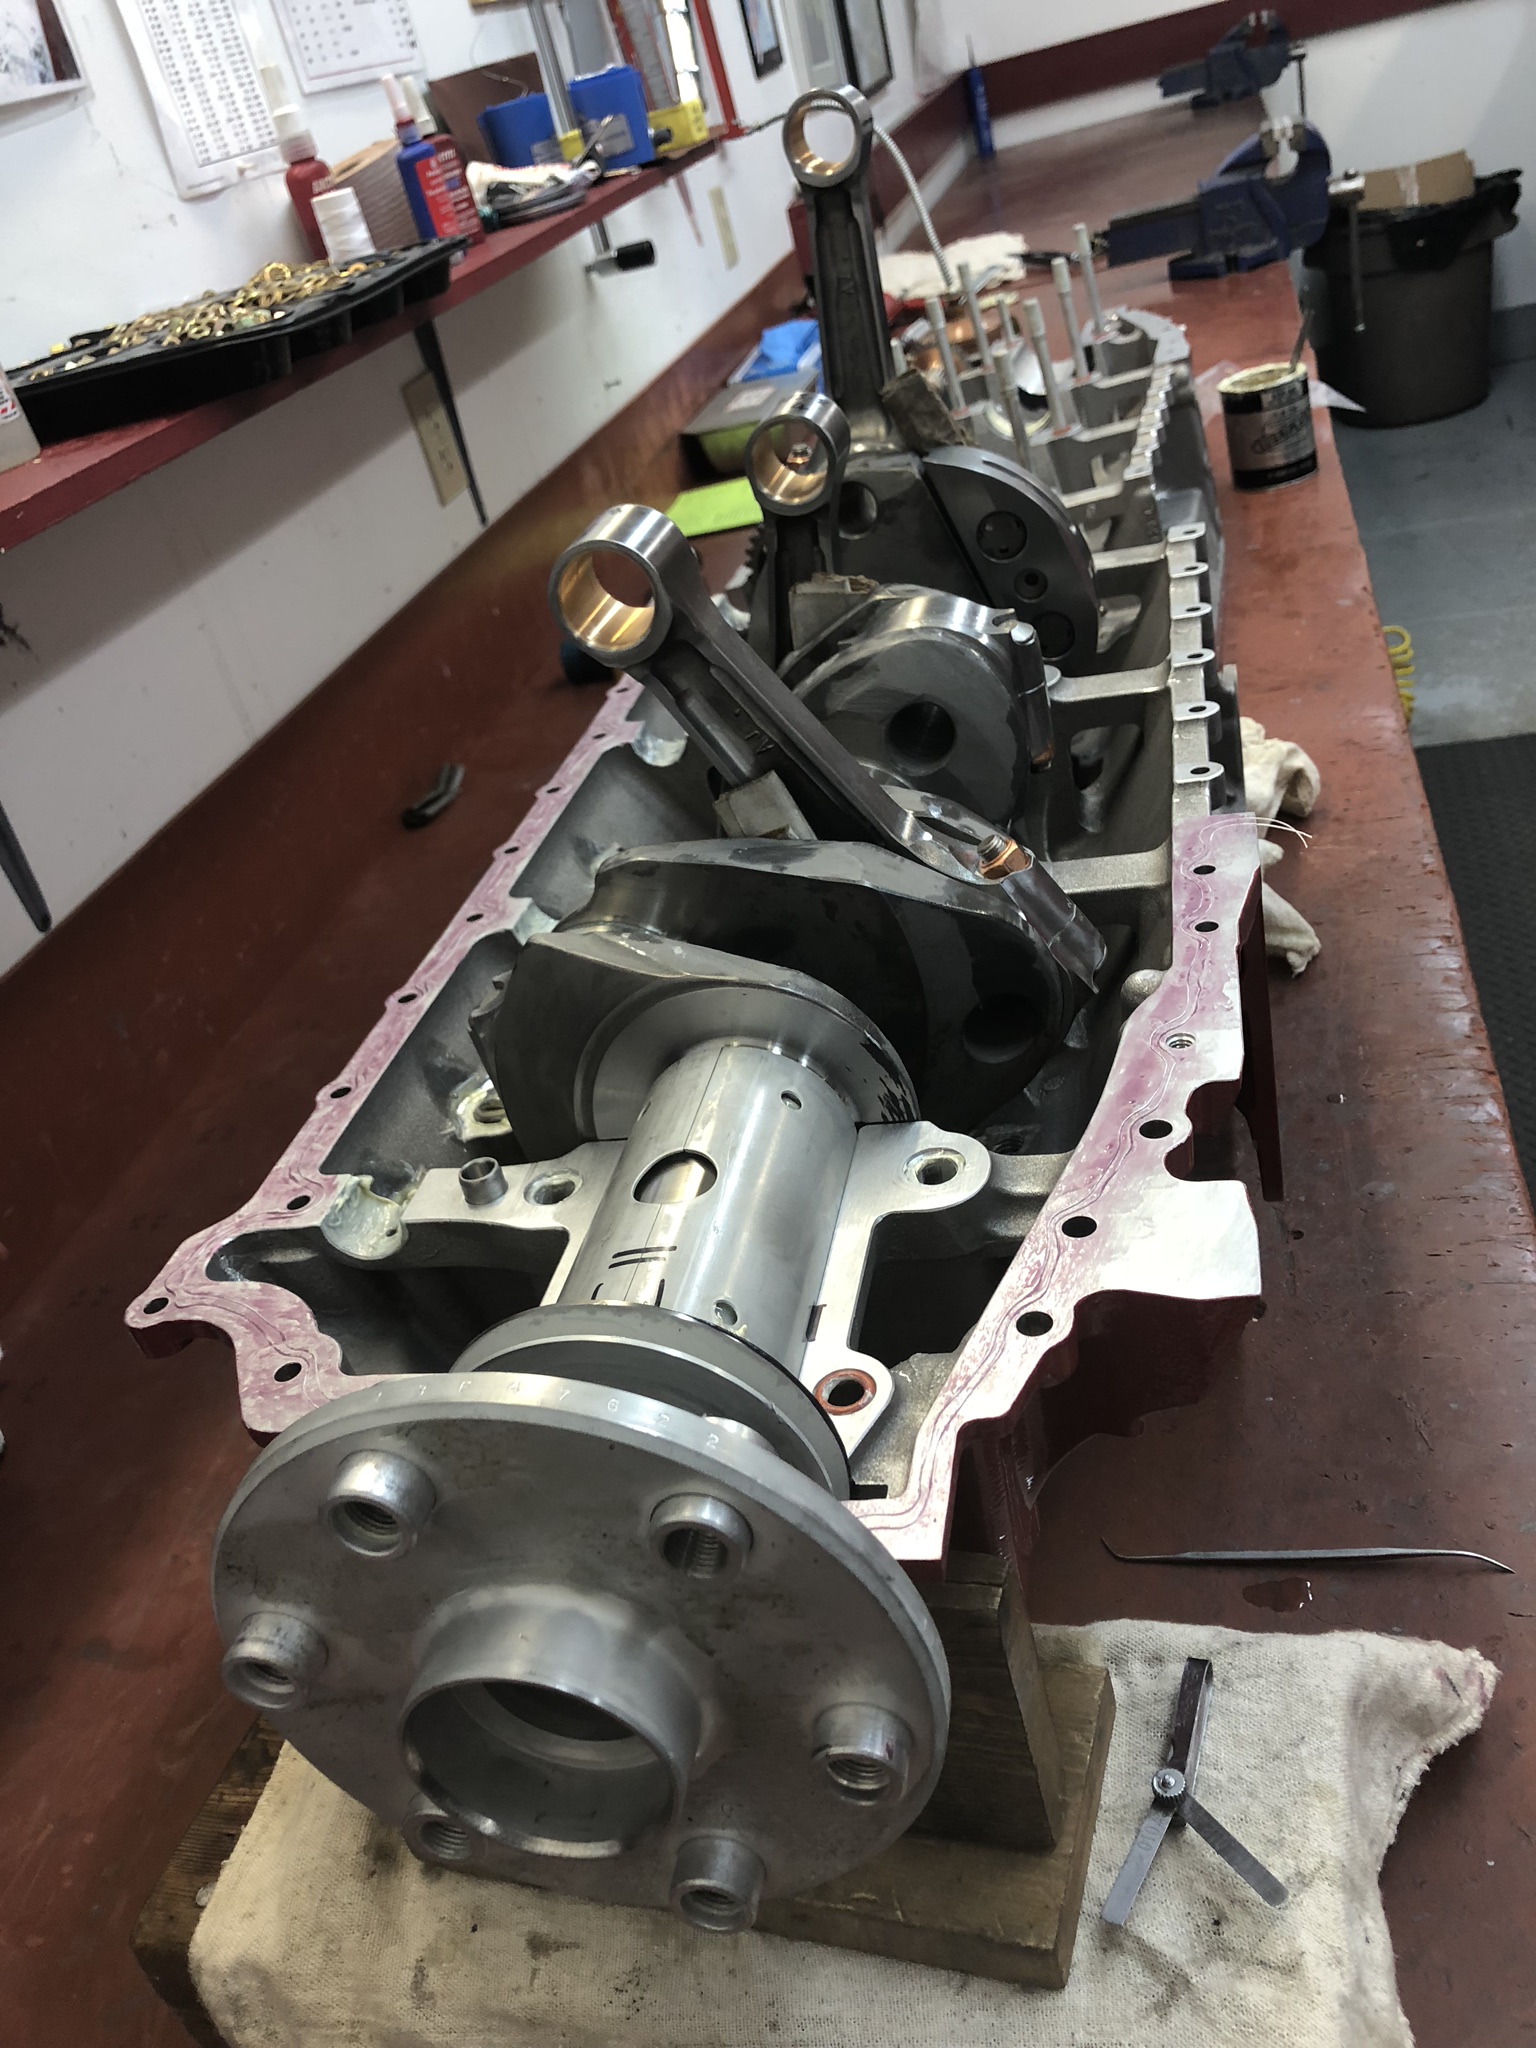
Next case through bolts were installed. The case half bolts were installed and torqued. Lastly, the engine block was returned to the engine stand.
Installing through bolts 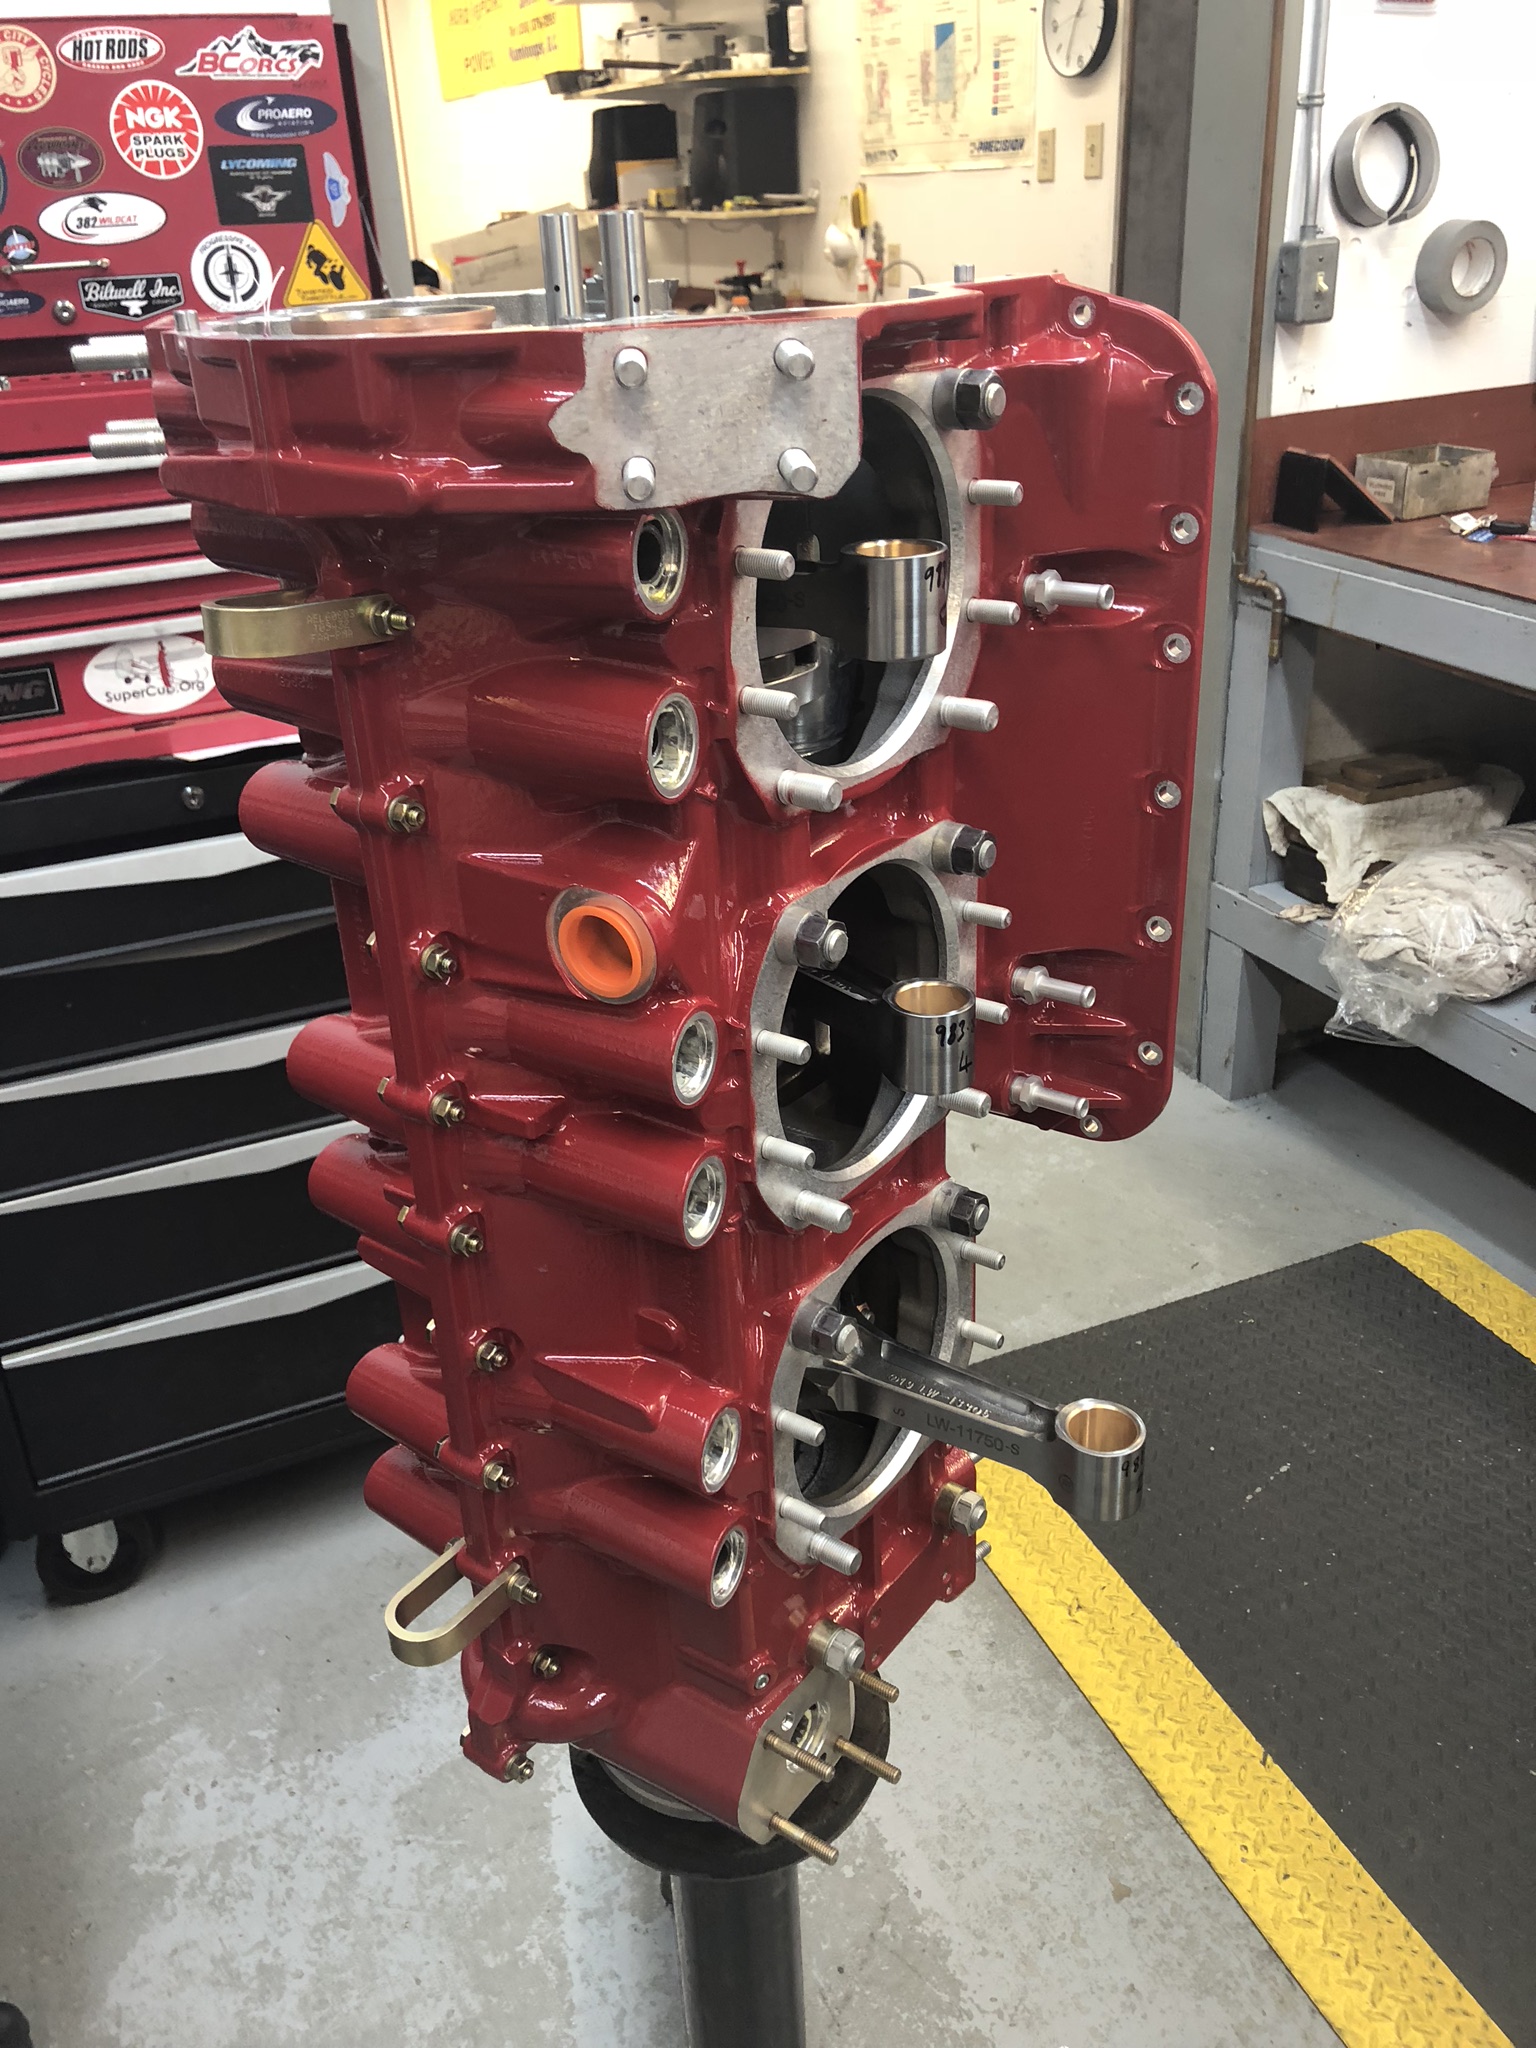
Case bolts installed 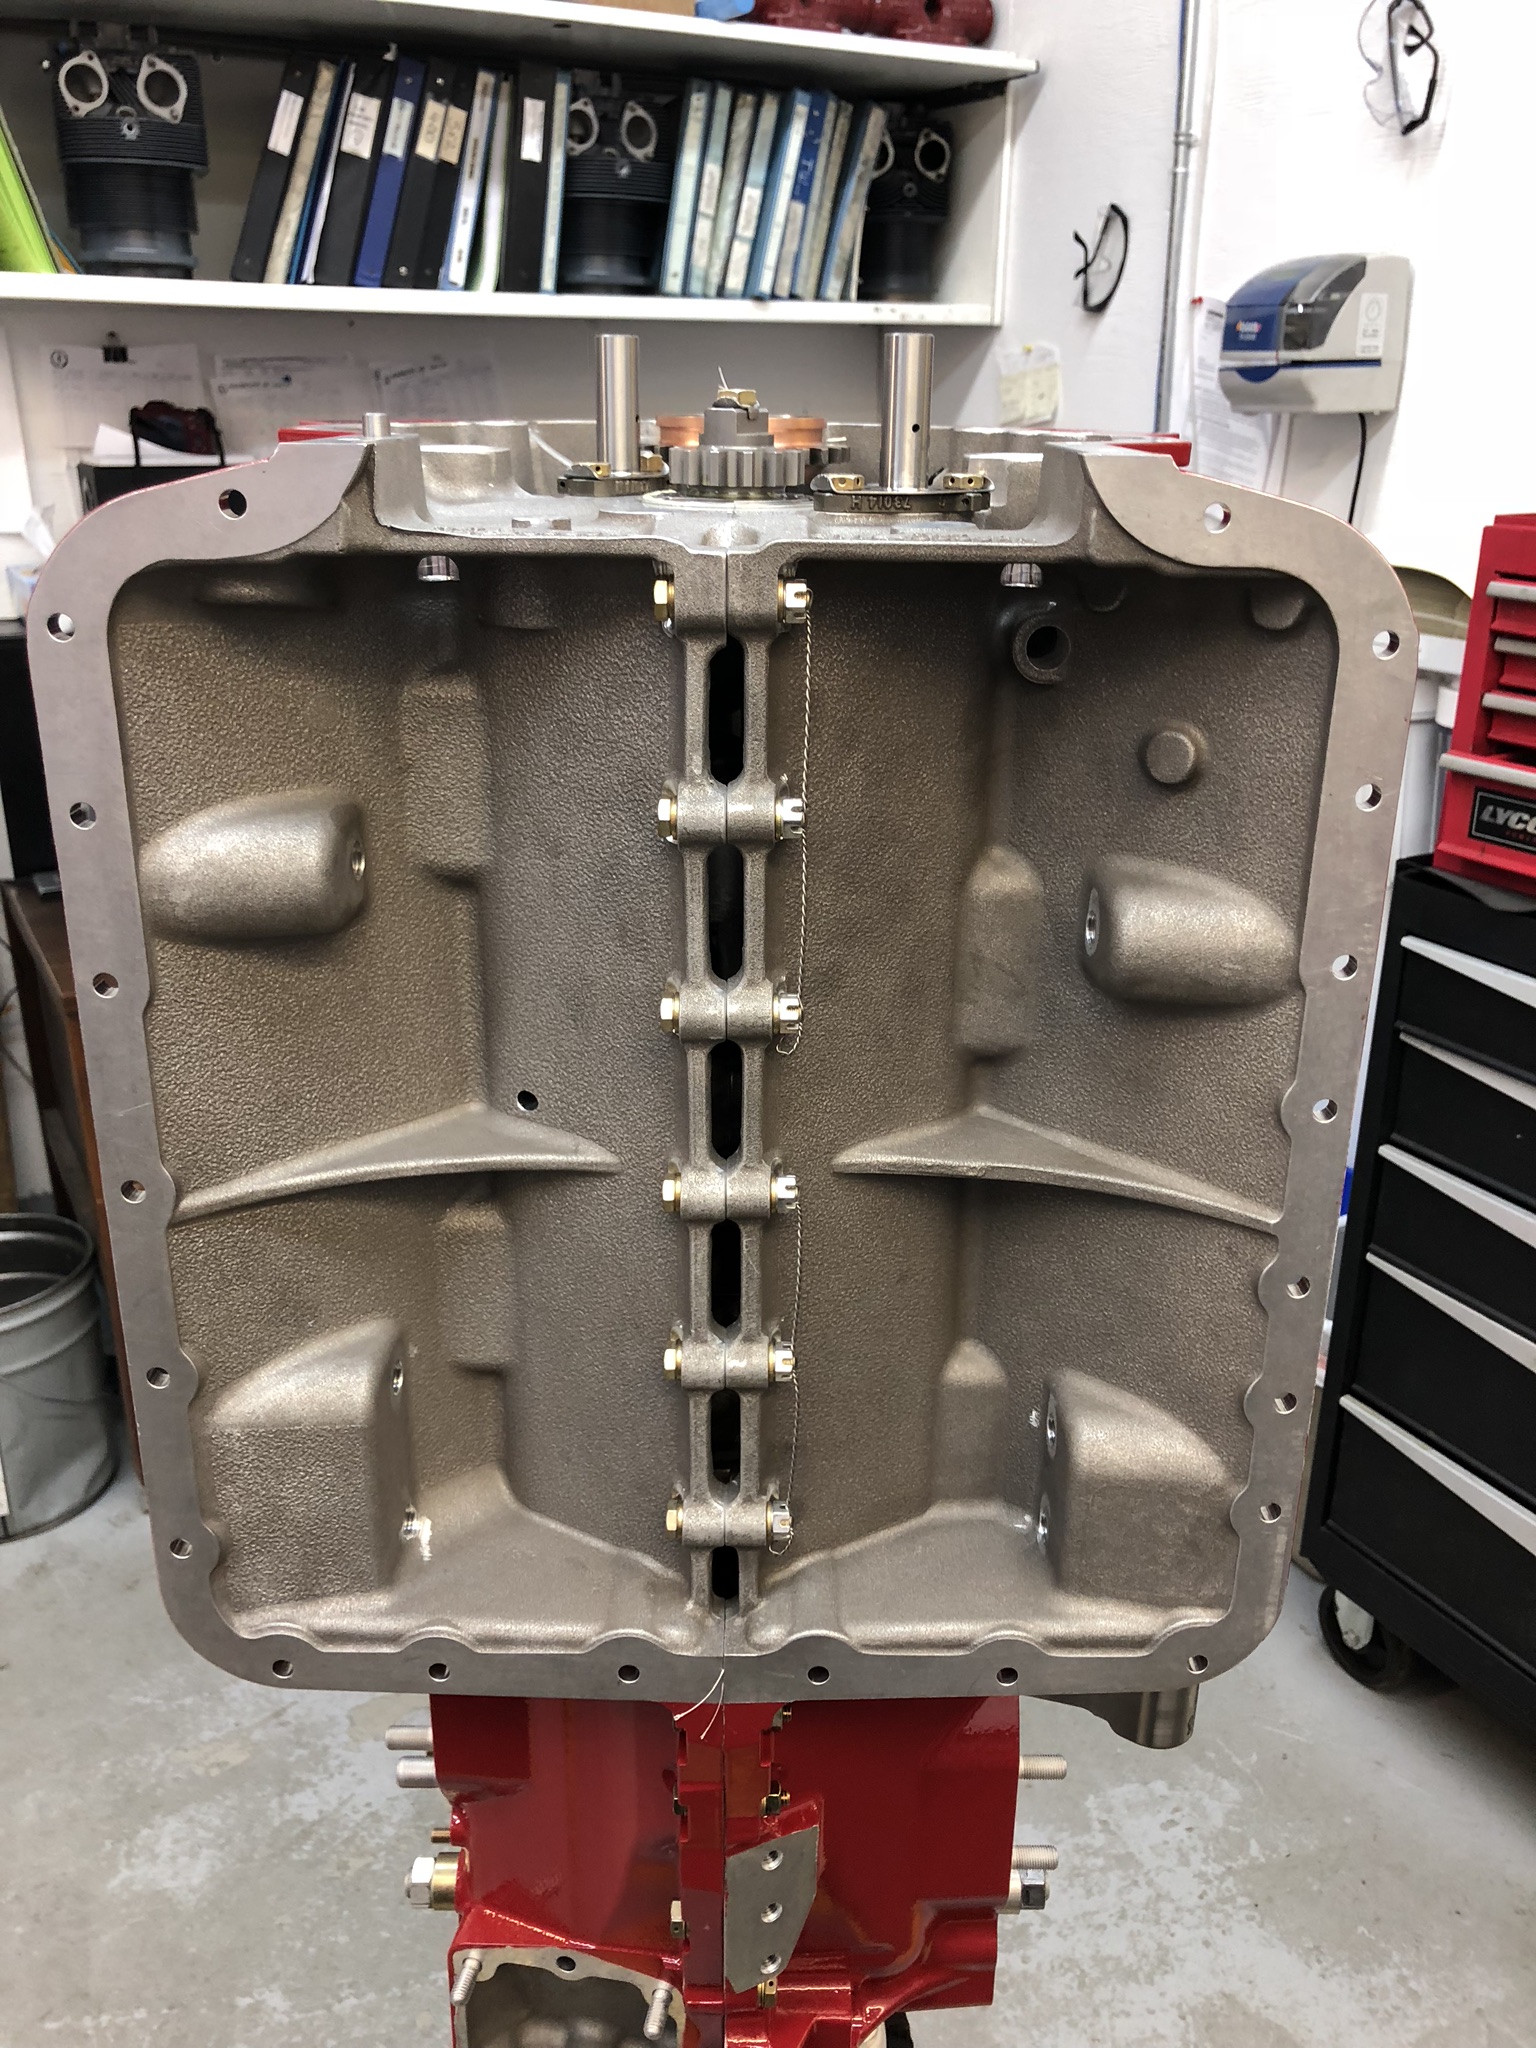
Note safety wire on bolts that will be inside oil pan.
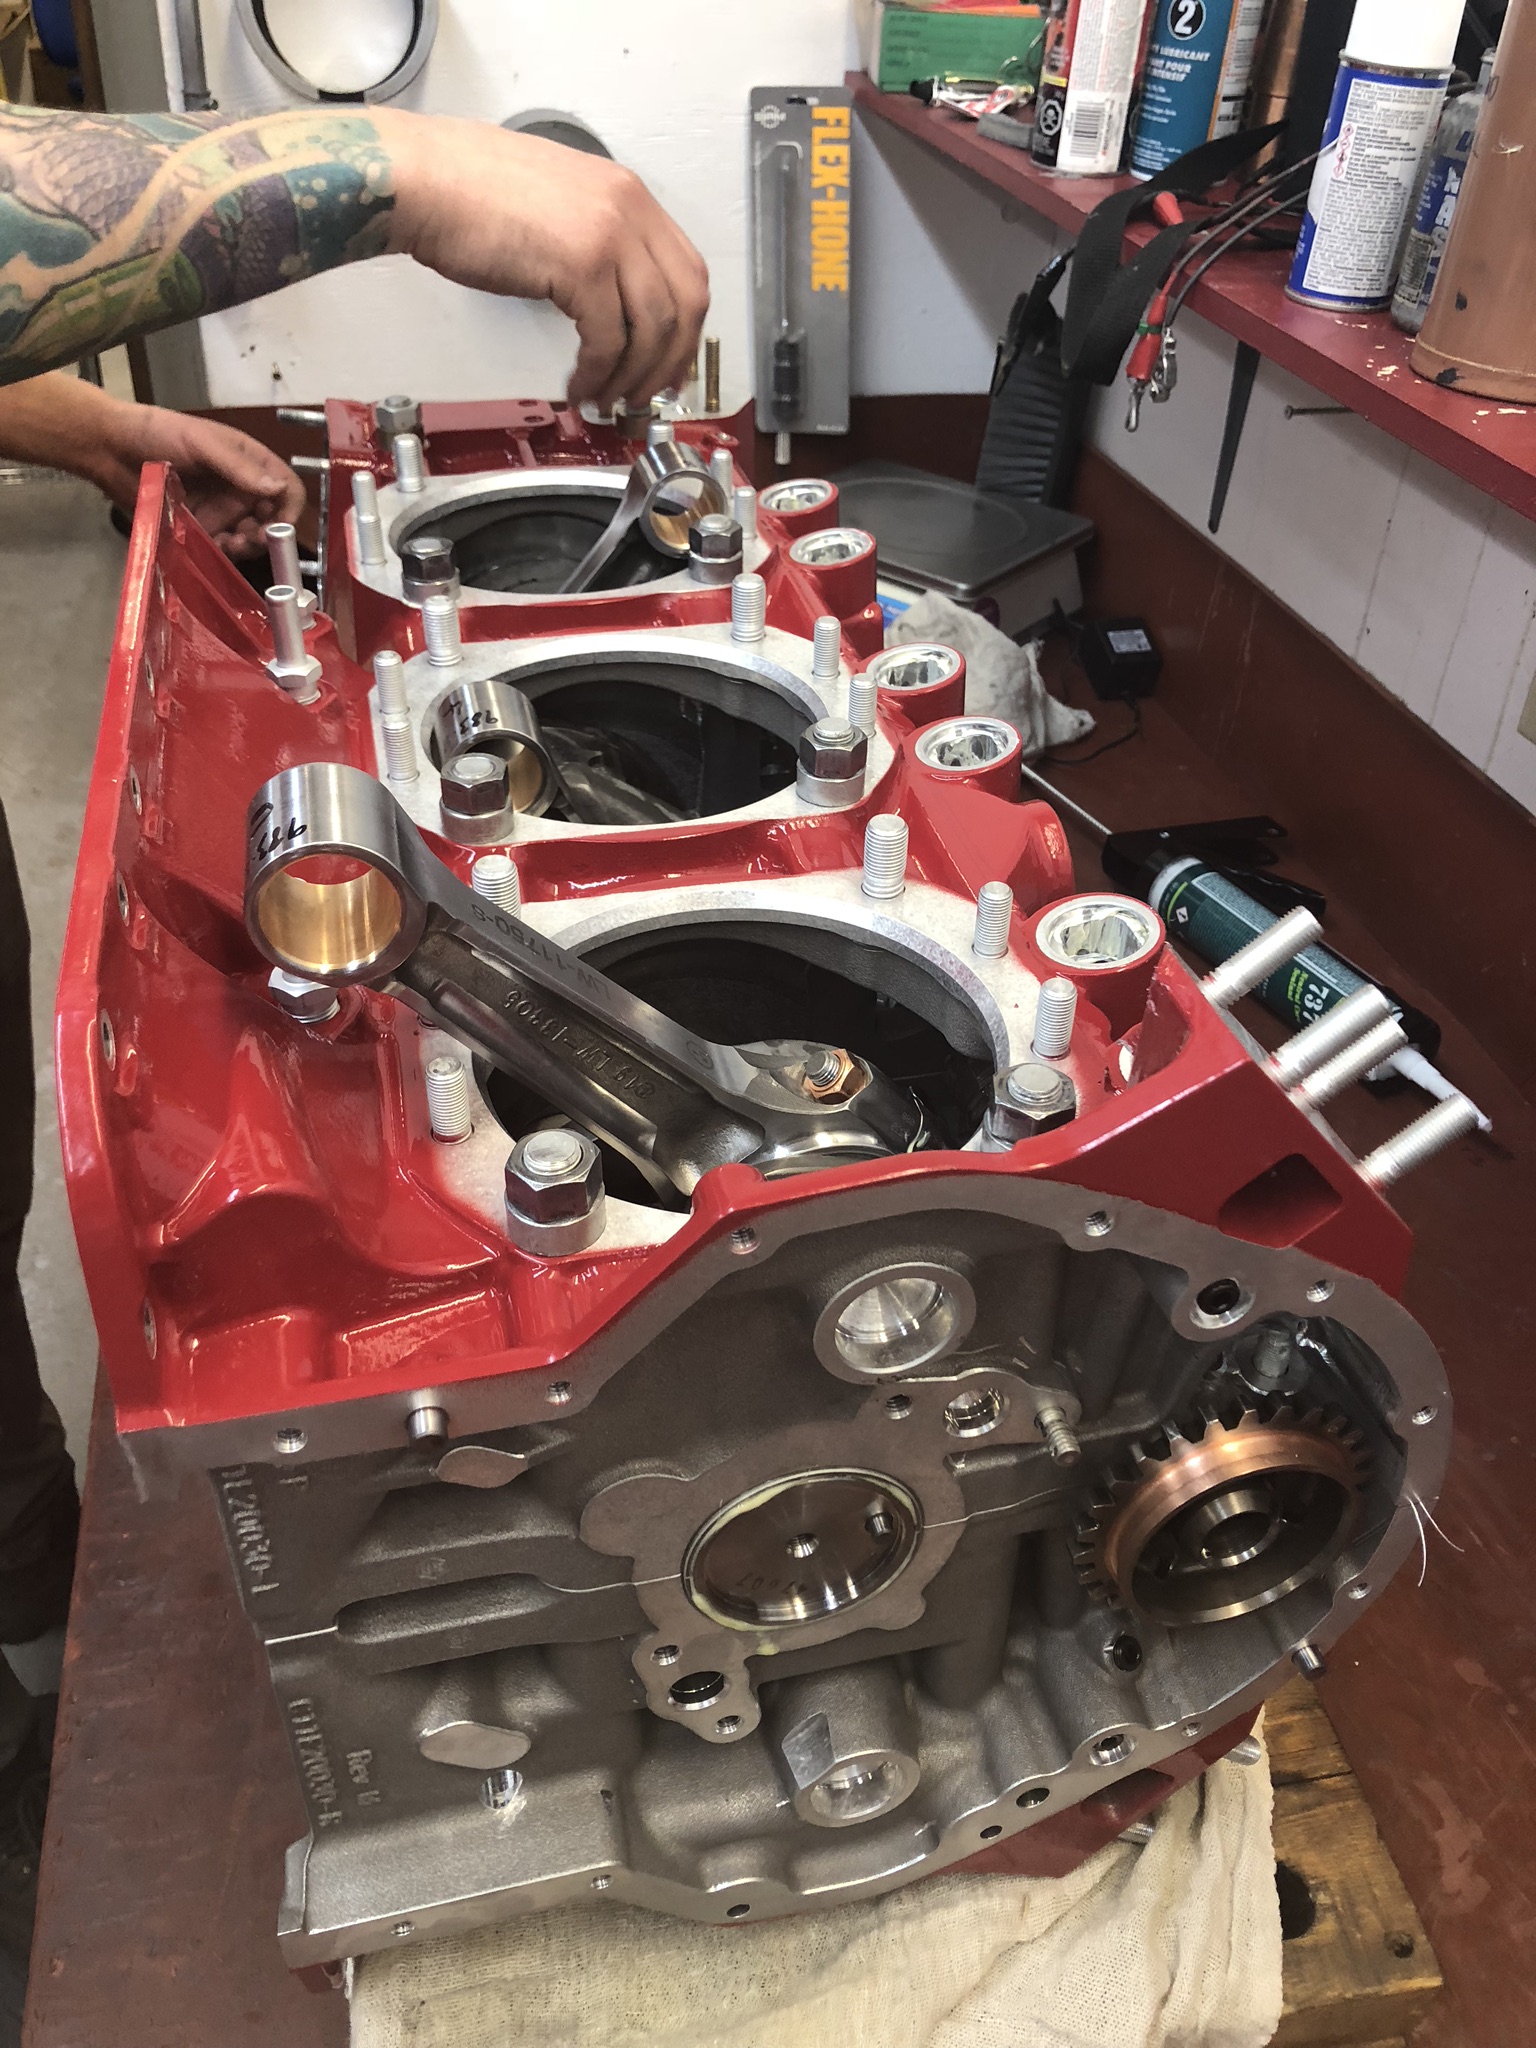
Accessory case being assembled and installed along with oil pan & cylinders. Everything gets torqued. Day # 1 ends at 5:22.

Accessory case (engine side) 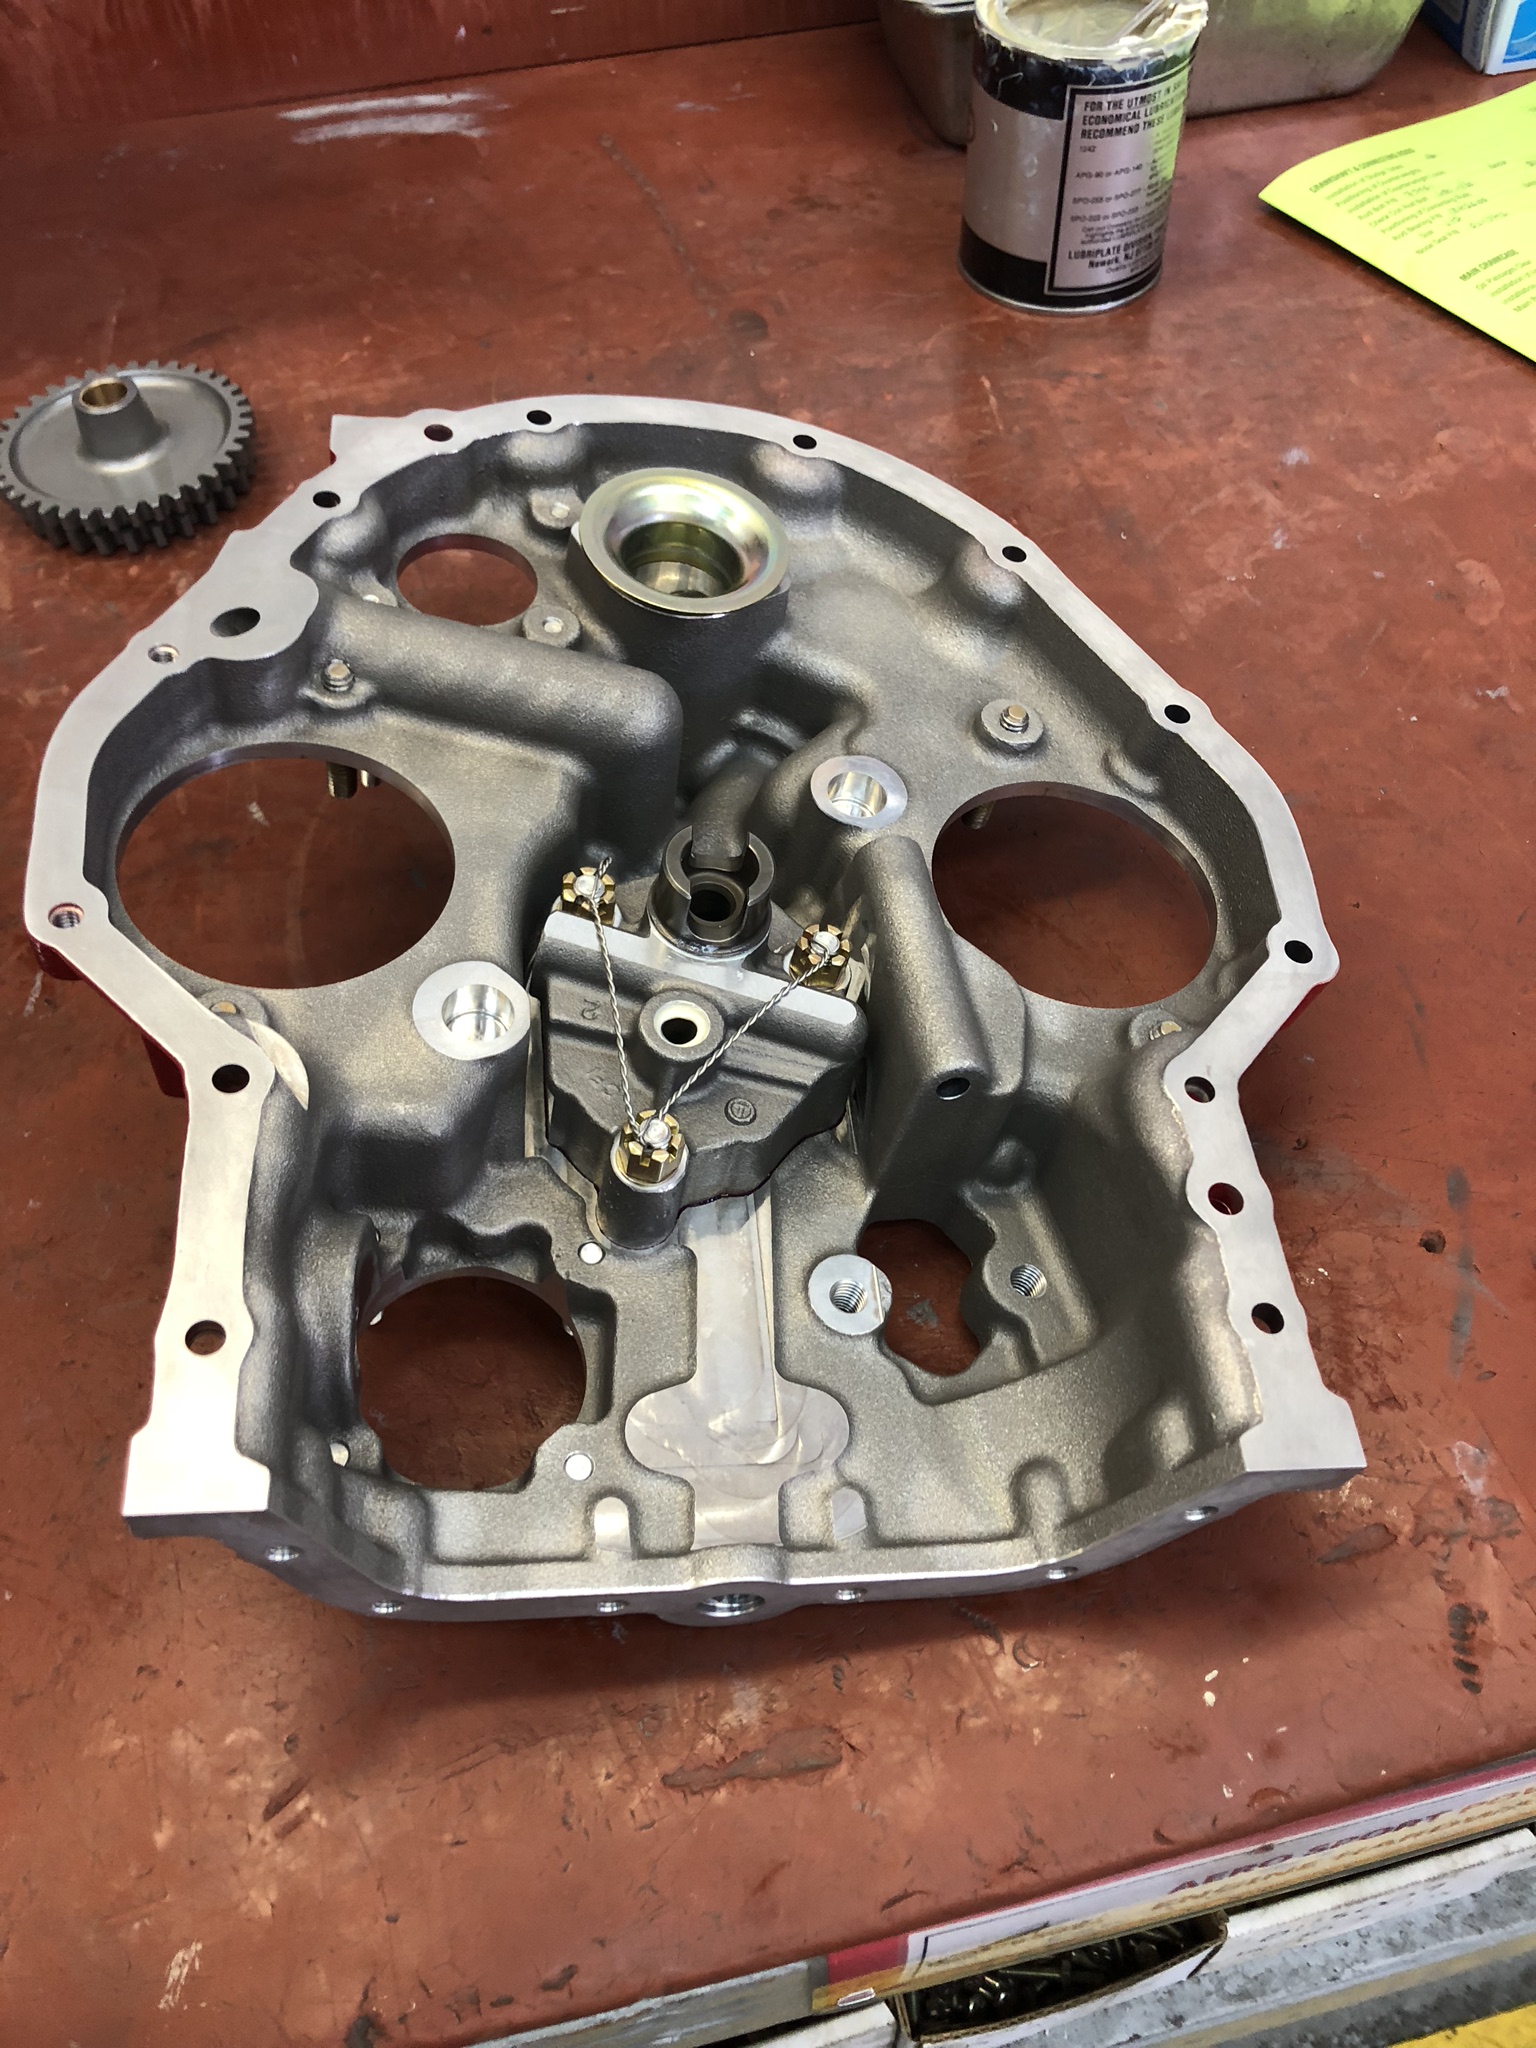
Accessory case cover 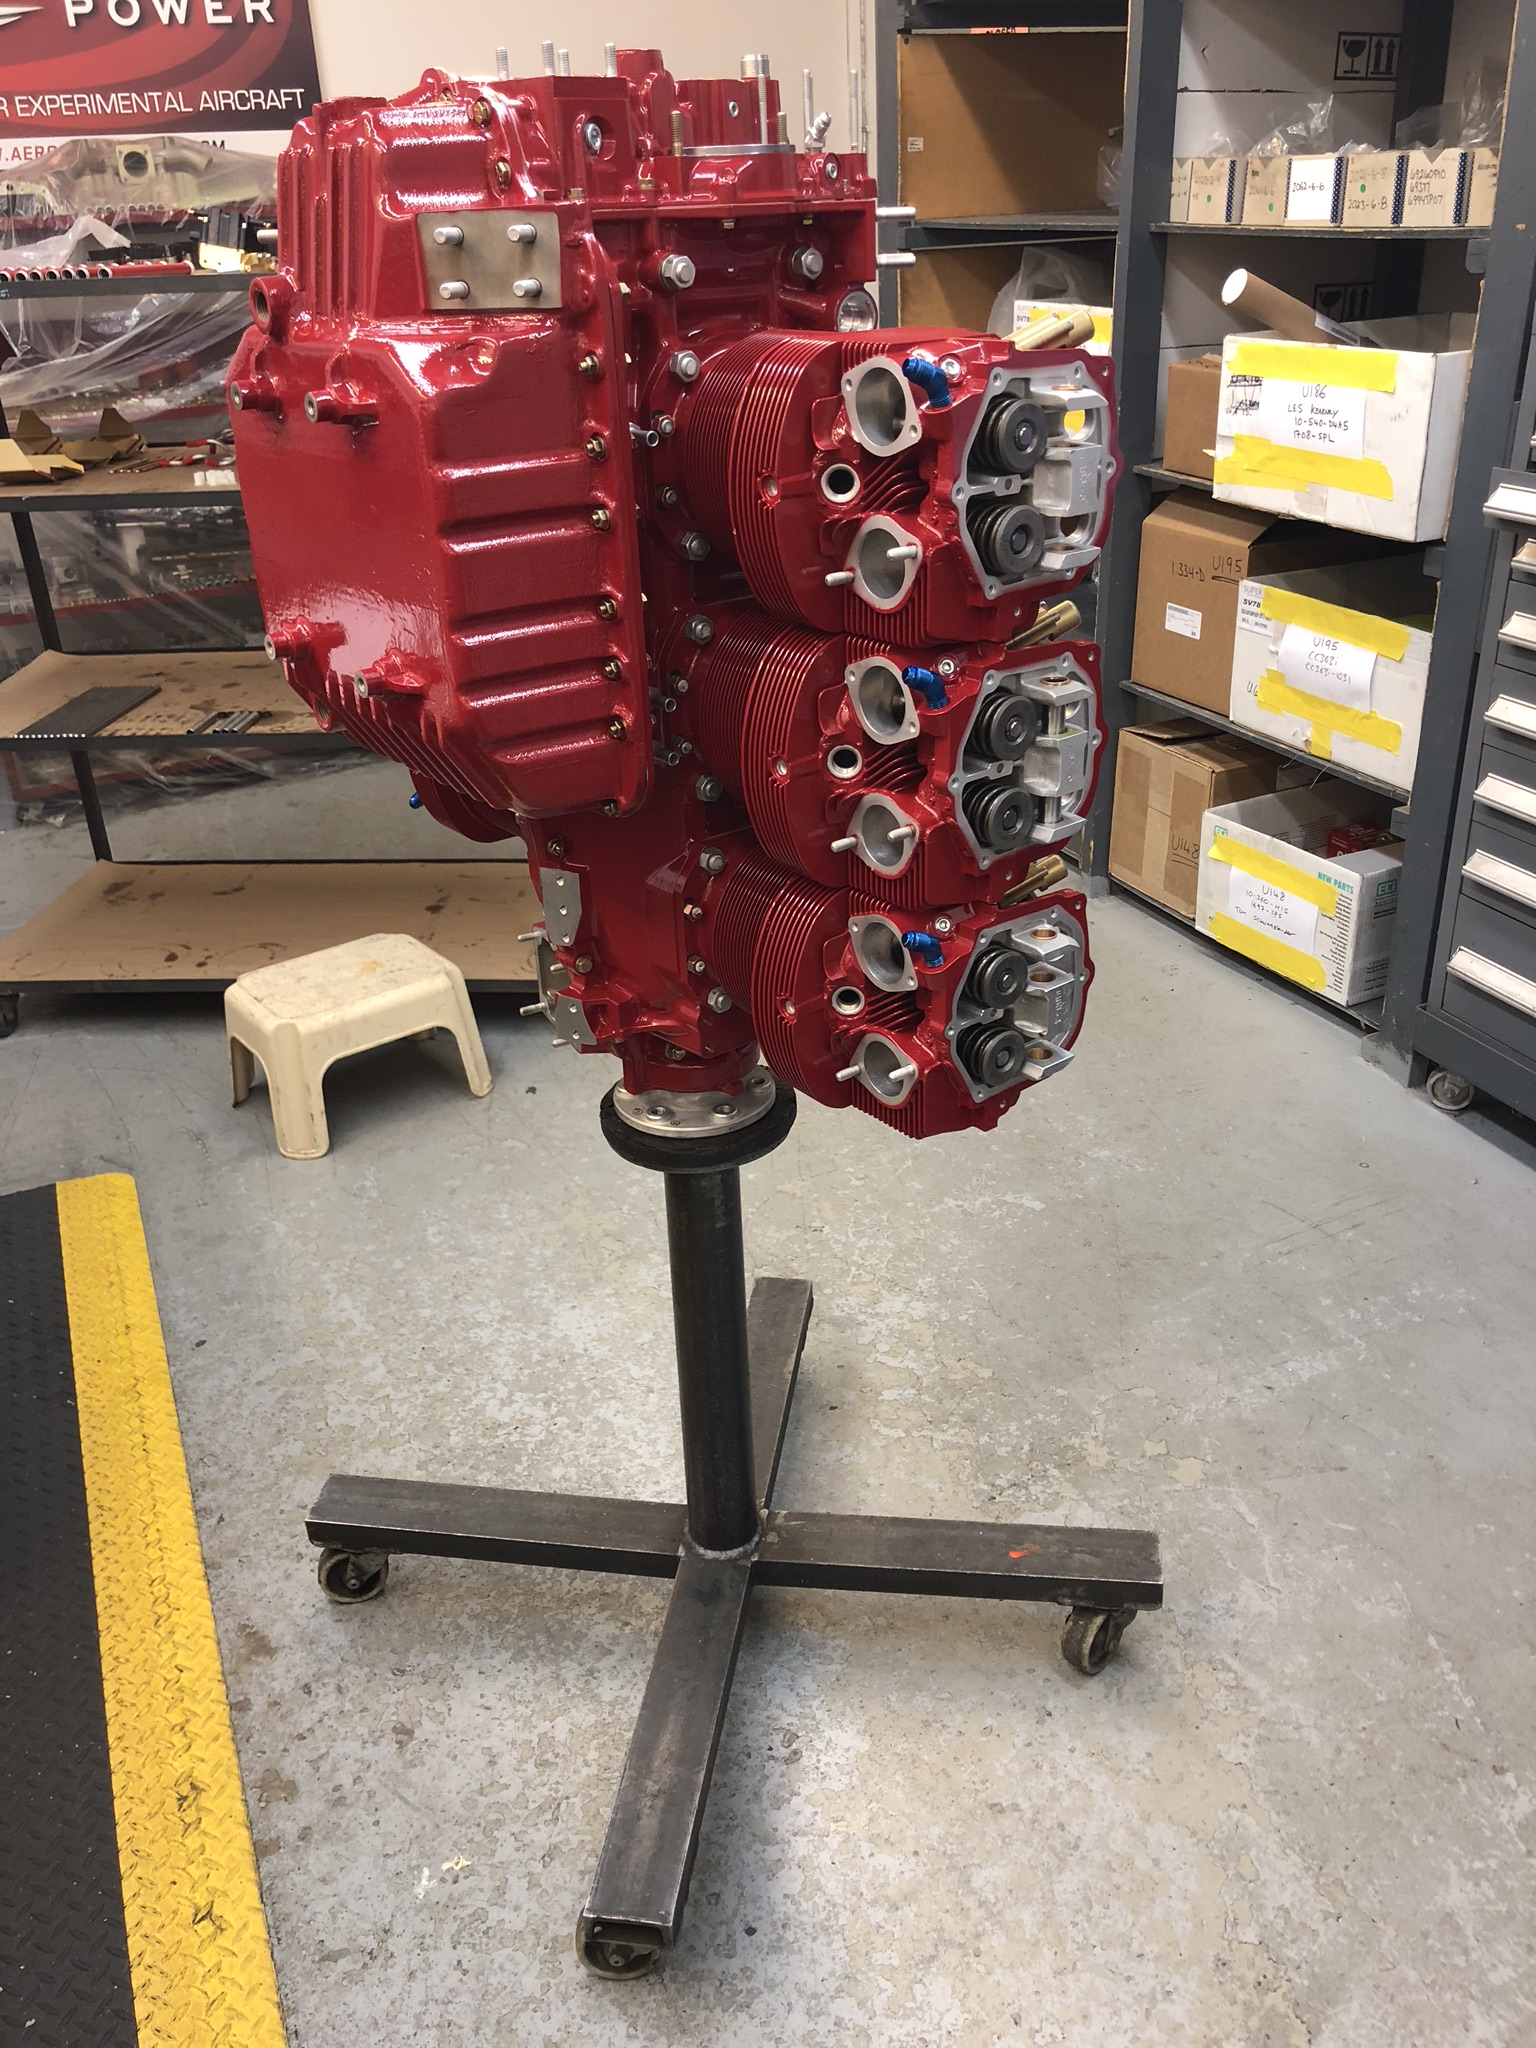
Engine with oil pan and jugs installed
Day # 2 starts – parts shelves look terribly empty. Major assembly is complete – no it is just the bits an bobs that have to go on. Cold Air Induction (CAI) airbox is installed.
Nearly empty shelving unit. 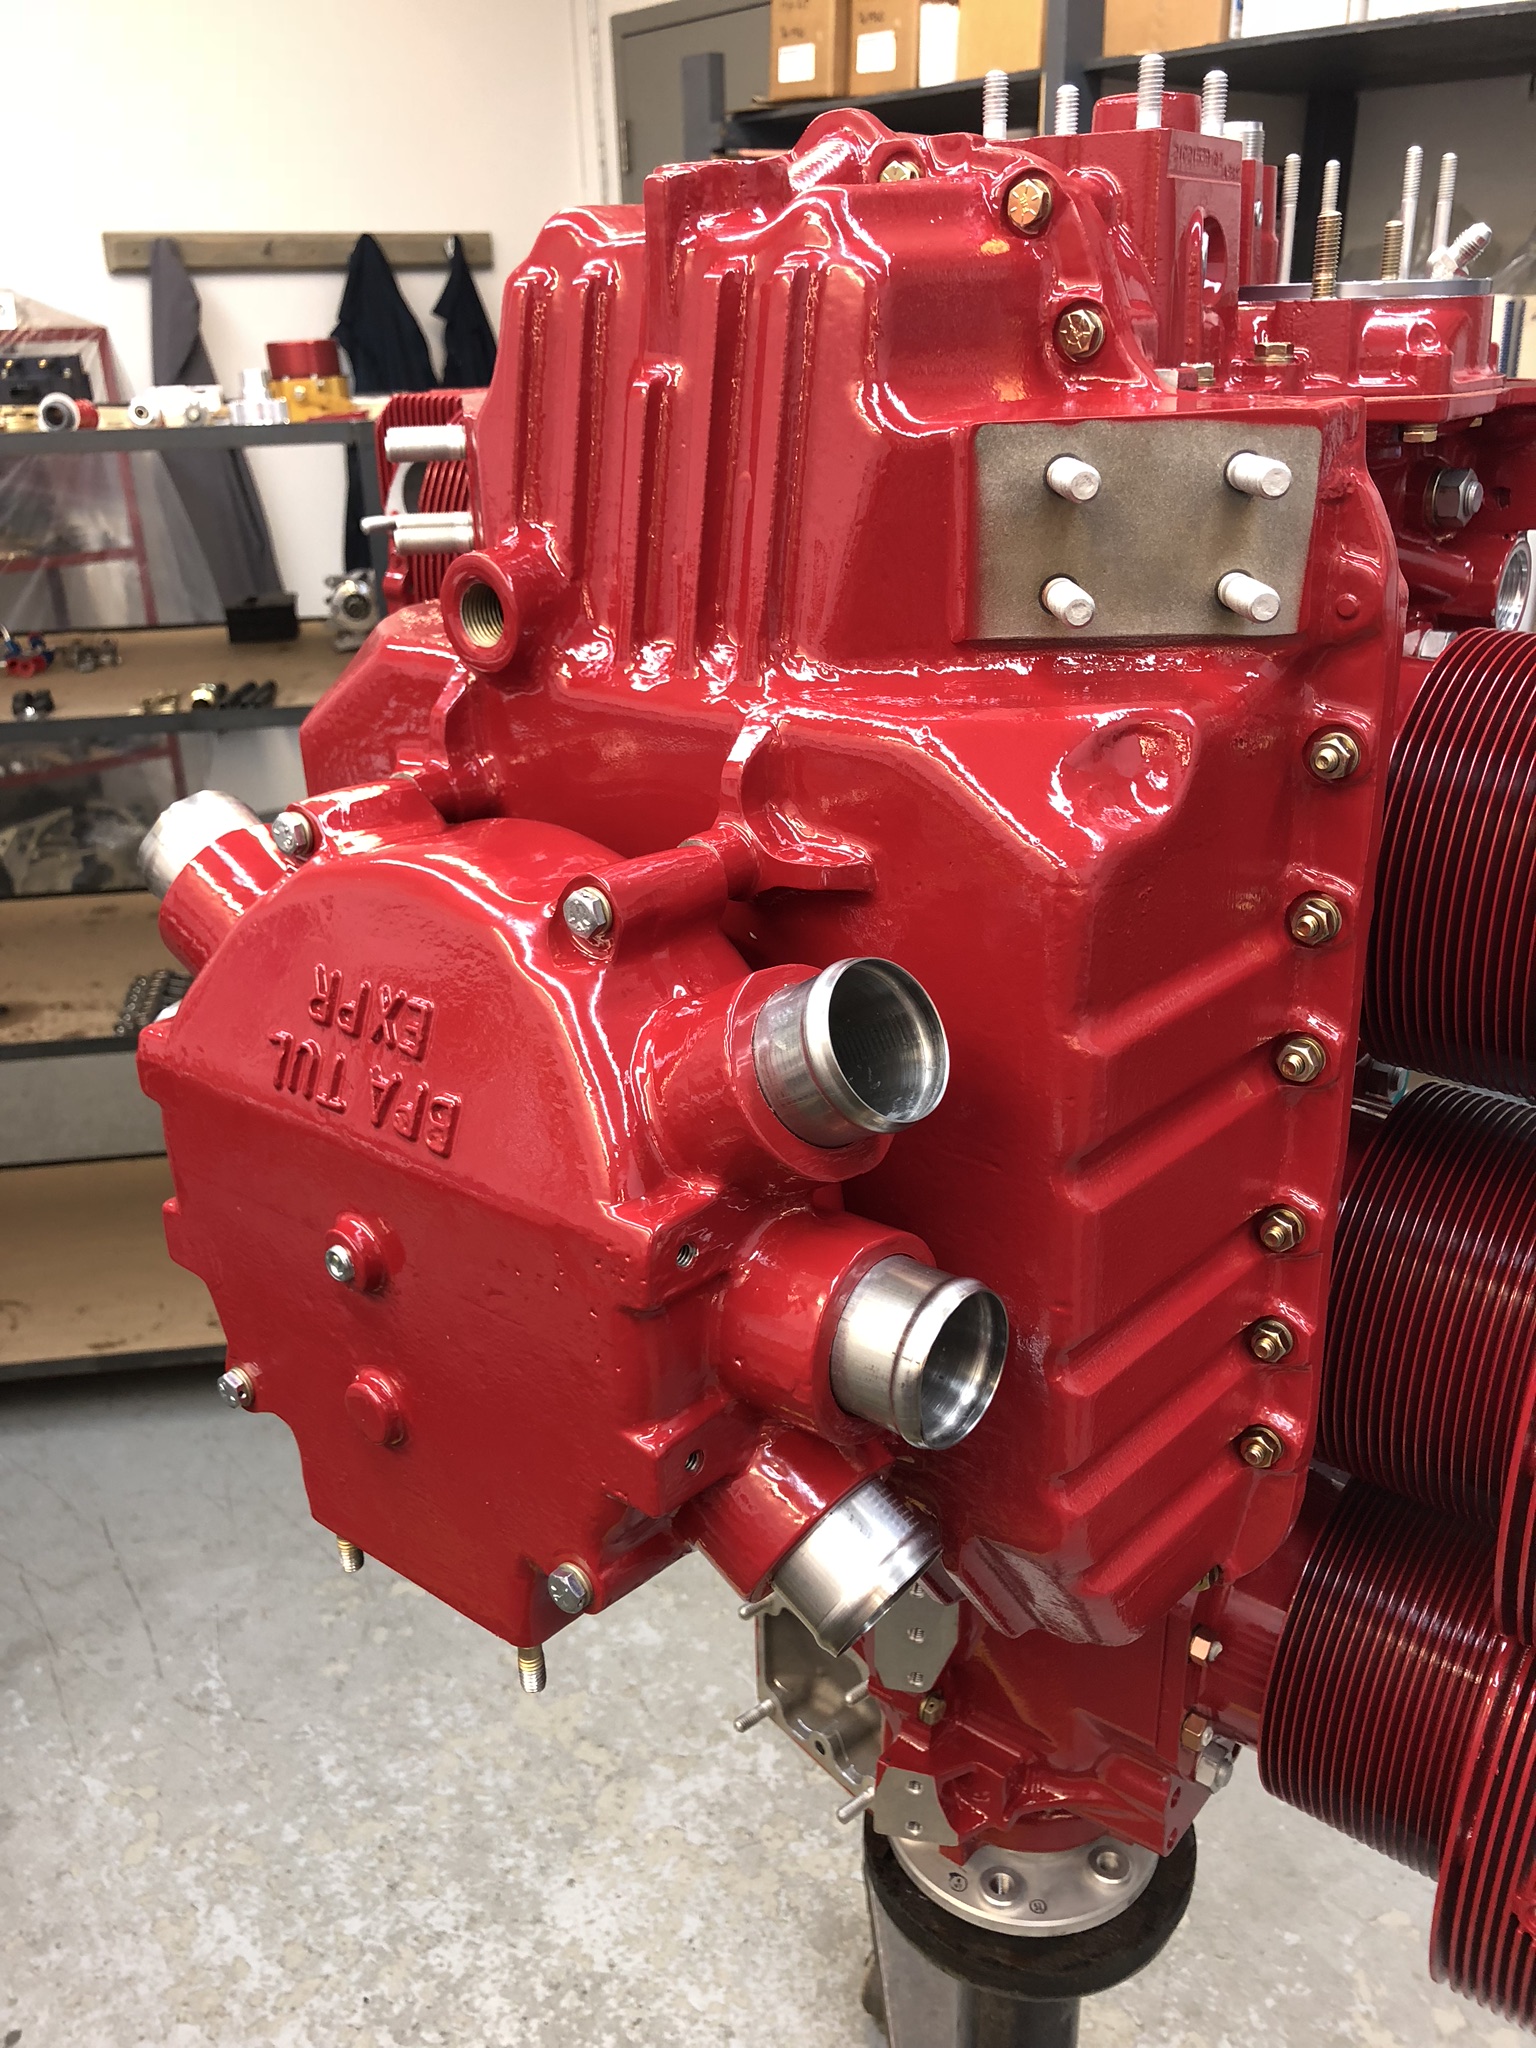
CAI air box
Next push rod tubes, push rods and rocker arms are installed.
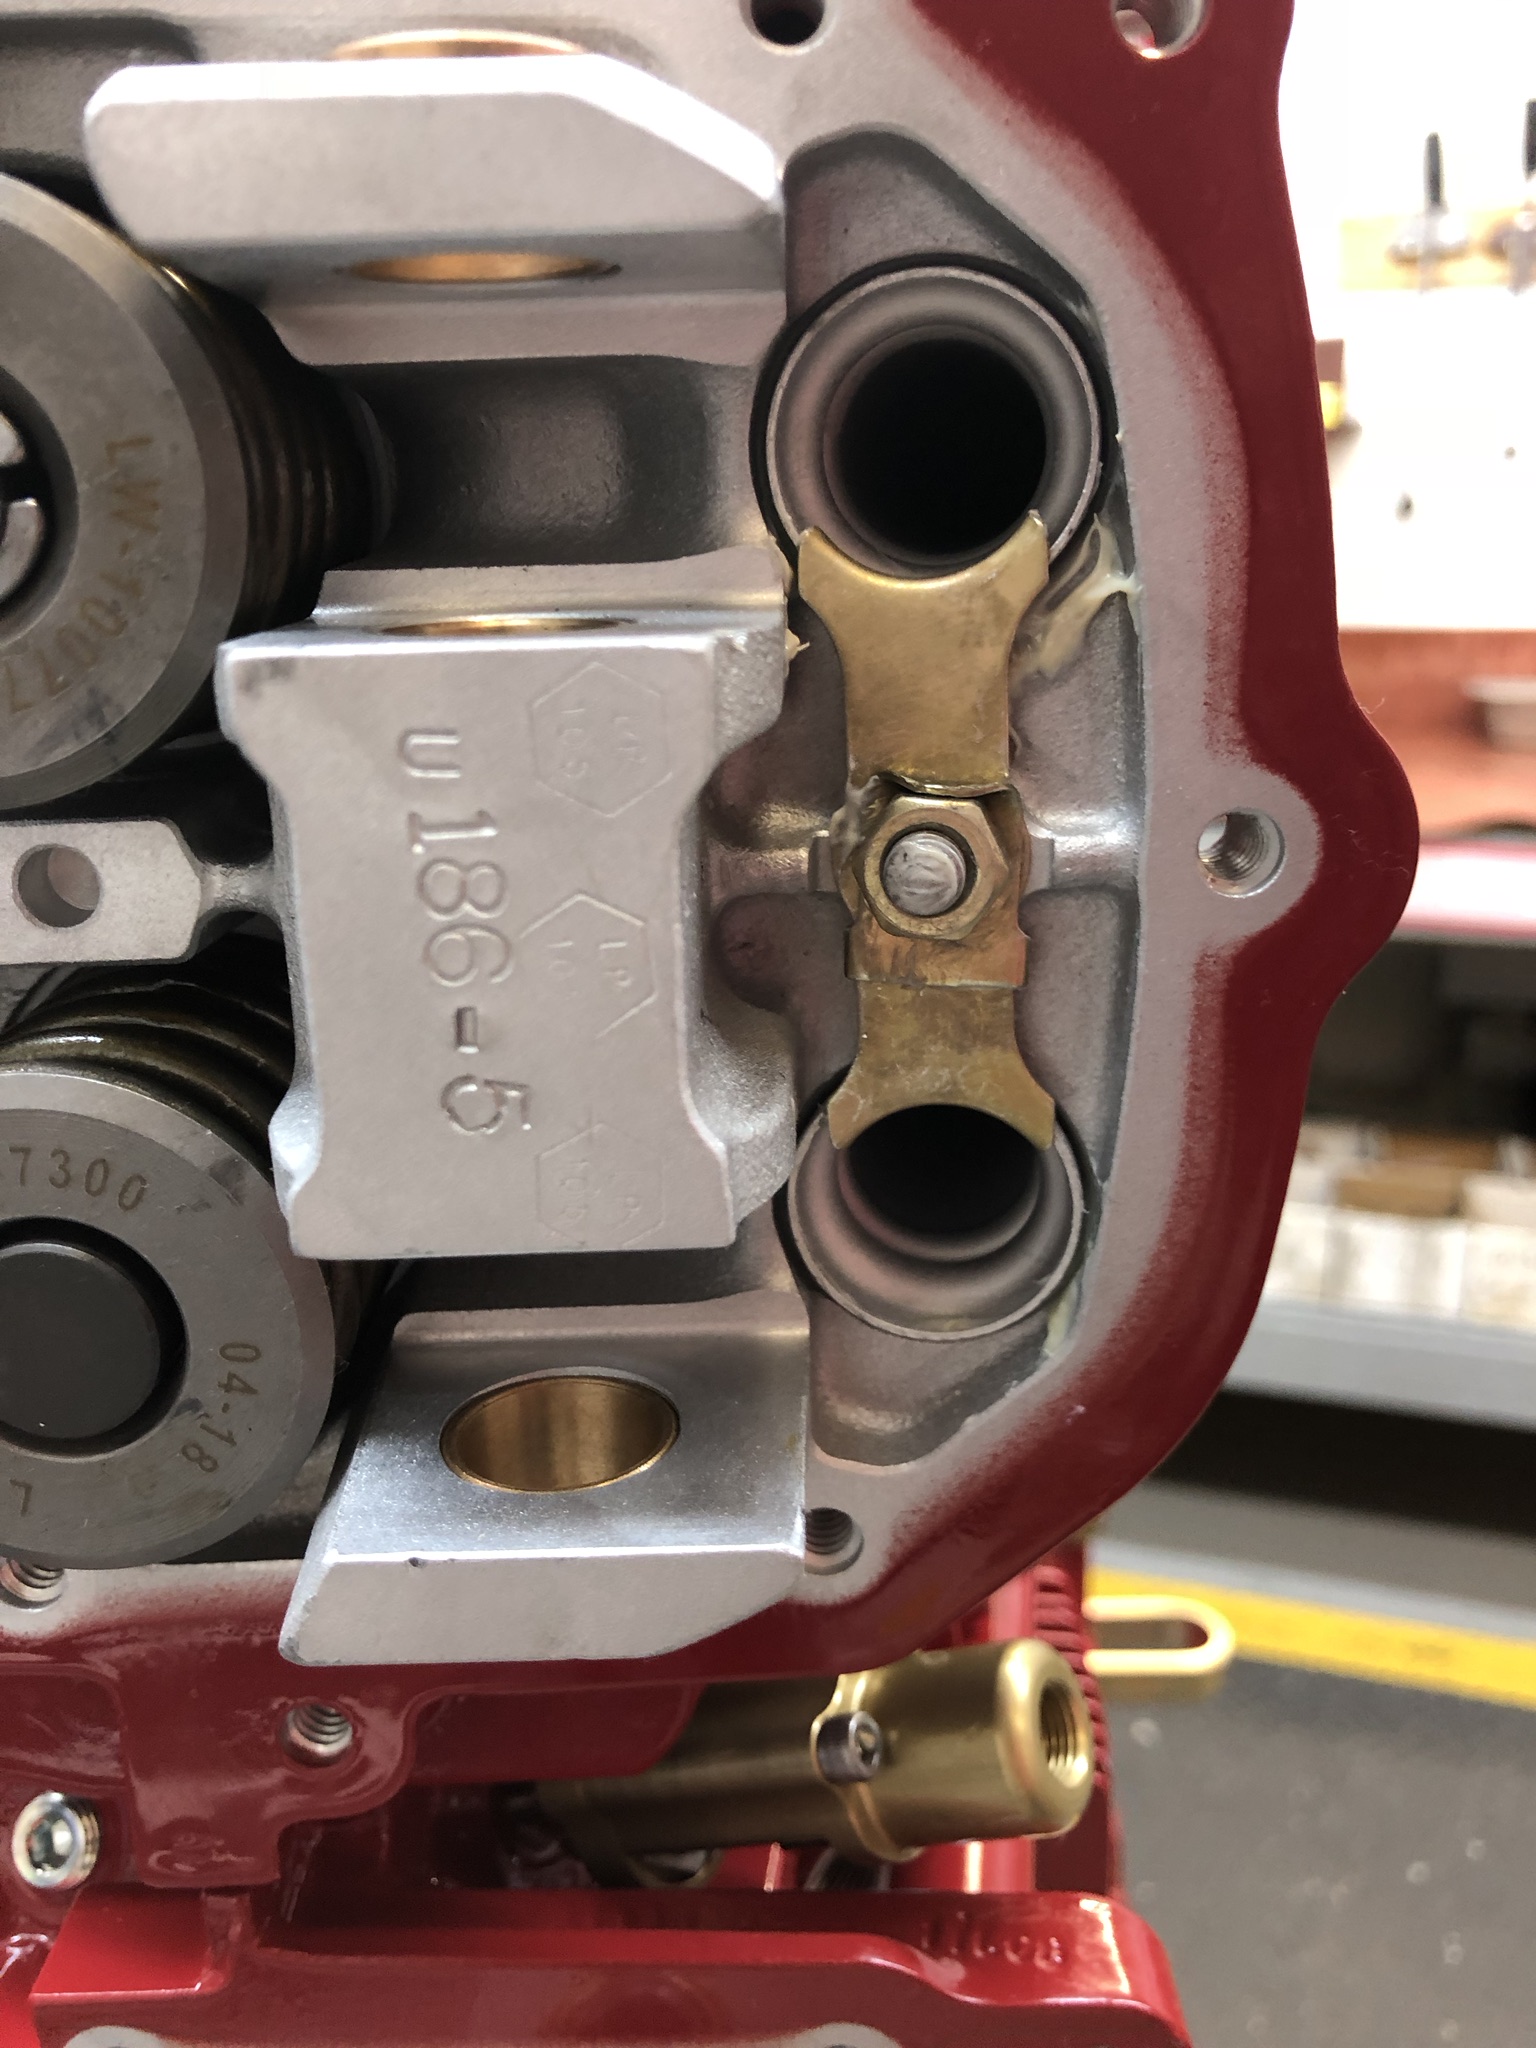
Push rod tubes & retaining clip 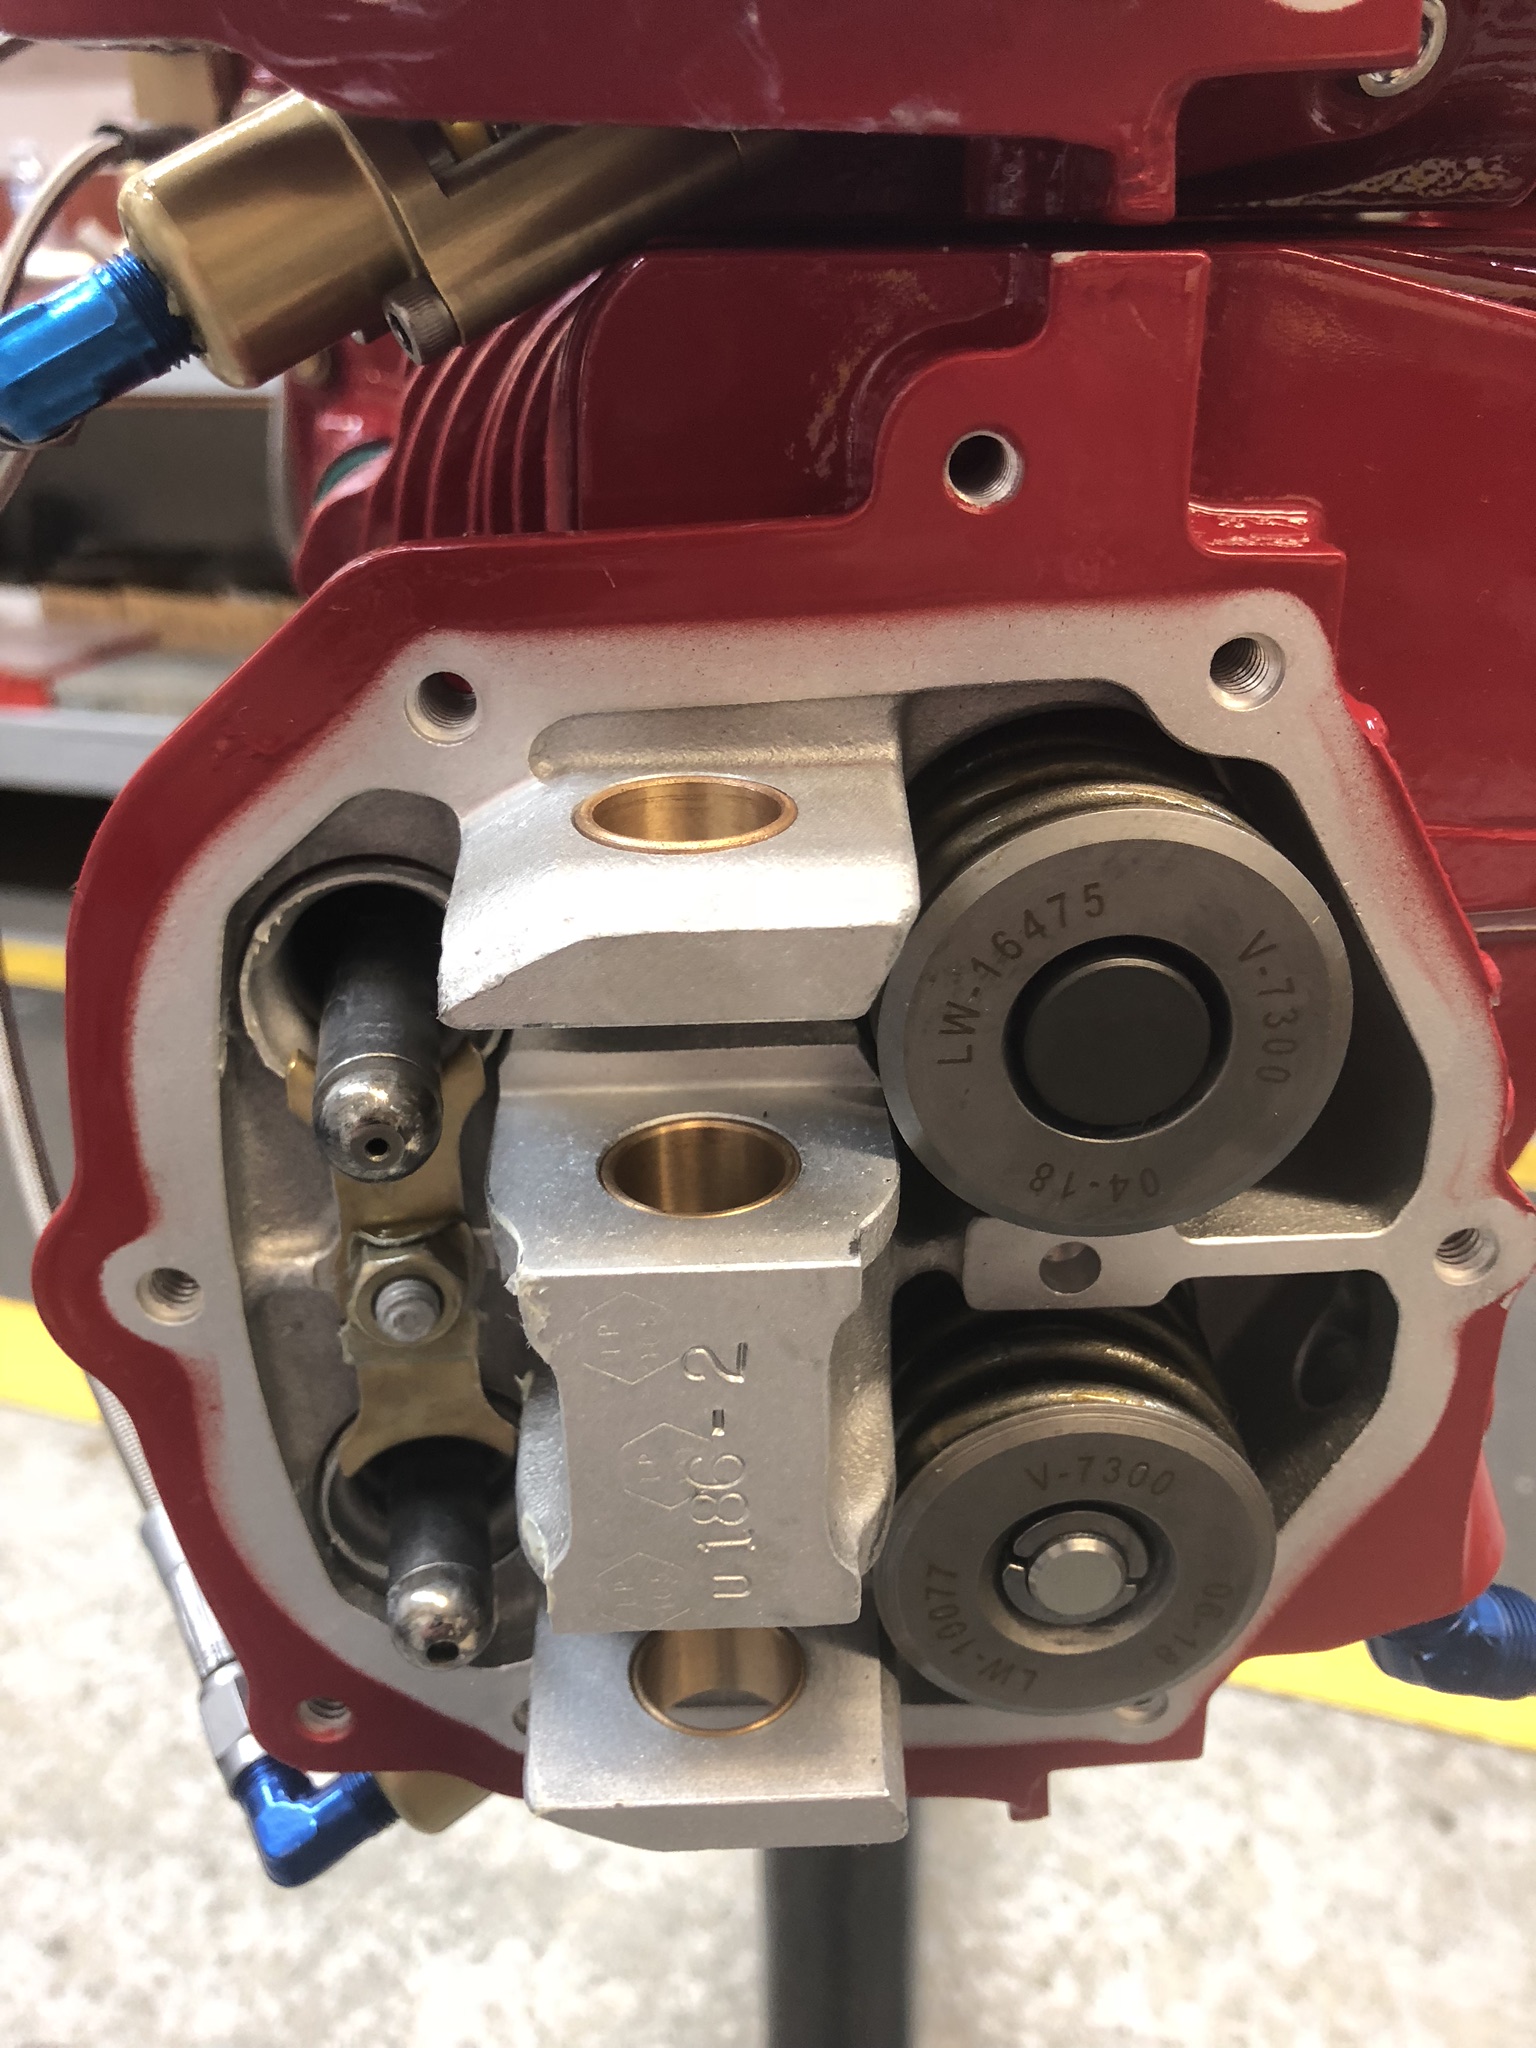
Push rods in tubes 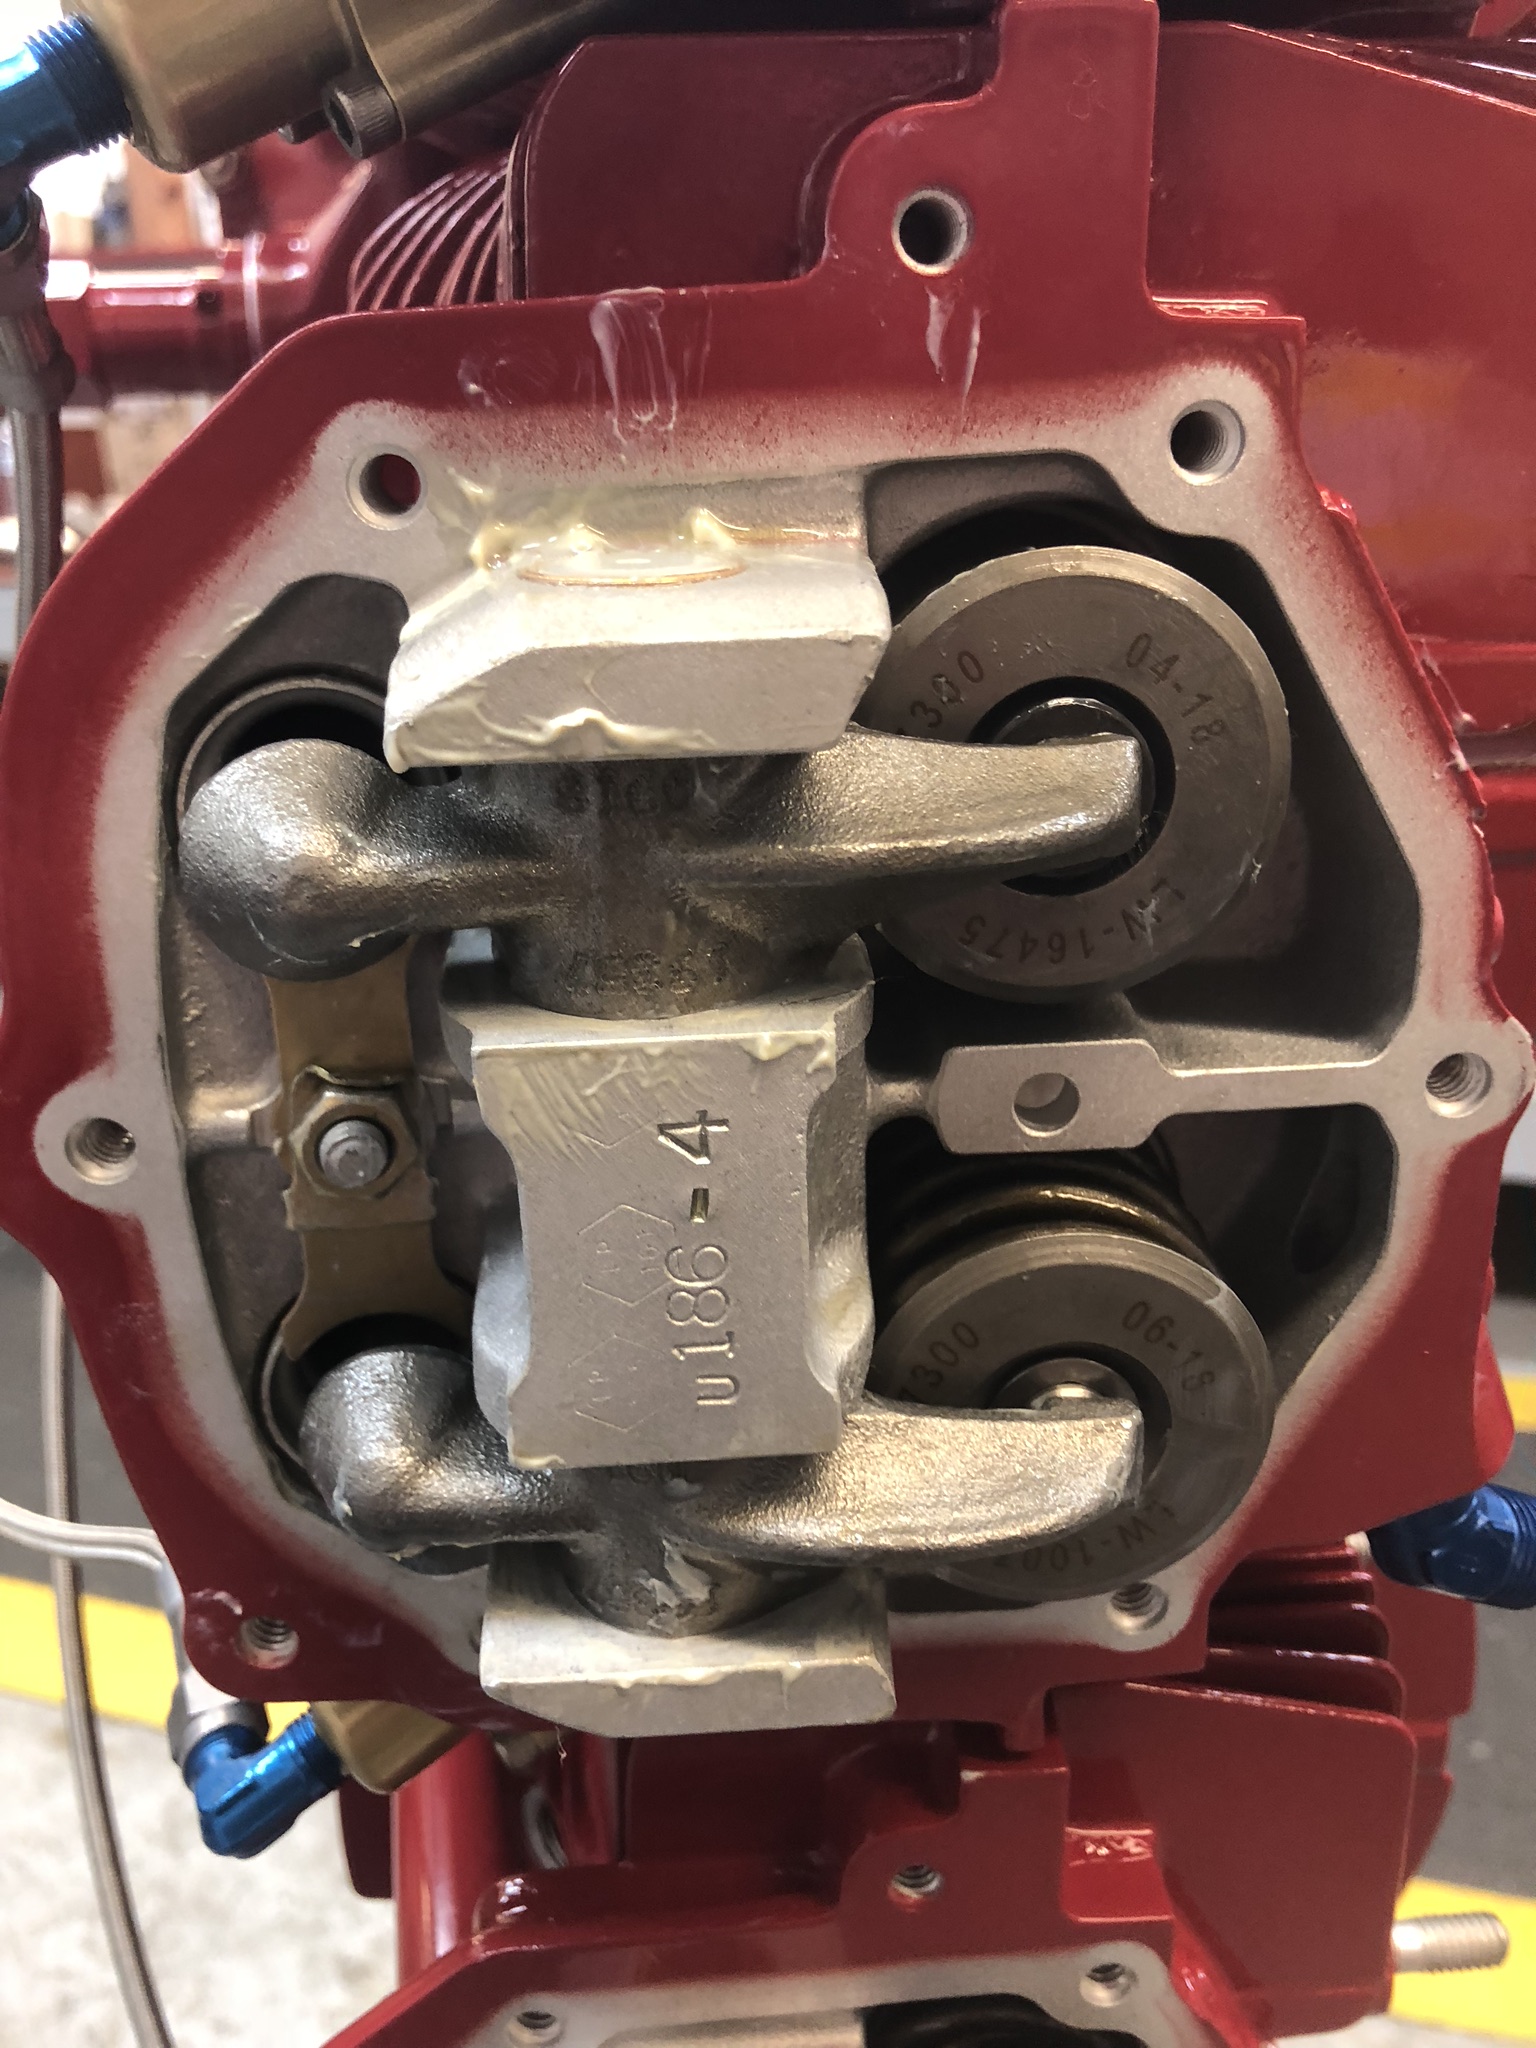
Rocker arms installed
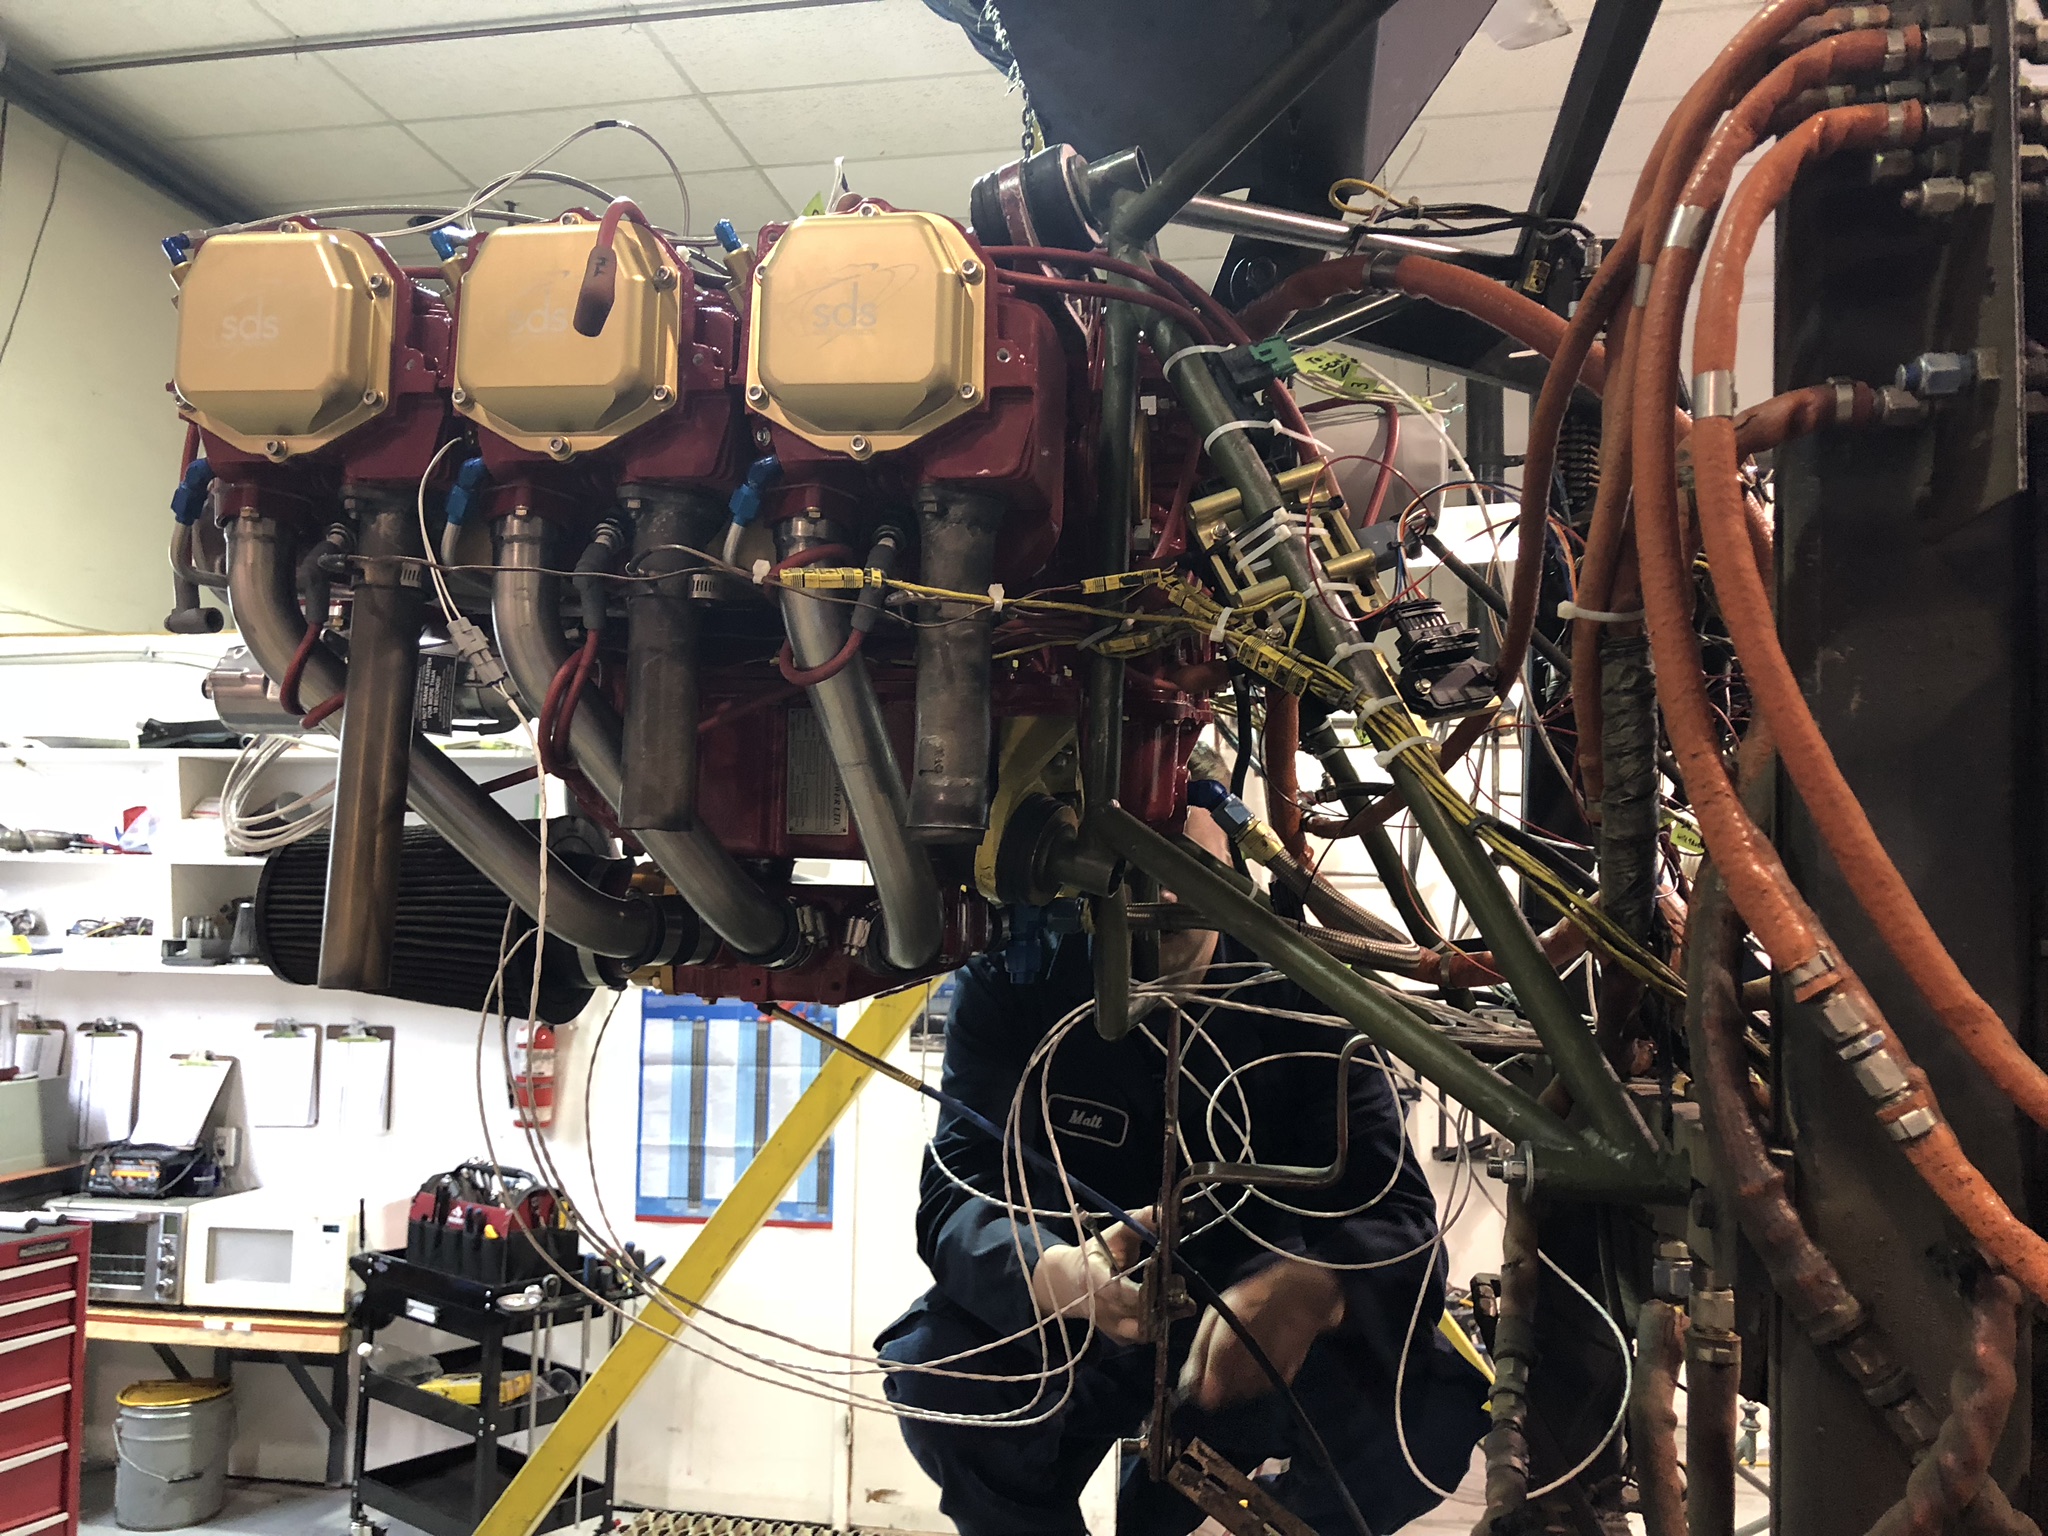
SDS billet valve covers were installed along with the SDS fuel distribution block, injectors and injector fuel lines.
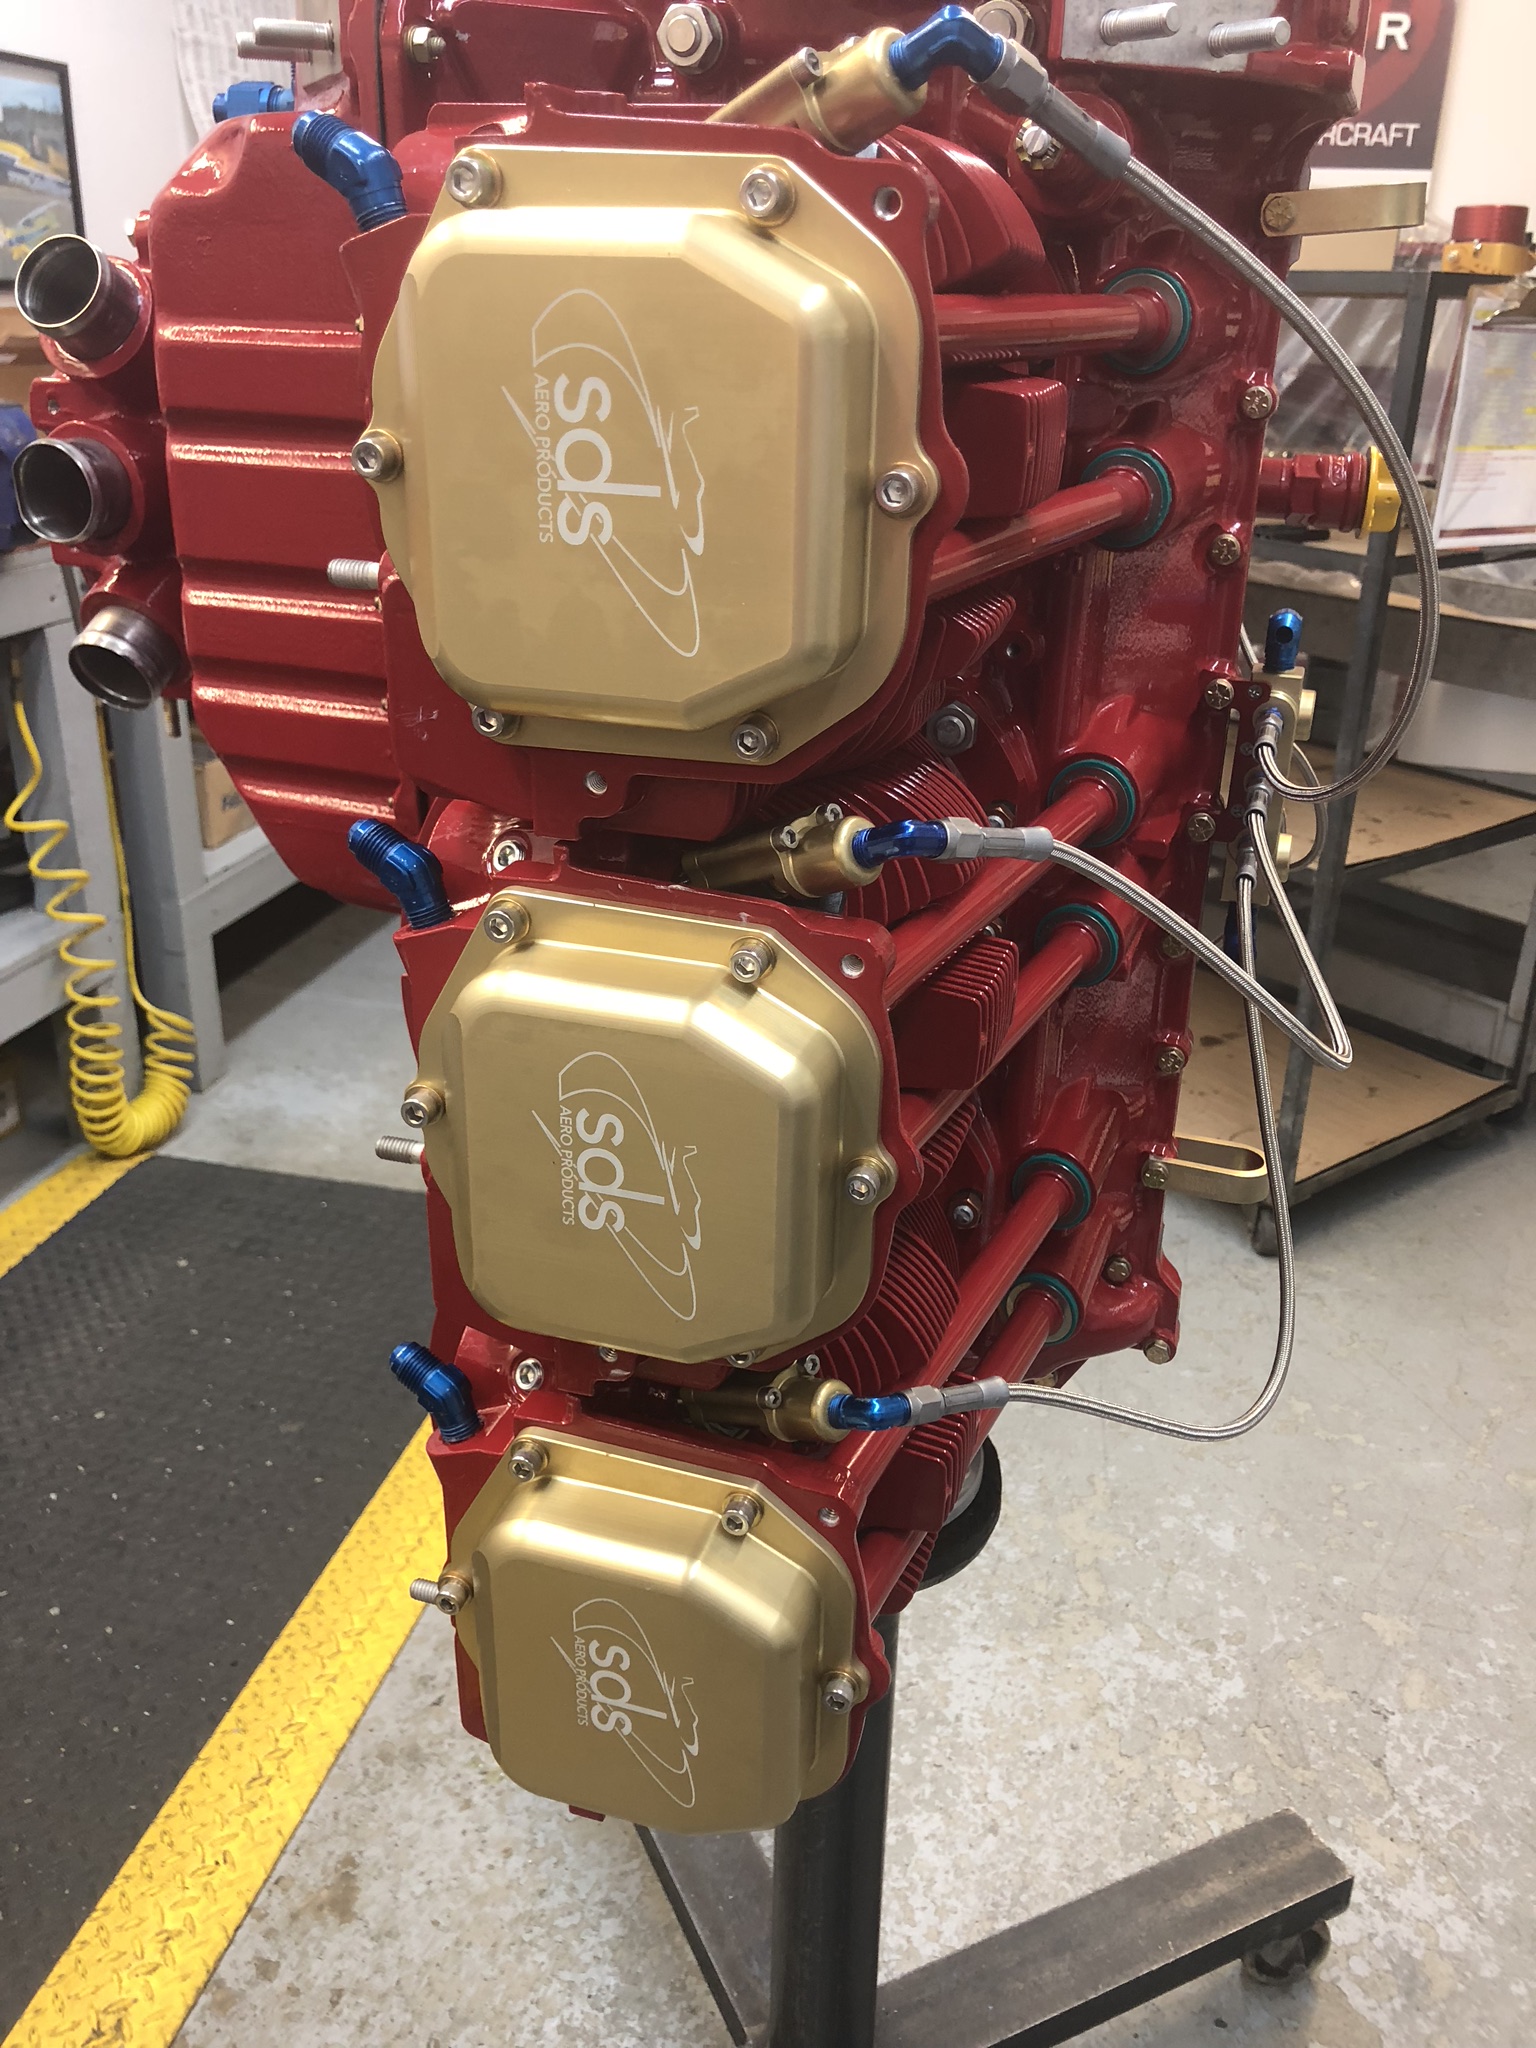
SDS rocker covers installed 
SDS fuel system installed 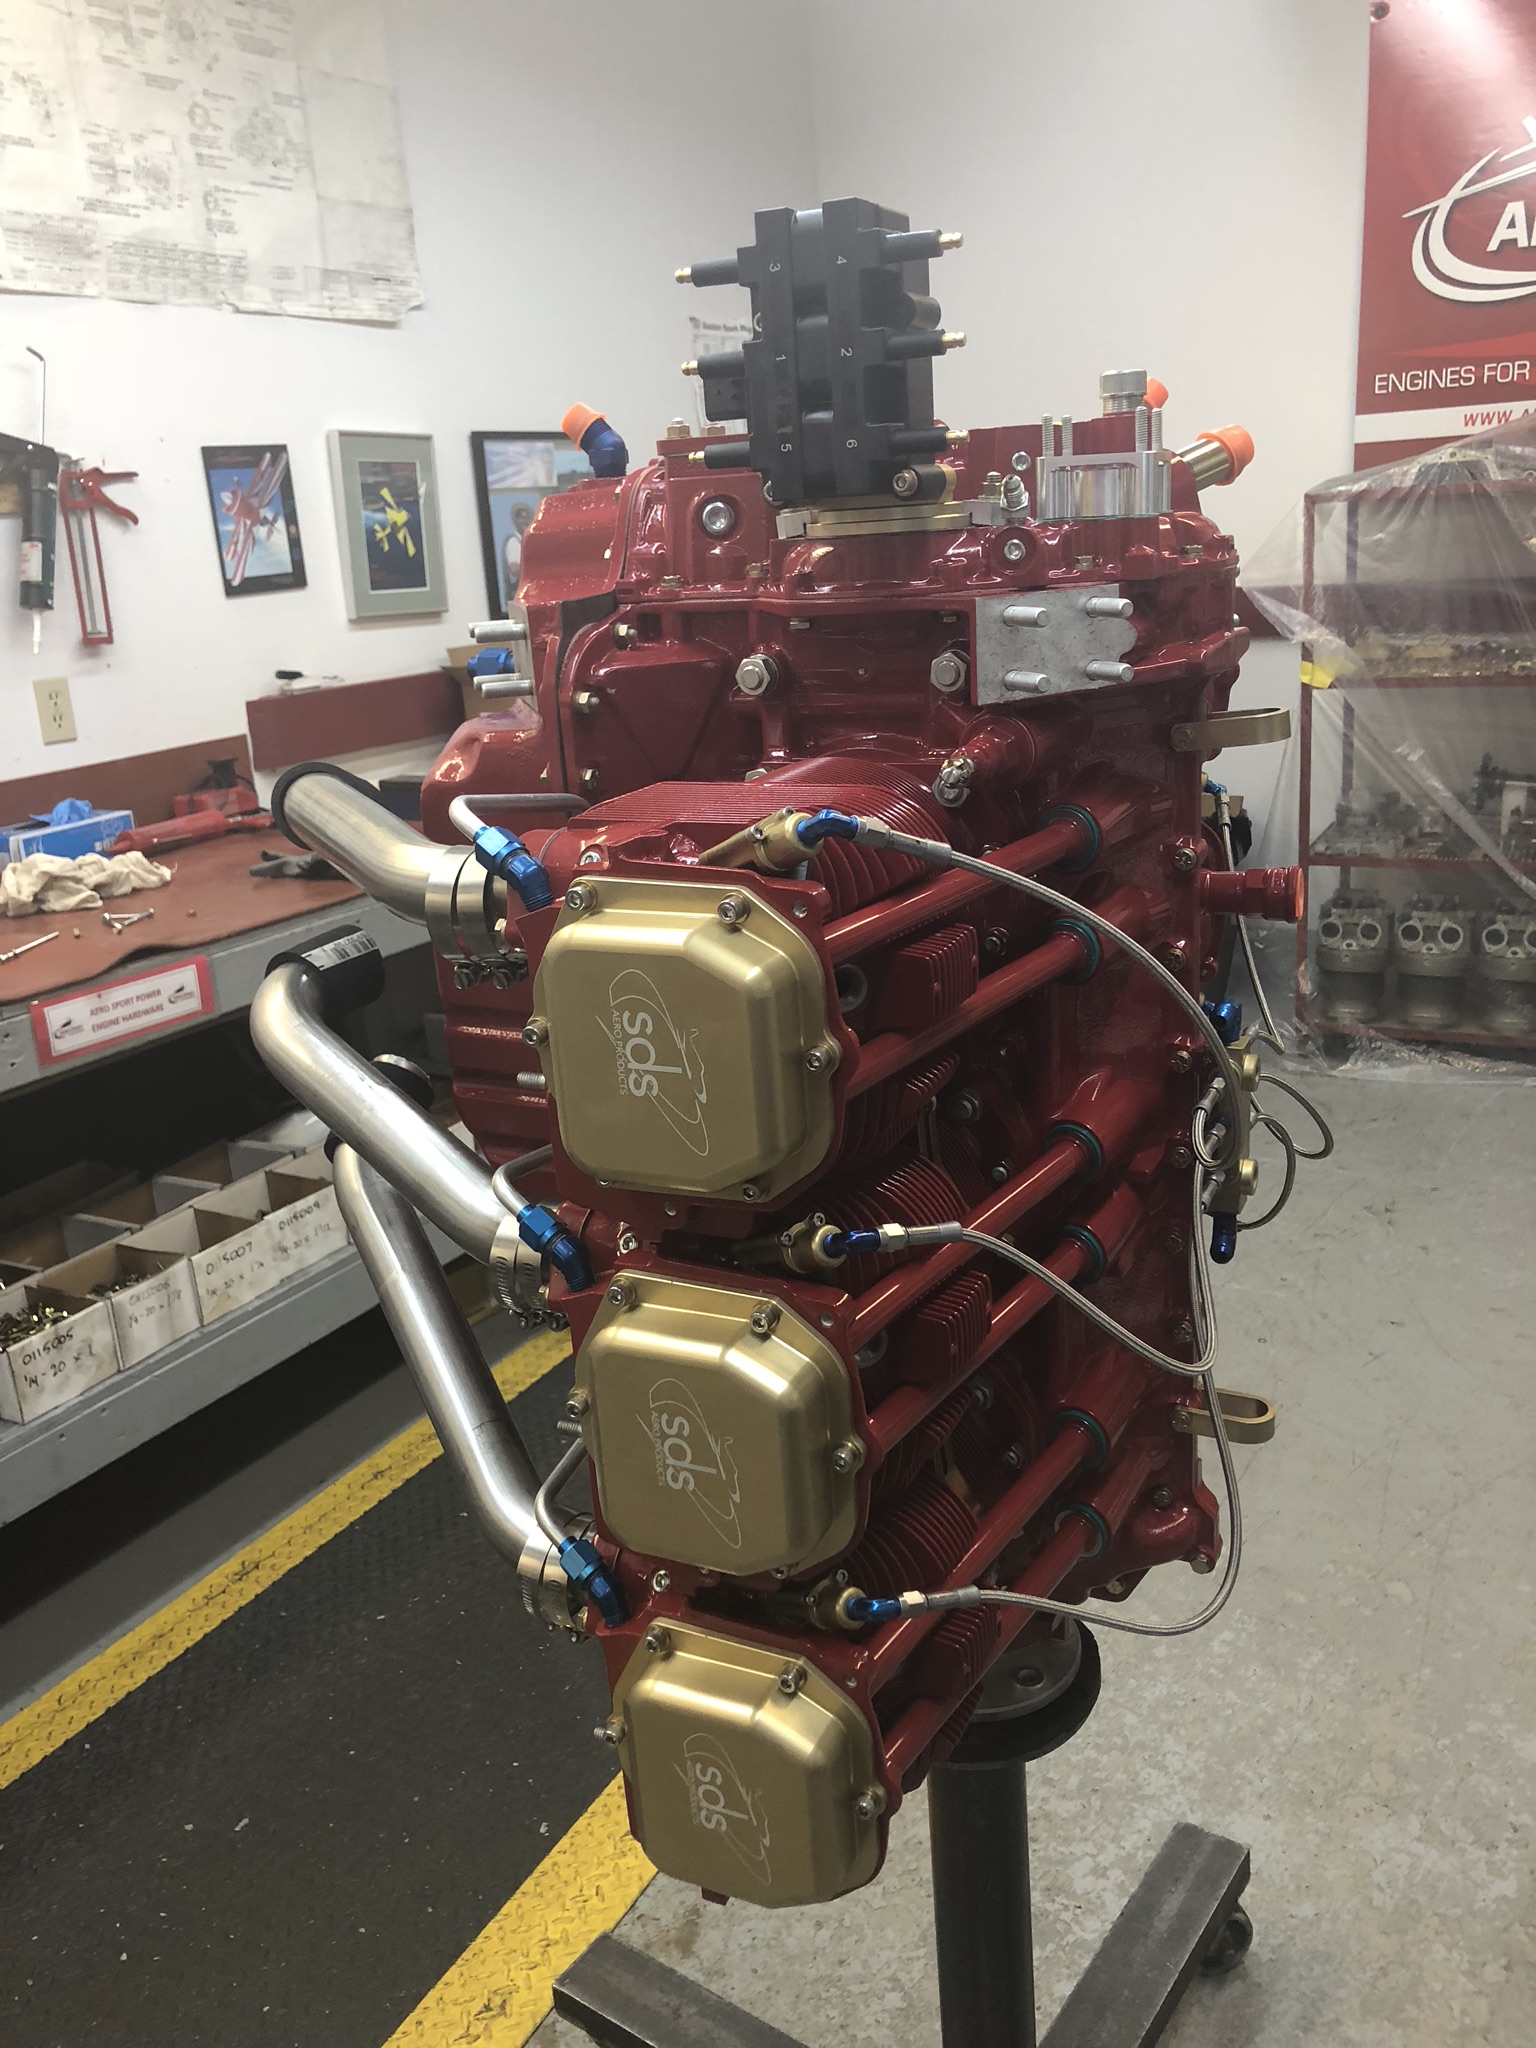
Induction tubes / oil return lines installed
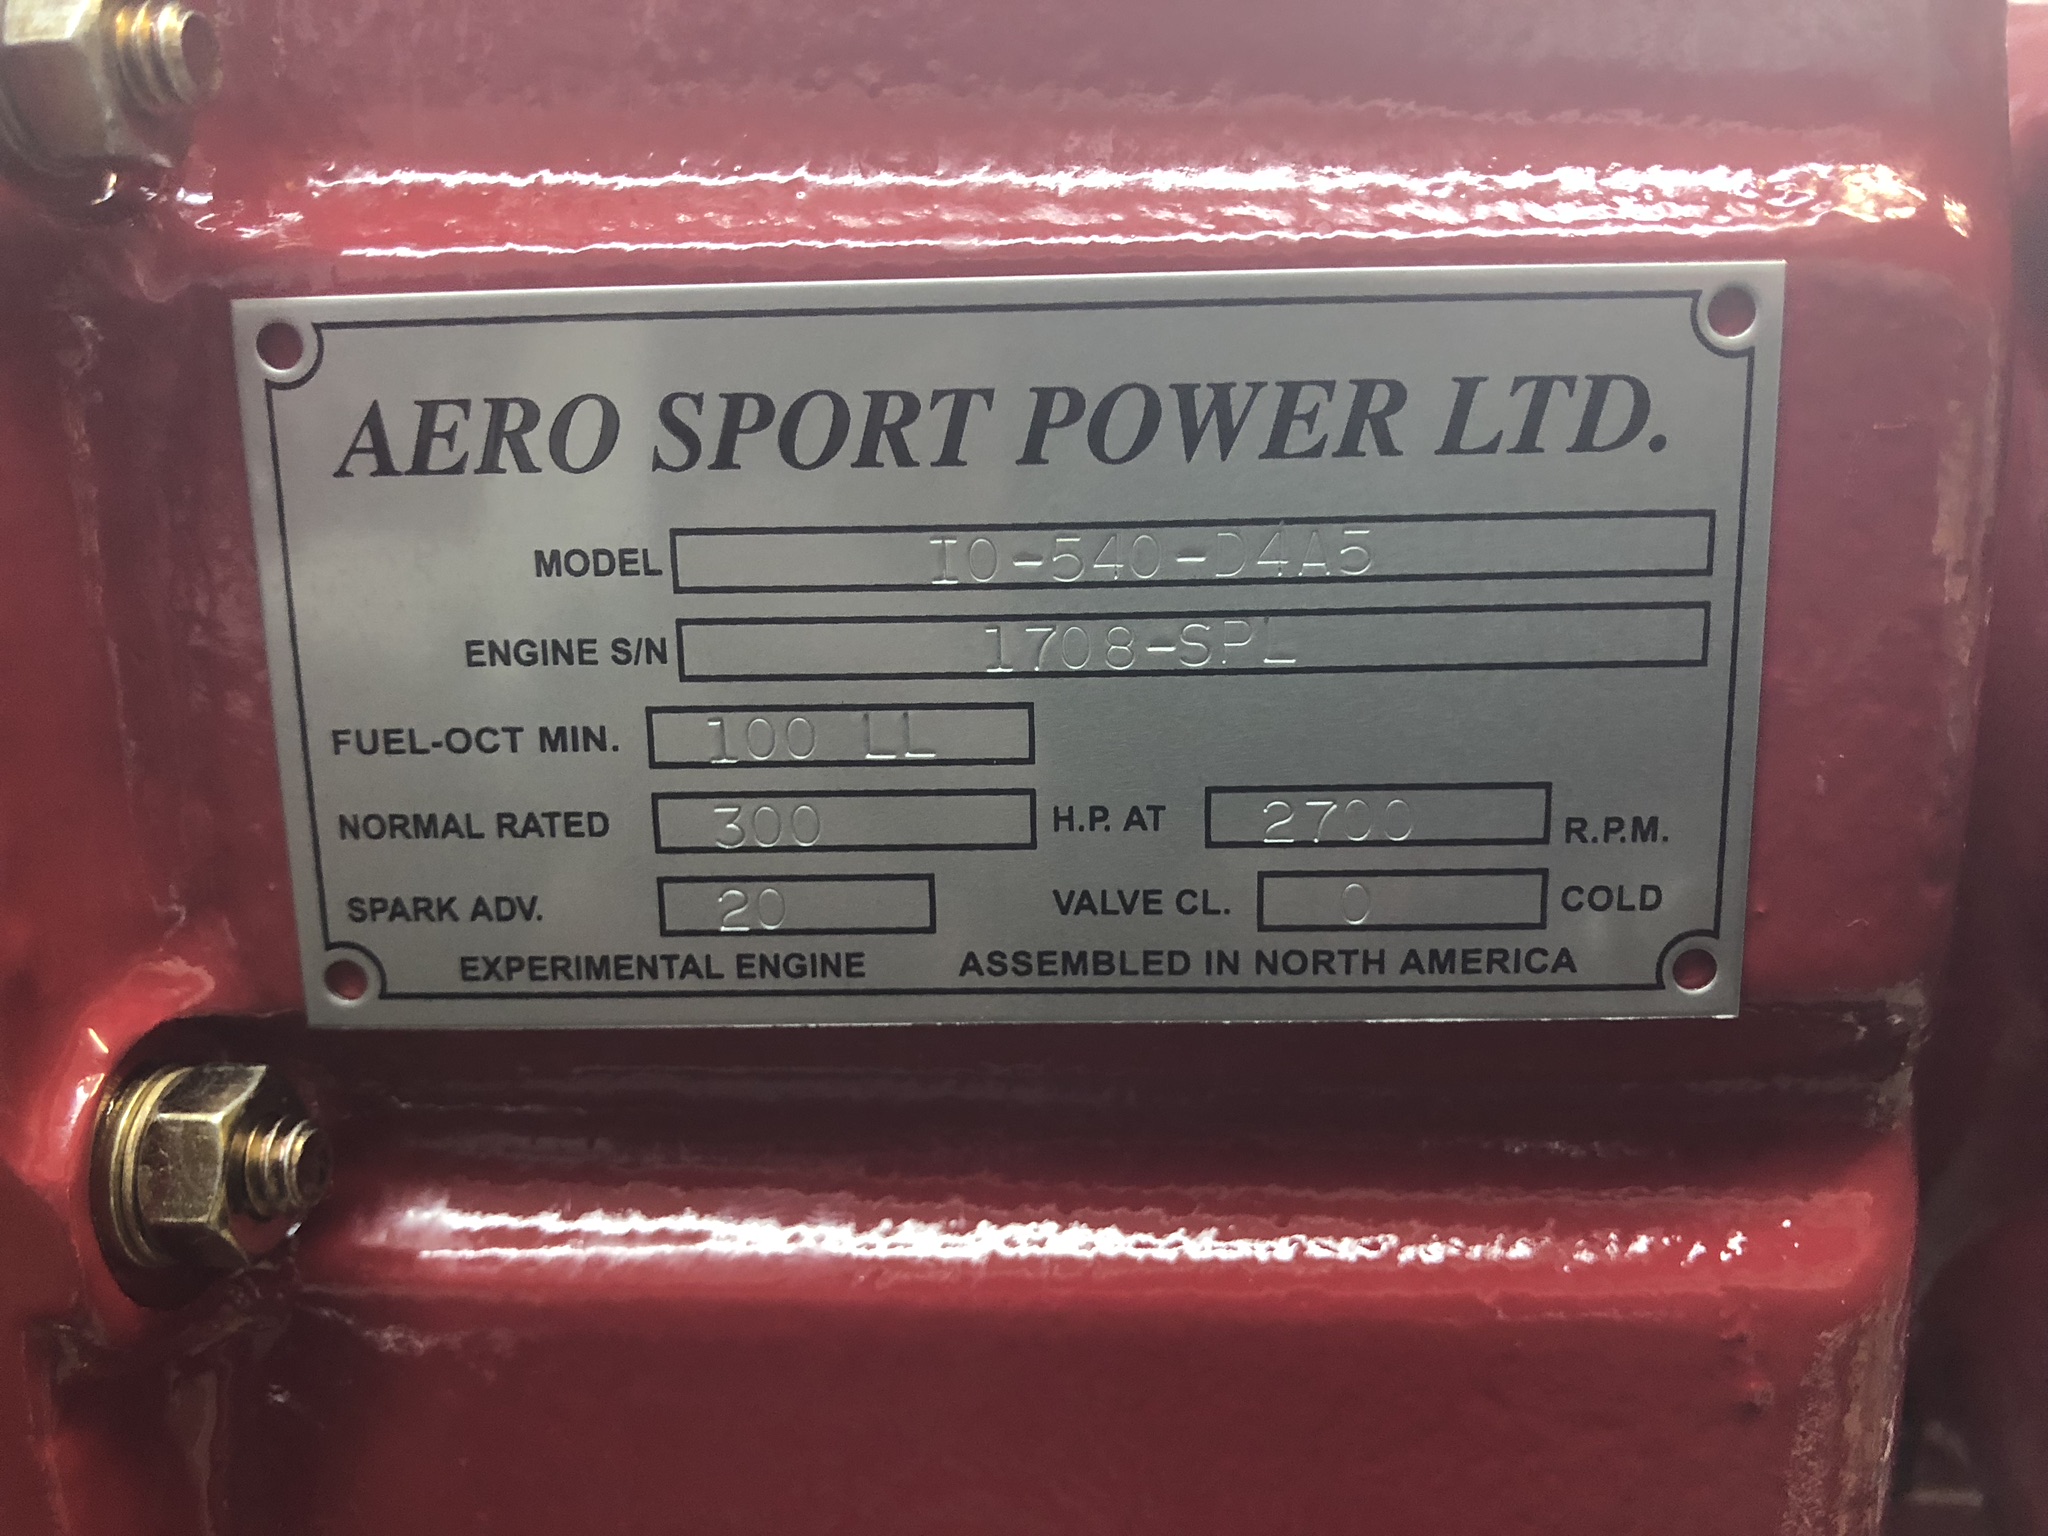
Engine Data Plate 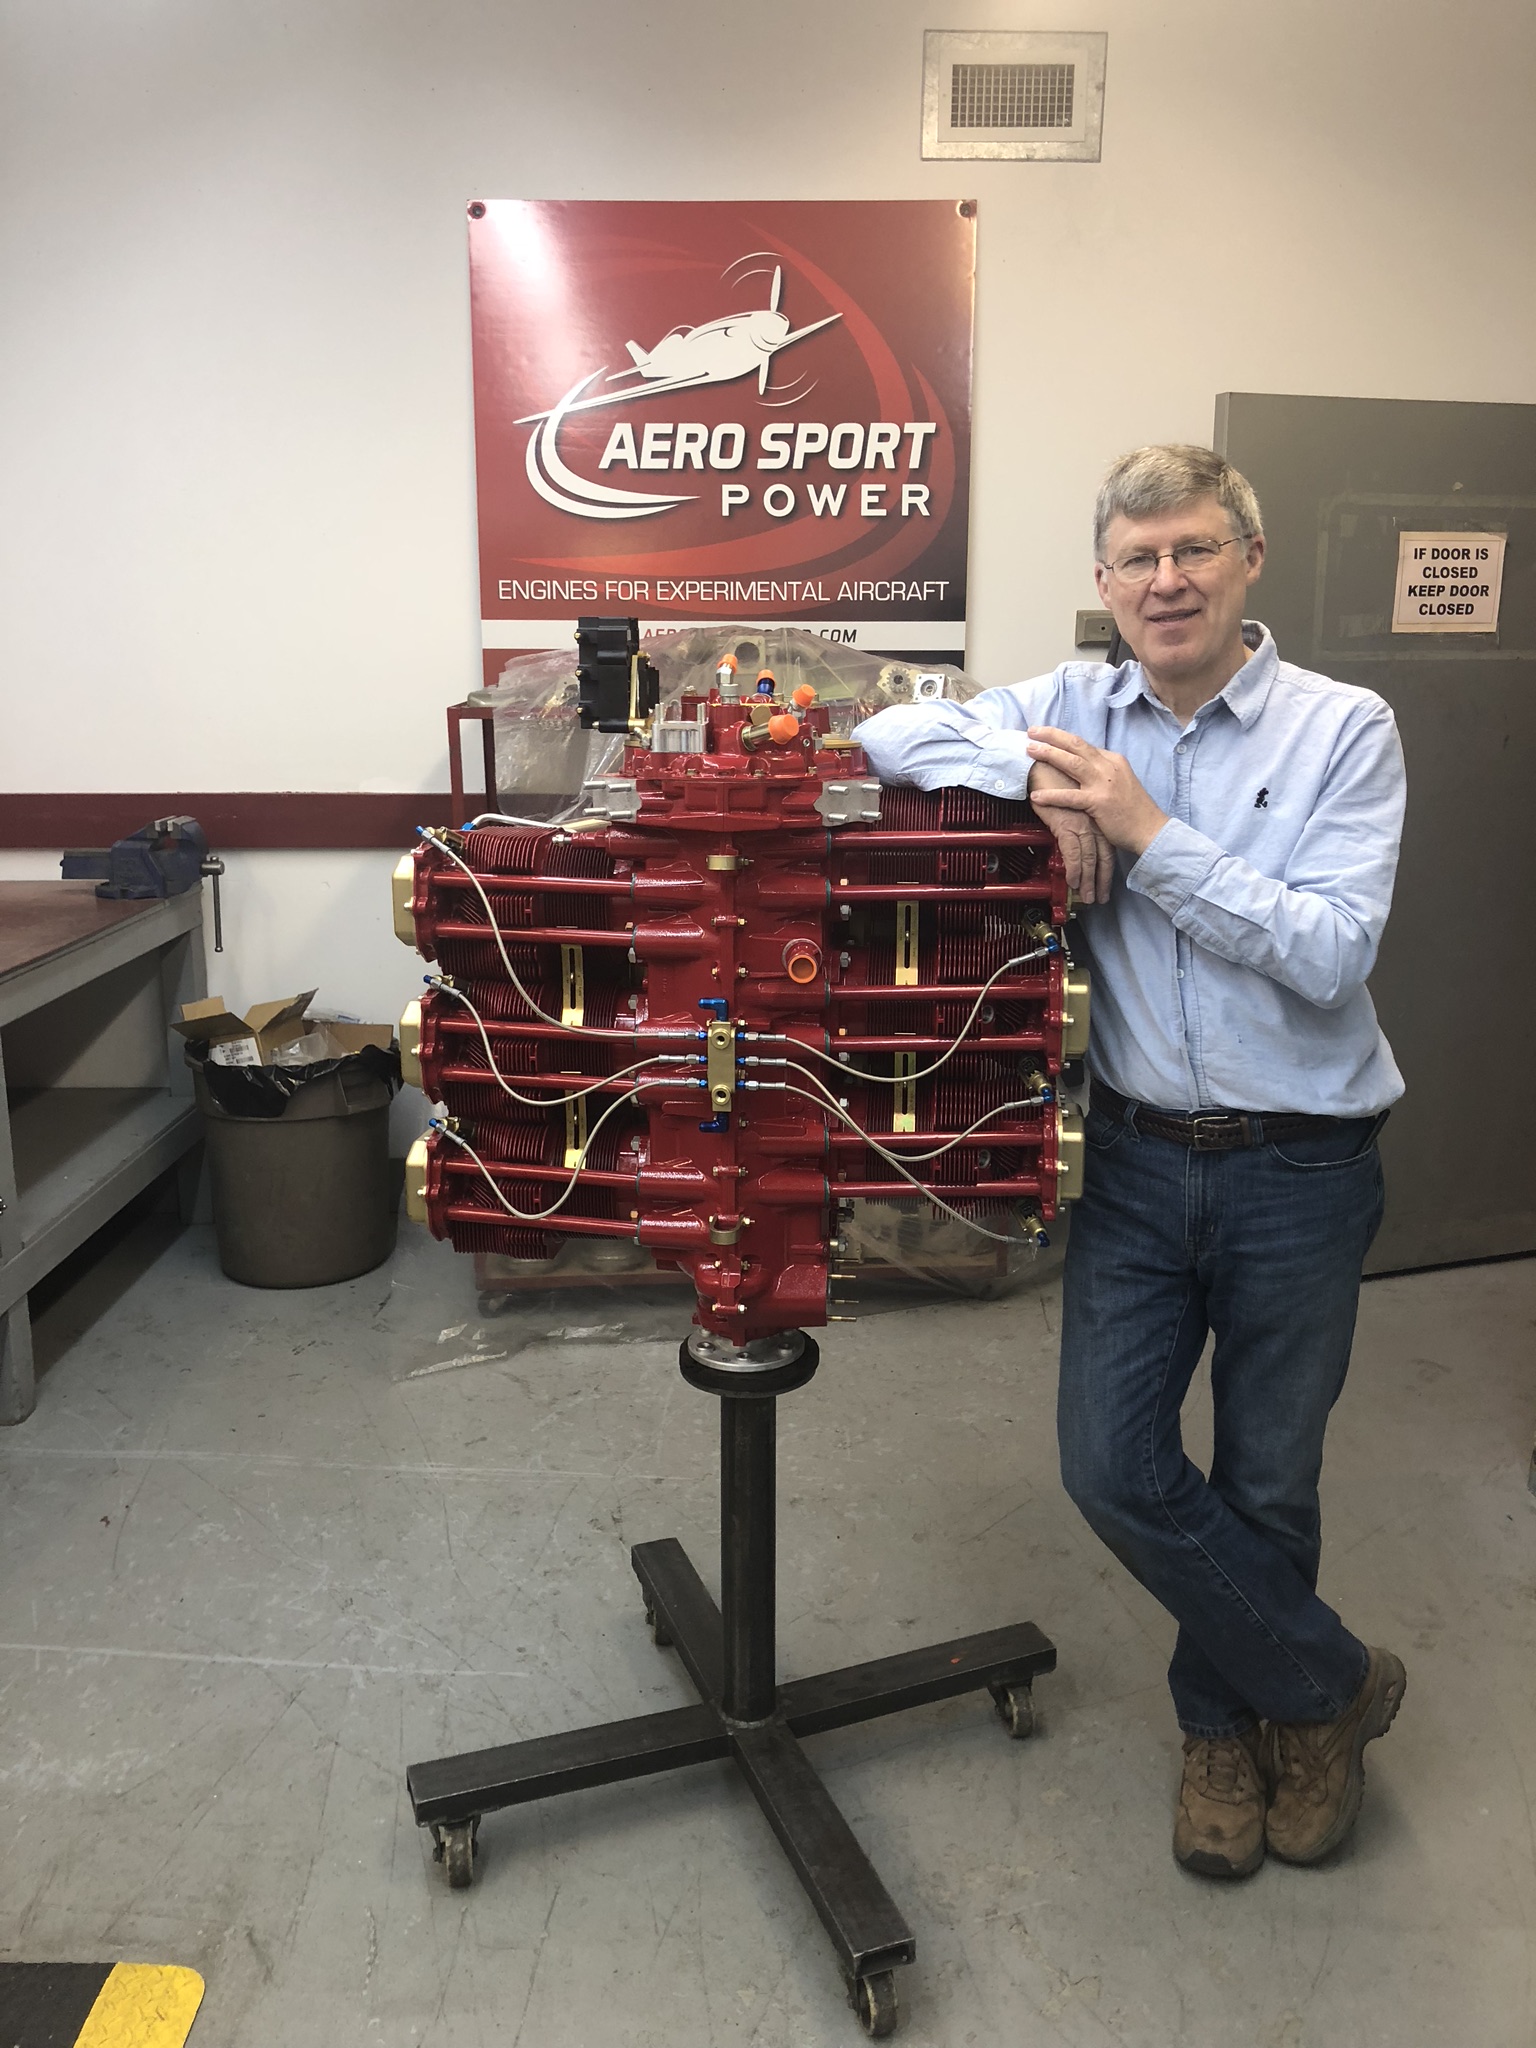
Proud Builder (Assistant) – me
Day # 3 was first engine start and initial break in. The engine was installed on a test truck along with a dummy prop. After test running it was wrapped up for the drive home next day.
Engine mounted to test truck 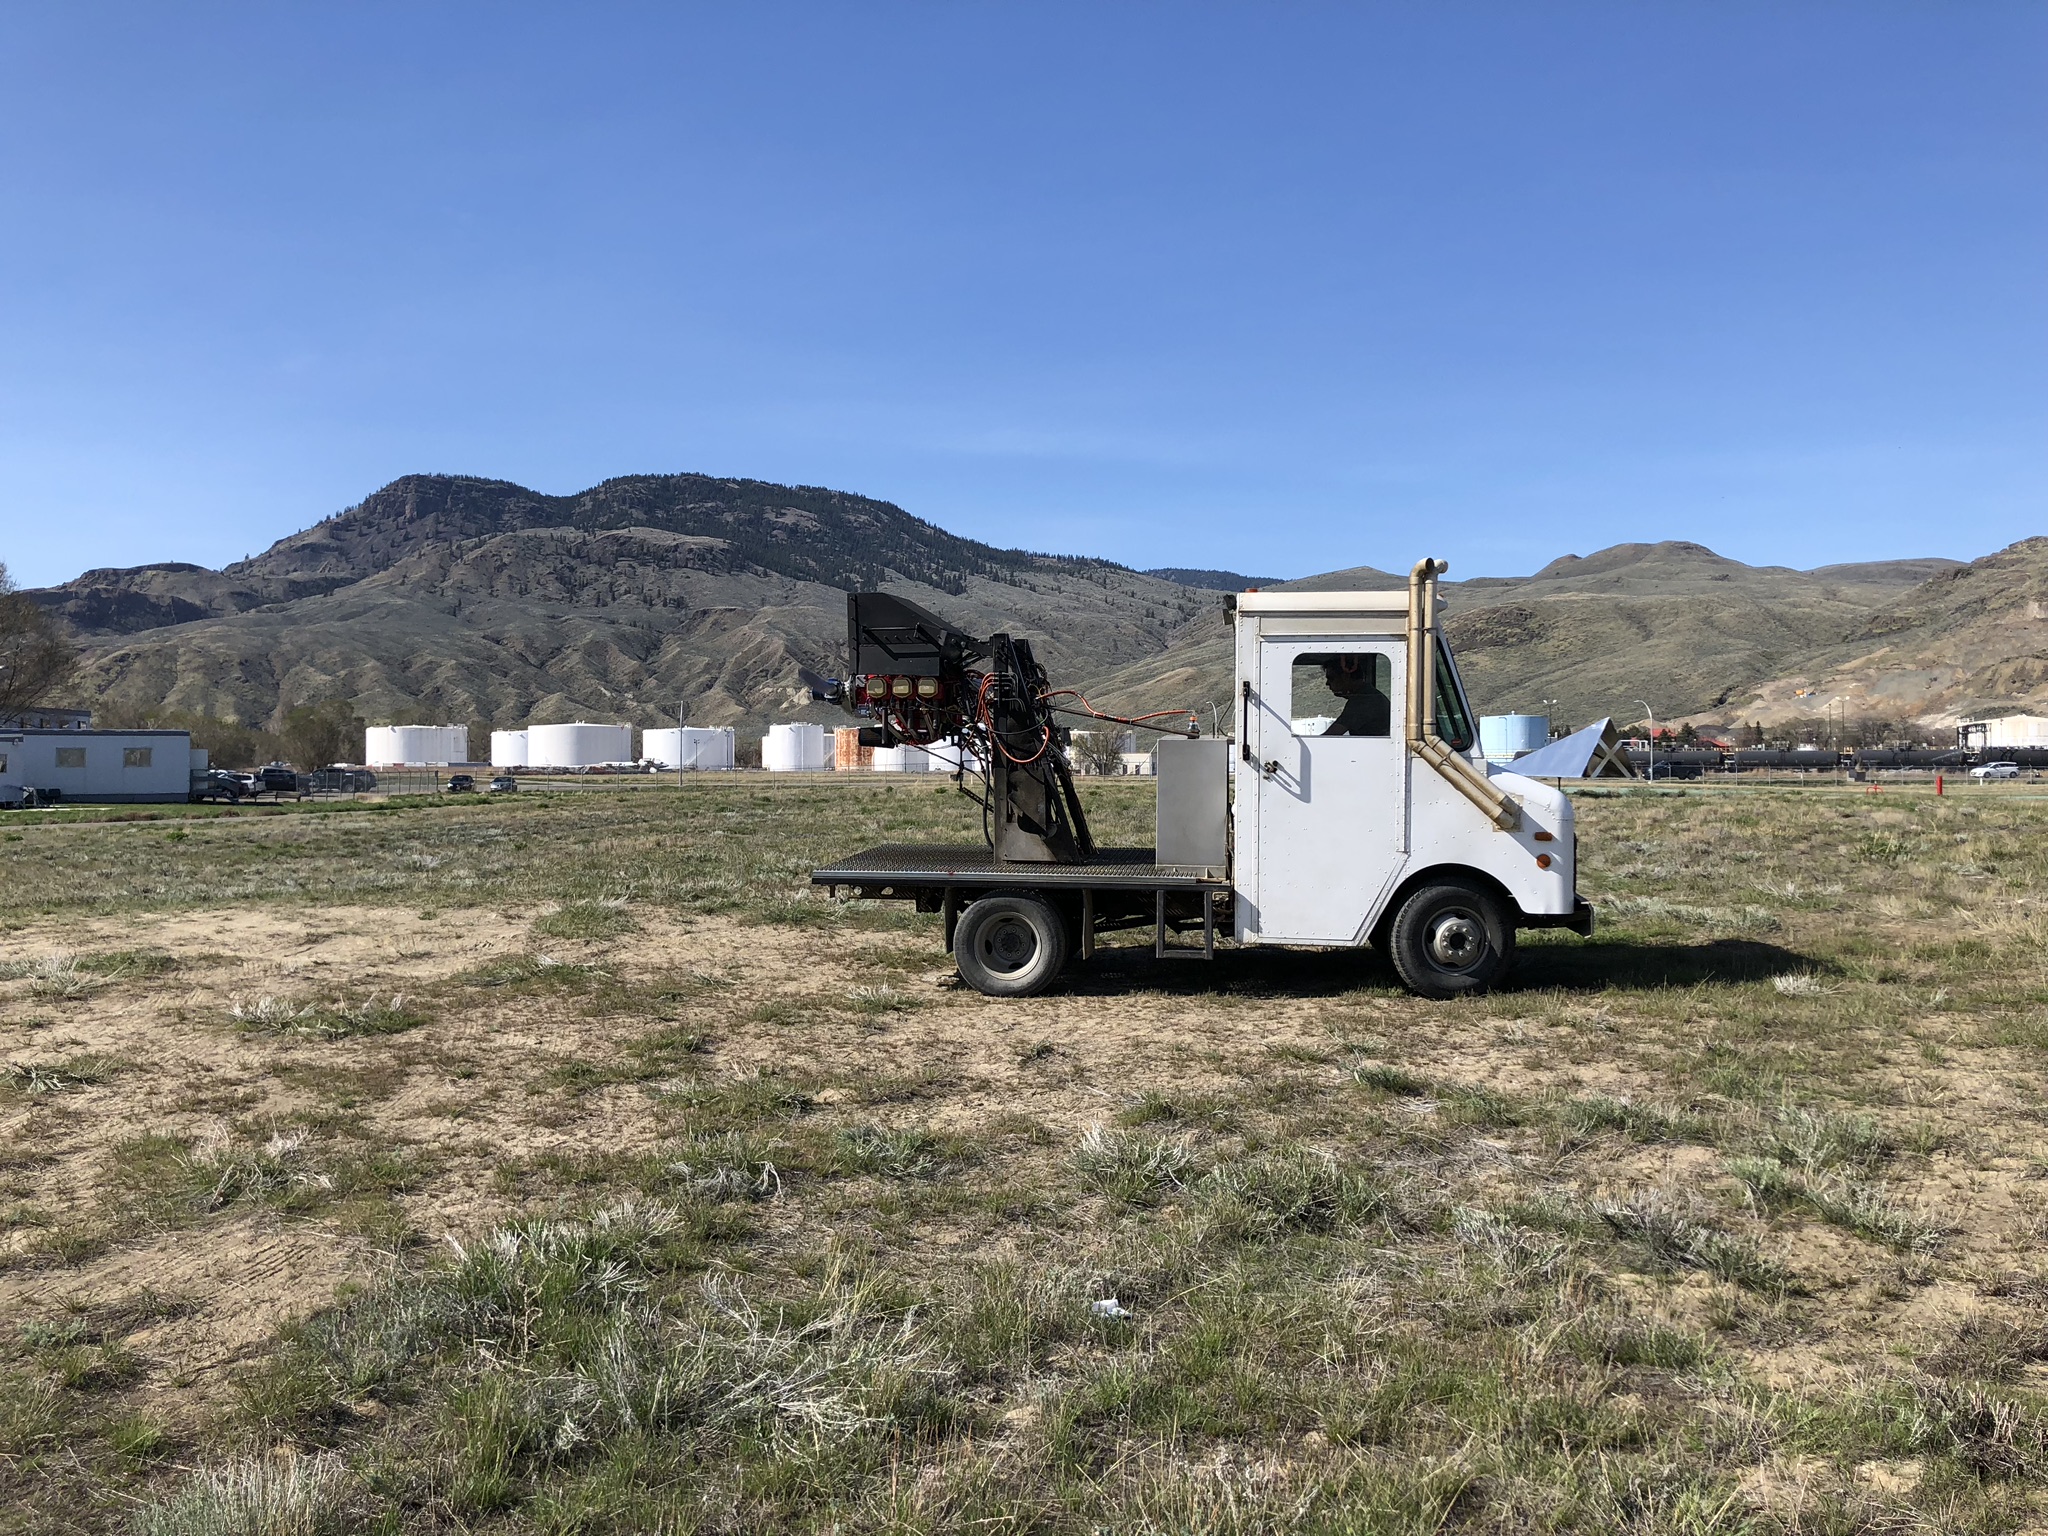
Engine ready for first start 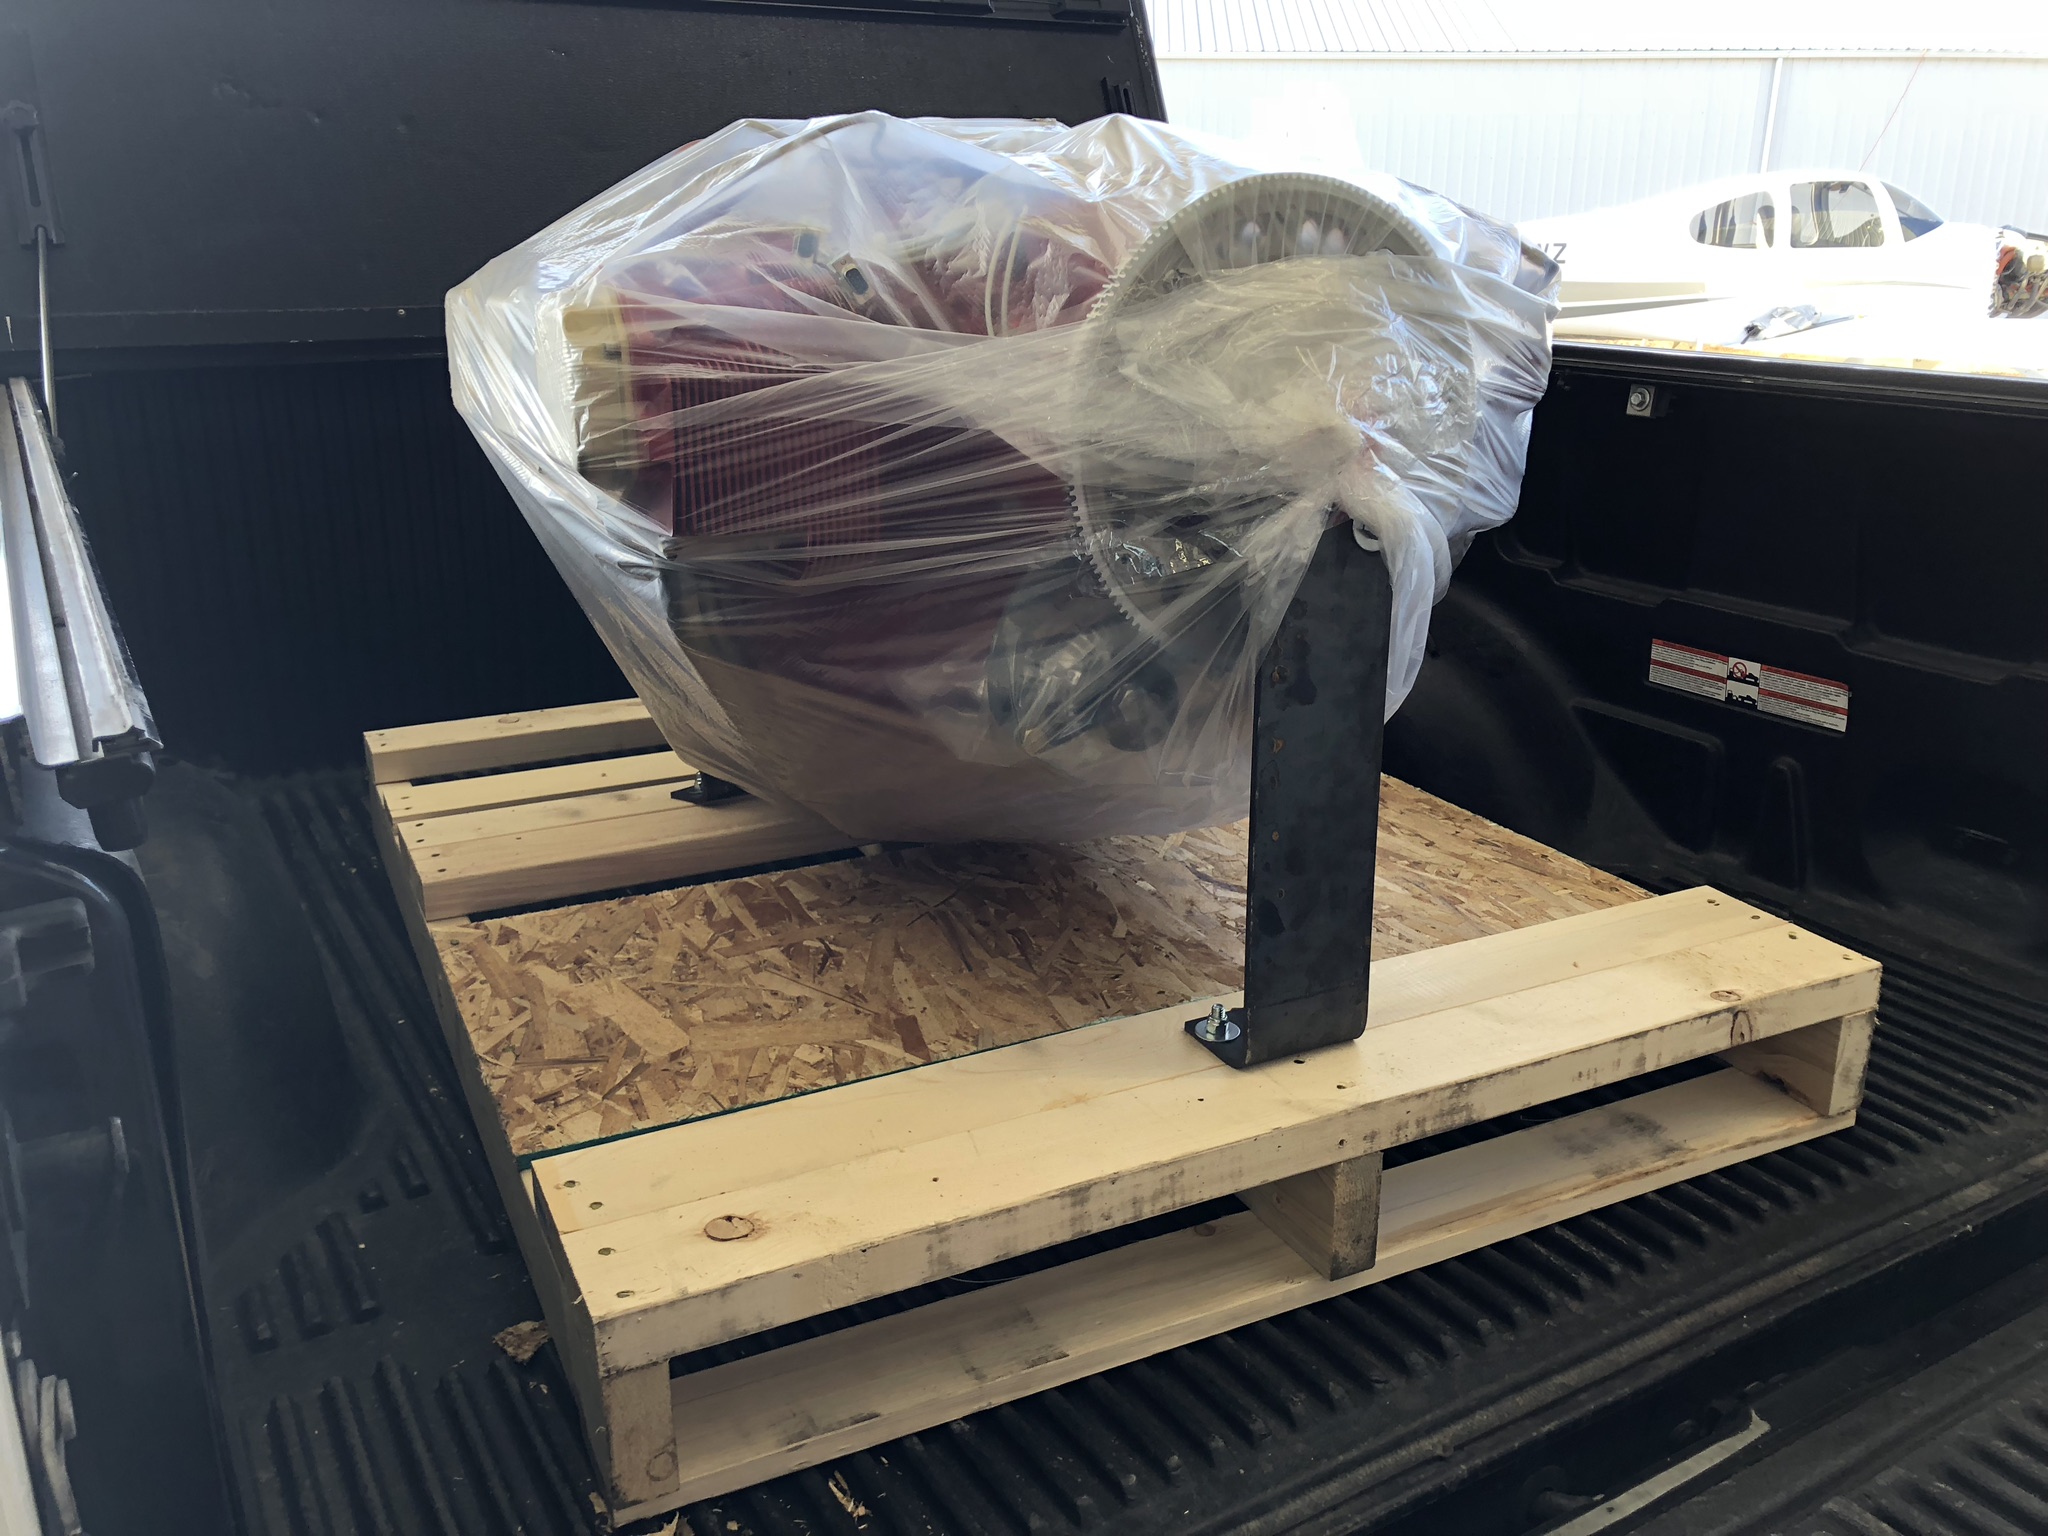
Engine wrapped for transport home